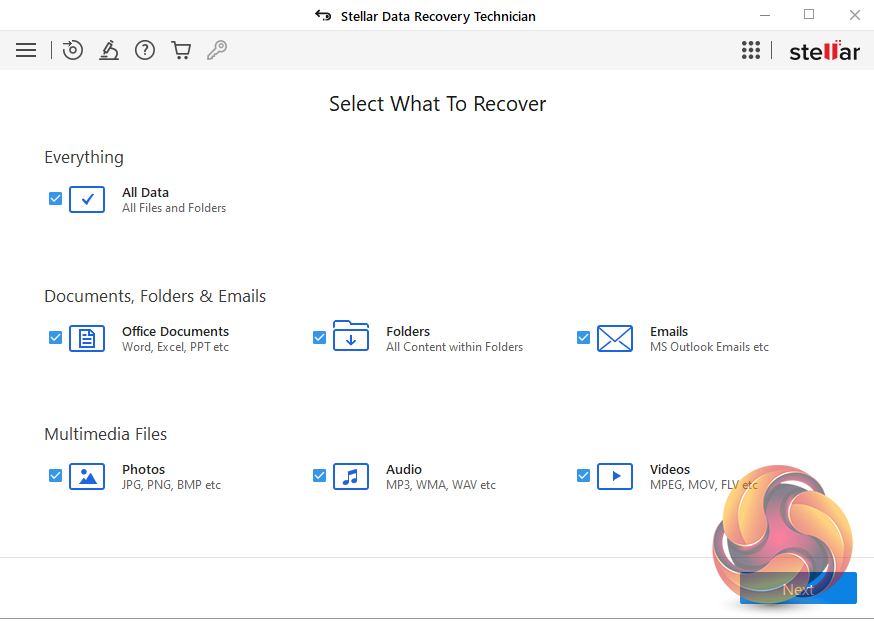
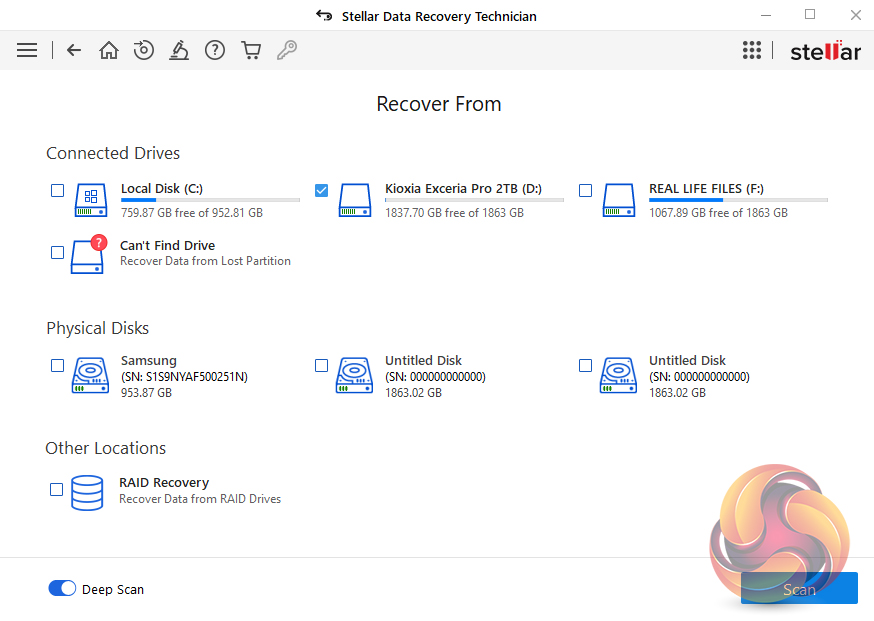
Thanks to the easy-to-follow dashboard, recovering data is pretty straightforward. The first job is to choose what data you want to recover, once this is done, clicking “Next” brings up the Recover From page. The Recover From section lists all the drives the software has found including external drives, optical drives, flash media and with the Technician version, any RAID arrays. Then it's just a matter of clicking the Scan button. We are using a 2TB Kioxia Exceria Pro PCIe Gen4 NVMe SSD to test this software.

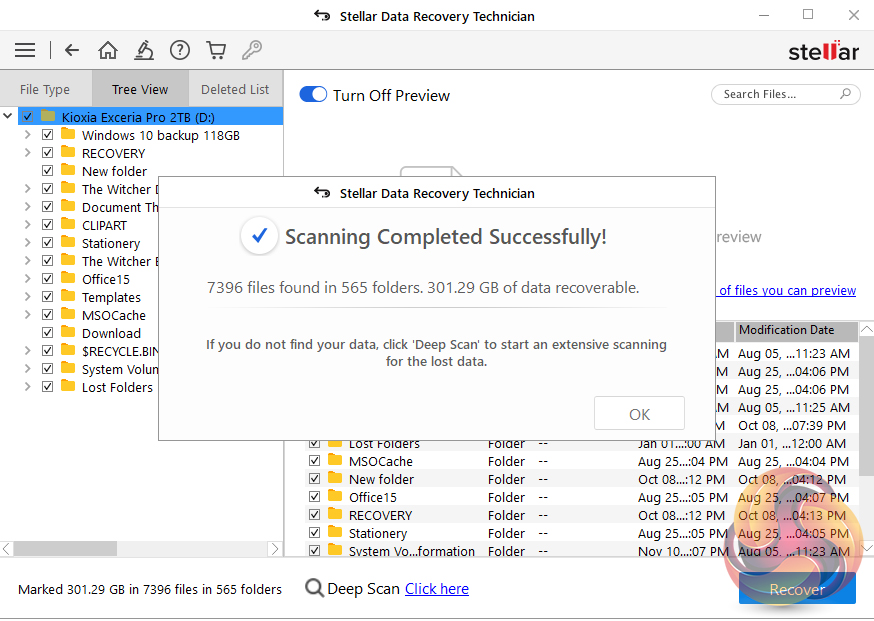
The scan can be stopped at any point. When the scan is completed a dialogue box appears with details of what the scan has found; the number of files, folders and how much data is recoverable. The complete list of data that has been found is clearly displayed. Scanned files are displayed in Tree View, File Type, and Deleted List formats and there is also a preview window that offers a preview of any found file that is supported by the software. This can be turned on or off. To scan our 2TB test drive took 5 seconds, finding 565 folders containing 7,396 files (301.29GB).
If the data cannot be found with the standard scan then there is the option of trying the Deep Scan mode (via an on/off button on the bottom of the Recover From page and a direct link on the standard scan results page) which scans the drive much more thoroughly. The Deep Scan took 6 minutes 3 seconds to complete on our 2TB test drive, with no new data found.
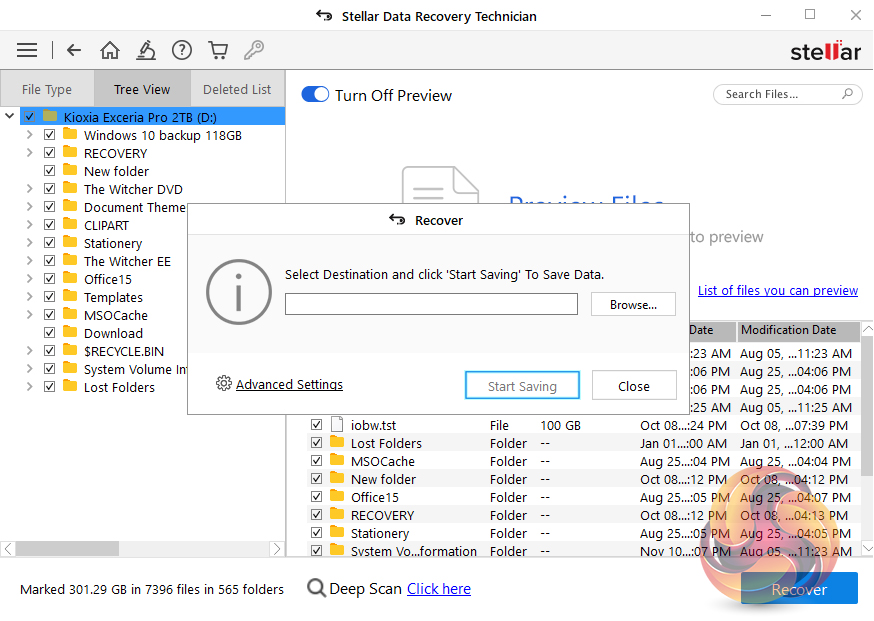
Once you are satisfied that all the files have been found, it's time for the final part of the recovery process, the data recovery itself. First off you have to select which of the files you want to recover (all or individual files), then when you press the Recover button, a location window pops up, and you then specify a location to save the data to. There are some useful tools under the Advanced Settings link at the bottom of the pop-up. Compression Option, Recovery Options and Add Filter.
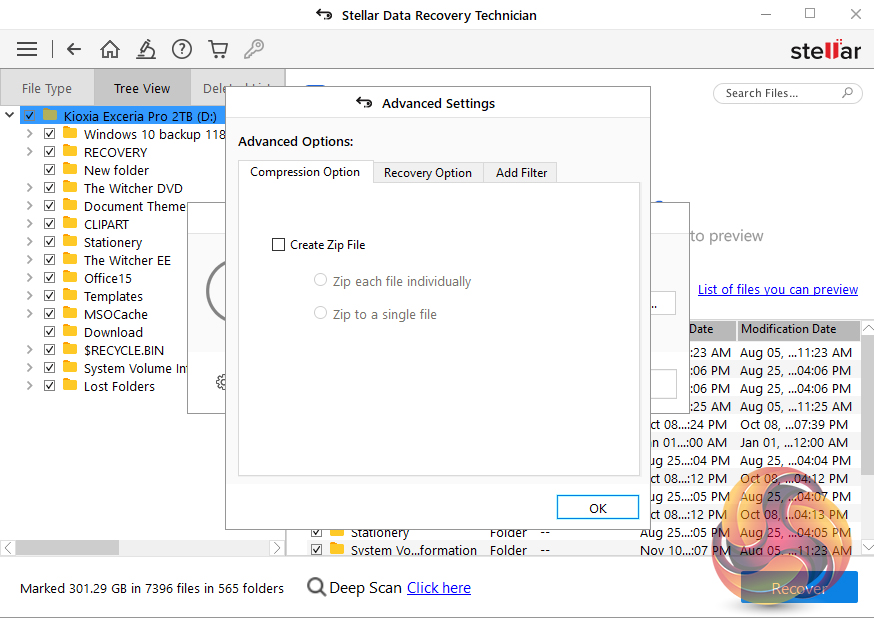
Compression Option
Create a Zip using a couple of options; Zip up each file individually or Zip up all the found data to a single file.
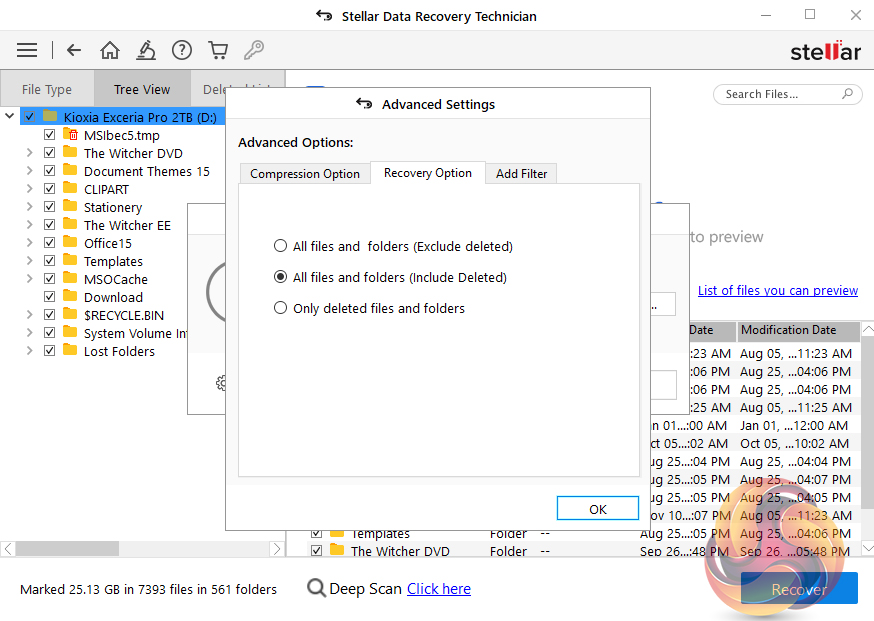
Recovery Options
Here you can choose what files and folders are recovered; All files and folders (excluding deleted ones), All files and folders (Including deleted ones) or choose only the deleted files and folders.
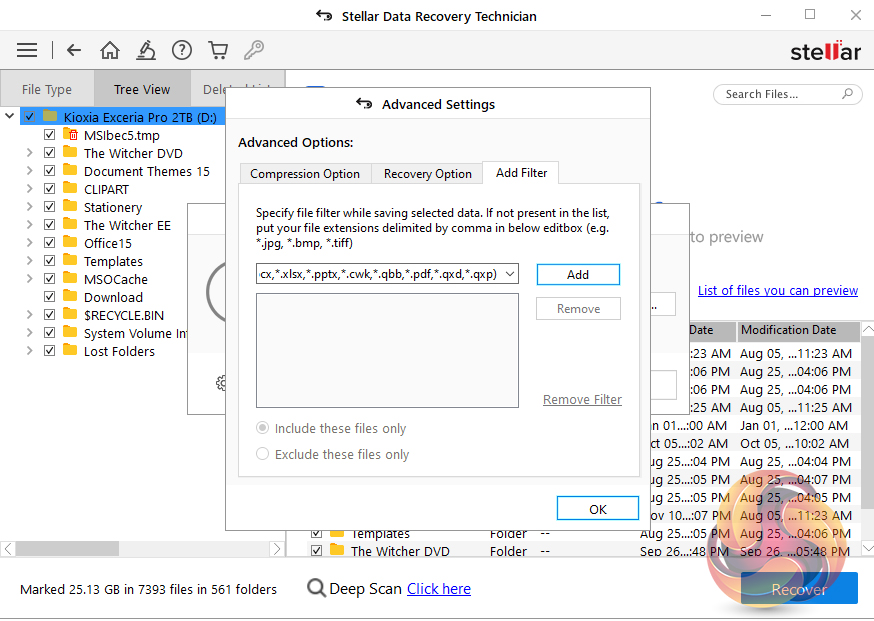
Add Filter
Here you can add a file filer to include or exclude the chosen file types. There's a whole host of options or you can add ones that are not listed.
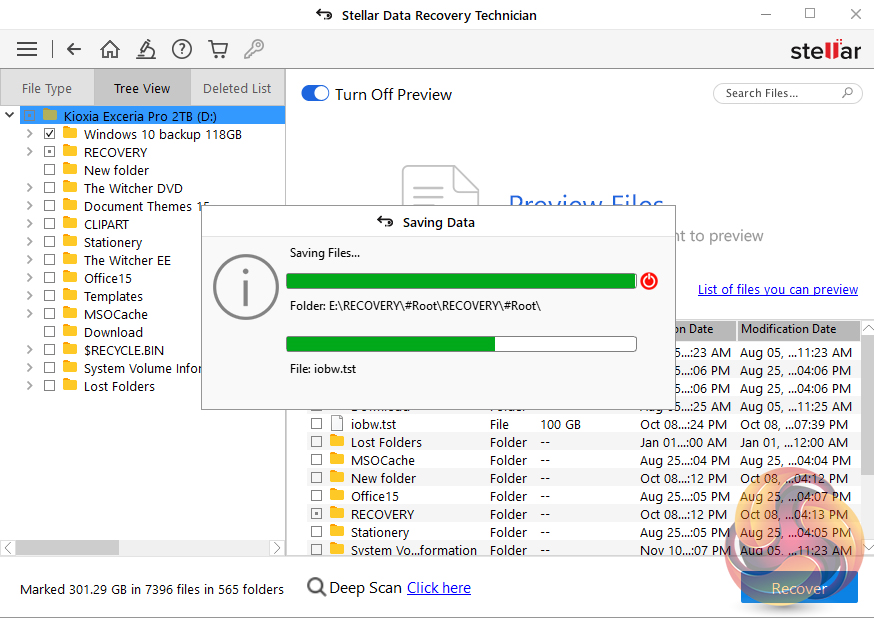
After you have chosen a location to save the files to it's just a matter of clicking on the Start Saving button. We chose to save the whole 301GB of found data. It took 43 minutes to write the data to a PCIe Gen 3 NVMe SSD, 50 minutes to a USB 3.2 Gen2 x 1 (10Gbps) external SSD and 5 hours 30 minutes to a NAS via a 2.5Gb/s network.