As we’ve seen from the last few BenQ displays we’ve reviewed, they’re one of the few monitor firms to really put some thought and effort into the design of its on-screen display (OSD). A simple set of five physical buttons on the right-hand side of the screen allows for easy navigation, with a high contrast menu showing bold text on a black background.
Unlike some of the pricier BenQ displays, there’s no external remote control for quick access to the shortcut buttons, but plenty of effort has still gone into the OSD.
It’s not just the visual design that’s good, but also the ease of navigation through the various submenus. This not only makes it easy to get to any option in just a few button presses, but it’s nearly always obvious how to return to the previous screen.
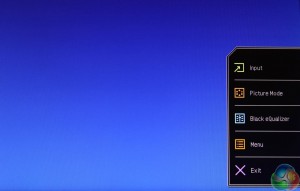
Pressing any of the buttons brings up a simple menu with five options: ‘Input’, ‘Picture Mode’, ‘Black Equalizer’, ‘Menu’ and ‘Exit’. A press of the corresponding button next to each option opens a further submenu.
In another setting buried deeper in the OSD, the middle three buttons can be customised to present a different set of options. We’re not too bothered about the ‘Black Equalizer’ setting for example, but thankfully this can instead be changed to adjust the volume or brightness.
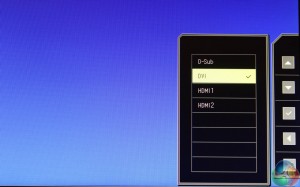
When you enter any of the submenus, a set of navigation arrows appear on the right. The buttons now let you move up, down, forward and back in the menus, and a tick and cross allow you to confirm or cancel any changes.
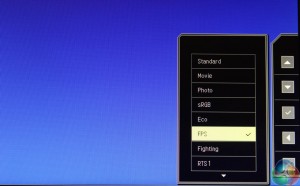
Pressing the second button down provides quick access to all the preset colour modes. BenQ includes a wide variety for many different genres of games. It’s a tad overwhelming, and although there are some big differences between them, in reality most users’ preferred colour settings will vary and could be happier playing an RTS game in ‘FPS’ or ‘sRGB’ mode than with the actual RTS option. It’s entirely subjective.
The default option is ‘FPS’ mode, indicating someone at BenQ assumed (perhaps wisely) that the vast majority of PC gamers will be playing this genre of game.
As such, we ran most of our tests of the RL2755HM using this setting as its out-of-the box default. For some of the other tests such as the Gamma settings (more on this later) we had to enable the Standard mode to enable the option.
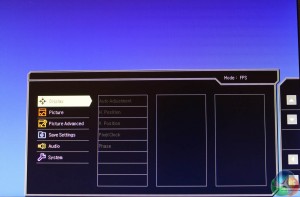
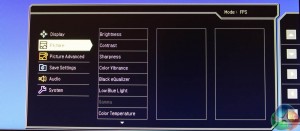
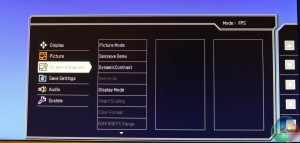
The fourth button down brings up a menu of more advanced settings. It’s laid out like Miller Columns in Finder on Apple’s OS X, with each previous menu remaining visible at all times, so you can see exactly how to get back to the previous setting. A great idea for a monitor OSD, which can often be a nightmare to navigate.
And you can see why it’s useful. There are dozens of extra settings, some of which are more useful than others. The main ‘Display’ menu lets you move the OSD around the screen.
The Picture menu leads to the Brightness and Contrast settings, Sharpness, Color Vibrance (which really over saturates colour), Black Equalizer, Gamma and Color Temperature.
The Advanced Picture menu is another way to adjust the colour preset, there’s a Sensesye Demo, Dynamic Contrast, Overscan, and a Display Mode option which lets you simulate the display size of a 17-inch,19-inch, 21.5-inch screen and so on. We think that option is fairly useless.
The audio menu allows you to change the volume and select an audio source
The Save Settings option lets you save all your preferred colour, brightness, gamma choices (and so on) to a preset called Gamer 1, 2 or 3, which is accessible from the main list. A nice idea, given there are so many options to choose from.
 KitGuru KitGuru.net – Tech News | Hardware News | Hardware Reviews | IOS | Mobile | Gaming | Graphics Cards




Check out with this site kitguru _____ ……………Keep Reading