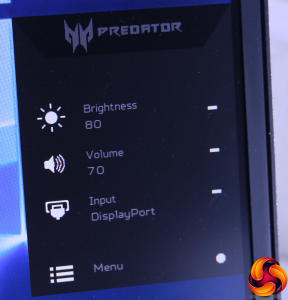
Press any of the buttons on the rear, other than the power button, or push the joystick, and this quick menu appears. By default, it provides access to adjustment of brightness, the volume of the built-in speakers, and toggling between the inputs. These are then adjusted with the joystick. However, press the joystick again and the main menu appears instead.
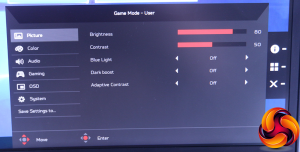
The default view of the full OSD menu is the Picture section. Here Contrast is available as well as Brightness, plus the ability to turn on a selection of enhancement features.
Blue Light helps reduce eye strain. Dark Boost and Adaptive Contrast both help increase perceived contrast, which you may not feel the need for in a VA panel that already has an advantage in this area.
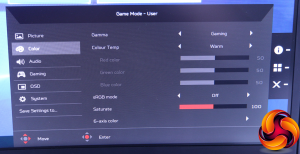
The Color menu offers a wide variety of controls over how the monitor presents its chromatics. The Gamma setting, curiously, offers options of 1.9, 2.2, 2.5 and a mysterious Gaming mode. Alternatively, Warm, Cool or Normal Colour Temperature options are available, as well as individual adjustment of red, green and blue, and there's Saturation control on hand as well.
The sRGB mode presets all of these. The 6-axis color sub-option allows adjustment of yellow, cyan and magenta as well as red, green and blue. You would really need to be very particular about your screen colour to use this. But there's no control over colour temperature by K value.
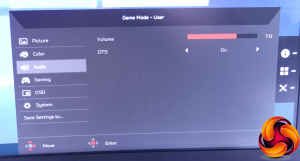
There's not much to play with in the Audio menu, just volume (again) and whether DTS is turned on or not (it's on by default).
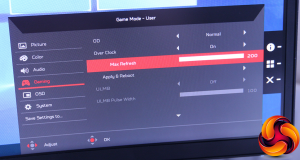
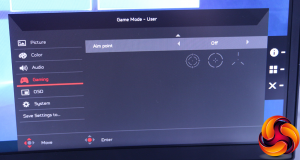
The most significant thing to be found in the Gaming menu is the ability to overclock the screen refresh all the way to 200Hz.
But you can also overdrive pixel response to make up a little for the relative tardiness of the 4ms rating, and enable Ultra-Low Motion Blur, which works in tandem with G-Sync to minimise ghosting.
A nice additional touch is the ability to select one of three built-in crosshairs, to aid aiming with First Person Shooters.
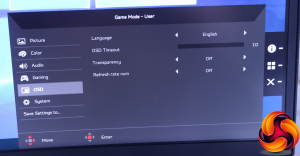
The OSD menu merely contains a few controls over how the OSD itself is displayed.
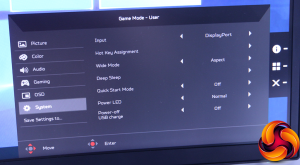
In a similar fashion, sundry settings can be found in the System menu, such as which functions are assigned to the three keys on the rear, the aspect mode, and whether USB devices still charge when the screen is off.
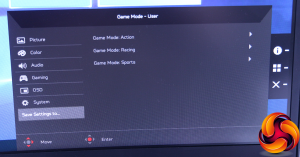
Custom configurations can be saved to one of three preset slots, but the question is, where do you find these presets to enable them?
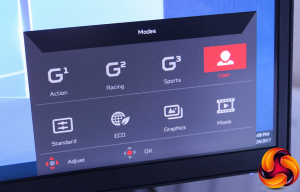
The answer is that, when the full OSD is visible, the middle of the three buttons on the back will call up the Modes. This option is represented by a windows-like array of four squares, which took us a while to spot. We don't think this is brilliant user interface design, since these presets should be a single button press away, as they are on most monitors.
But once you've found the Modes, they do at least present a decent array of options. The three gaming presets are available here, plus the User option will recall the last custom settings you used. There are Standard, ECO, Graphics and Movie modes, which cover most of the everyday types of use.
Overall, the OSD provides plenty of adjustment, with some nice extras for gamers. The organisation and control of these menus isn't perfect, but once you get into the main sections, the joystick is relatively ergonomic for navigating the many settings.
 KitGuru KitGuru.net – Tech News | Hardware News | Hardware Reviews | IOS | Mobile | Gaming | Graphics Cards


hahahaha …. “some extra pixels” ??? well ….. that “some” is >> 33% extra !!!! btw this screen has better pixel density than 24″ FullHD screen on 30″ !!!! STOP calling ultra wide 2560×1080 21:9 panels FullHD !!!! Standard FullHD resolution 1920×1080 !!!!
Google is paying 97$ per hour! Work for few hours and have longer with friends & family! !mj289d:
On tuesday I got a great new Land Rover Range Rover from having earned $8752 this last four weeks.. Its the most-financialy rewarding I’ve had.. It sounds unbelievable but you wont forgive yourself if you don’t check it
!mj289d:
➽➽
➽➽;➽➽ http://GoogleFinancialJobsCash289HomeMasterGetPay$97Hour… ★★✫★★✫★★✫★★✫★★✫★★✫★★✫★★✫★★✫★★✫★★✫★★✫★★✫★★✫★★✫★★✫★★✫★★:::::!mj289d:…..