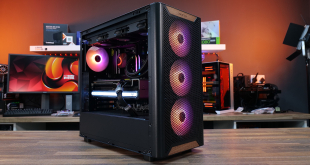
Starting at the front we can see there is space to install two 120 mm front in-take fans.
The I/O panel has been integrated separately from the top and front panels to prevent any accidents that may occur as a result of taking the case apart. Turning the front panel around reveals one of the included Silent Series R2 fans. This fan is rated to provide 40.6 CFM of airflow at 1,200 RPM with a maximum noise level of 15.0 dBa
Moving to the inside of the case we can see Fractal Design have chosen to accentuate the Arc Mini R2's design with white drive caddies.
At the bottom we can see there are four rubber feet for the power supply to rest on.
Directly to the right of these feet are four holes to facilitate the installation of a 120 mm bottom in-take fan. Each drive cage can hold three 2.5″ or 3.5″ drives. Thumb screws hold the cages in place. Users who decide to remove the drive cages can instead install either a thick or slim 240 mm radiator here.
In the bottom centre of the case is a large rubber grommet to aid with cable routing. Its position behind the power supply means only the longest of power supplies will block the grommet. Above the white expansion slots covers we find the second 120 mm Silent Series R2 fan. This fan's specifications are identical to those of the front in-take fan.
A relatively large CPU cut-out is available to facilitate the installation of CPU coolers without removing the motherboard.
Three rubber grommets are placed directly to the left of the drive cages.


The rear exhaust fan can be removed and a 120 mm or 140 mm can be installed instead.
A shot of the roof shows the third fan, a Silent Series R2 140. This fan is rated to provide 66.0 CFM of airflow at 1,000 RPM with a maximum noise level of 18.5 dbA. There are four additional mounting holes available for an additional 120 mm or 140 mm fan. Alternatively, a 240 mm radiator can be installed without the need for any modifications.
Directly below the roof there are also two additional rubber grommets to route and hide additional cables.
Removing the top 5.25″ drive cage is required for those who want to install a 360 mm radiator in the top. It should be noted that some cables are routed across the top of the drive cage. These should be routed away before such a radiator is installed.
Moving to the back of the case shows the 6 rubber grommets and relatively large space behind the drive trays. This additional space ensures there will be no issues if there is a shortage of angled SATA connectors.
Additional cable tie points have been included to route cables underneath the CPU cut-out and along the centre of the case.
Directly below the CPU cut-out are two Solid State Drive mounting positions. Each mounting bracket is held in place by two screws and four additional mounting holes are provided to keep a drive in position.
The metal caddies come with rubber spacers pre installed to reduce vibrations from mechanical disks. As is standard, 2.25″ drives can be secured with four screws in the centre of the caddy.
The connectors on our Gigabyte Z77N-WIFI motherboard are clustered at the top of the case. Despite their unconventional positioning we had no issues routing our cables through the relatively large rubber grommets in the top of the case.
As always, we aim to find out how forgiving a case is by stacking cables cable deliberately and only applying minimal cable management. The Arc Mini R2 certainly offers plenty of opportunities for demanding users to create a clean build with clever cable tie points to keep the SSD brackets clear.
 KitGuru KitGuru.net – Tech News | Hardware News | Hardware Reviews | IOS | Mobile | Gaming | Graphics Cards


I’d like to know more about the dust build-up on the side panel window. Is it on the inside or outside of the case, or both? Thanks for this review.