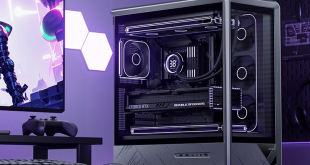
Removing the front panel reveals the two pre-installed front in-take fans. The lighting effects of these 120 mm fans can be controlled with the LED On/Off button that we saw on the I/O panel.
Directly below the front in-take fans are two drive caddies, allowing users to install two drives from the front.
Removing the top mesh of the case shows a large open space behind the I/O panel where users can install either a 240 mm or 280 mm radiator. Alternatively, users can also install two 120 mm or two 140 mm fans.
Moving to the inside of the case and starting at the bottom left we can see Cooler Master have chosen to use two long rubber strips to reduce vibrations from the power supply.
Directly above these strips are two large rubber grommets, one of which is placed directly behind the power supply. The second rubber grommet still remains easily accessible when using a standard ATX size power supply.
A large CPU cut-out is available to facilitate the installation of coolers without removing the motherboard.
Along the center of the case are two additional rubber grommets.
On the right-hand side of the case we can see 6 drive caddies facing outward. The drive cages can be removed to allow for the installation of a 360 mm radiator in the front.
Moving in closer we can see the pre-installed 120 mm rear exhaust fan. An additional molex connector is available for users with a low number of available fan headers on the motherboard.
The included fans all ship with an additional molex connector, ensuring users can fully utilize the Cosmos SE's cooling potential without having to worry about their available fan headers.
A lower angle shows the included 240 mm top exhaust fan.
This angle also shows the use of a 280 mm radiator will block some of the 5.25″ drive bays.
Not using a locking mechanism for the 5.25″ drive bays means water cooling enthusiasts will not have to worry about breaking off any bits and pieces.
The plates behind the drive cages can removed. Doing so allows users to rotate the drive cages or remove them completely.

To install the power supply users will need to remove the frame surrounding the cut-out to slide the power supply in from outside the case.
Around the back we can see there are plenty of cable routing opportunities as well as three additional mounting positions for solid state drives.
A closer look at one of these mounting positions shows only two screws are required to secure a drive. Two clips on the opposing side ensure the drive sits in place during installation.
As always, we aim to find out how forgiving a case is by stacking cables cable deliberately and only applying minimal cable management.
We had to struggle to put the Cosmos SE under pressure, thanks in large part to the curved design of the side panel. Overall, the installation of our system was a breeze.
 KitGuru KitGuru.net – Tech News | Hardware News | Hardware Reviews | IOS | Mobile | Gaming | Graphics Cards


