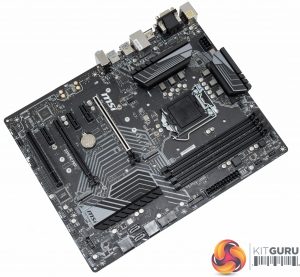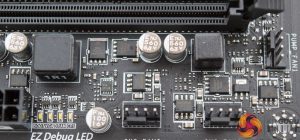
As a general rule the Intel B360 and H370 chipsets offer a more affordable route into Intel's 8th Generation “Coffee Lake” CPUs, than the Z370 chipset. However, there are a number of Z370 motherboard options that are as affordable, if not cheaper, than many B360 or H370 models. MSI manufactures a number of those low-cost Z370 options including the Z370 PC Pro.
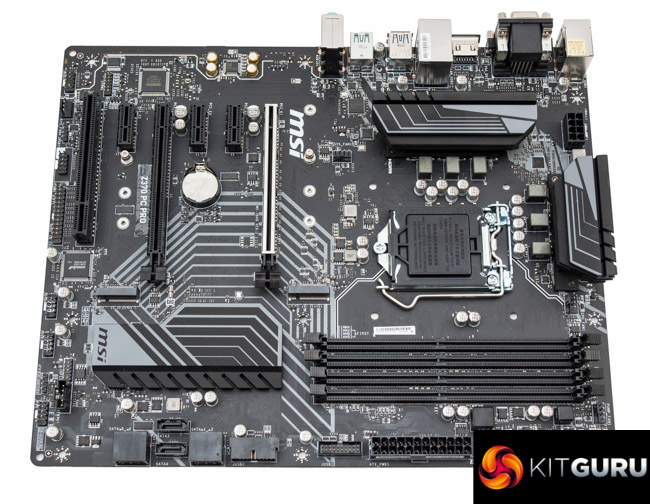
The MSI Z370 PC Pro is a price-sensitive product, meaning its unique selling point in a marketplace full of expensive gaming options is its low price (£110/$120). However, It should still be noted that there are number of Z370 motherboards that are more affordable. MSI, for instance, produces the Z370A-Pro (£90/$100) and Z370 Tomahawk (£100/$110) while rival motherboard vendors produce models such as the ASUS Prime Z370-P (£110/$120), ASRock Z370 Pro4 (£95/$100) and Gigabyte Z370P D3 (£90/$105).
Price need not comprise the entire narrative as it is one thing to produce a low-cost Z370 motherboard, but another to produce one that's still worthy of purchasing. While consumers appreciate a lower price point, the trade-offs that are made to bring that price down are crucial and should inform the buying decision.
The type of decisions MSI has made to keep retail pricing down include a fairly basic CPU VRM implementation, a decade-old audio codec, no official SLI support and trimming back on “nice to haves” such as power and reset buttons, M.2 cooling or a front panel USB 3.1 connection.
That said, MSI has still managed to include features like dual M.2, onboard RGB lighting, USB 3.1, Intel Gigabit LAN and a sleek-looking matte-black design. Let's see how MSI's Z370 PC Pro holds up under KitGuru's testing and analysis.
| MSI Z370 PC Pro | |
| Form Factor | ATX, 30.4cm x 24.3cm |
| CPU Socket | Intel LGA 1151 Version 2 |
| Chipset | Intel Z370 |
| Memory | DDR4, 4 DIMMs up to 64GB, up to 4000MHz+ with OC |
| On-board Graphics | Intel HD Graphics (supported CPUs) |
| Discrete Graphics | Single Nvidia graphics card configurations, up to AMD 2-way CrossFireX or Quad CrossFire |
| Expansion Slots | 1 x PCIe 3.0 (x16 electrical, from CPU) 1 x PCIe 3.0* (x16 physical, x4 electrical, from from Intel Z370 chipset) 3 x PCIe 3.0 x1 (from Intel Z370 chipset)** 1 x Legacy PCI** *PCIe 3.0 x4 electrical slot unavailable when M2_2 populated with PCIe device **Either PCI_E2 or PCI_E3 and PCI1 or PCI_E5 |
| Storage | 6 x SATA III 6Gbps (via Intel Z370 chipset)* 2 x M.2 (both support PCIe x4 32Gbps or SATA III 6Gbps) *2 x SATA ports will be disabled when both M.2 slots are used for M.2 SATA devices |
| USB | 2 x USB 3.1 (2 Rear, Type-A and -C, all via ASMedia ASM3142) 8 x USB 3.0 (4 Rear, 4 Front, all via Intel Z370) 6 x USB 2.0 (2 Rear, 4 Front, all via Intel Z370) |
| Networking | Intel I219-V Gigabit Ethernet |
| Audio | Realtek ALC887 7.1 channel audio* *5.1 channel available from rear I/O, to get 7.1 channel the front audio header must be teamed with the rear ports through the Realtek driver |
| Fan Headers | 6, all support 3/4 pin fans (1 x CPU, 1 x W_PUMP, 4 x SYS) |
| Rear I/O | 1 x PS/2 keyboard/mouse combo 2 x USB 2.0 1 x VGA 1 x DVI-D 1 x HDMI 1 x LAN RJ45 4 x USB 3.0 2 x USB 3.1 (Type-A and -C) 3 x audio jacks |
| UEFI | 1 x 128Mb UEFI AMI |
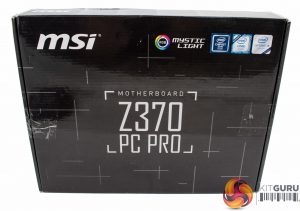
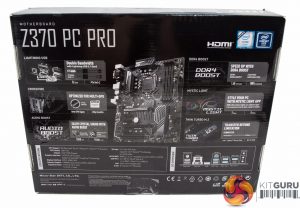
MSI's no-frills packaging for the Z370 PC Pro reflects the price. The feature highlights on the box are the USB 3.1, dual M.2 and Mystic Light RGB lighting.
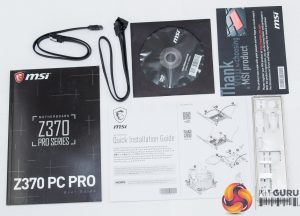
The bundle is slim with just a typical documentation set, a driver/utility DVD, two SATA cables and a rather cheap-looking rear I/O shield. The M.2 screws came pre-fitted to this motherboard.
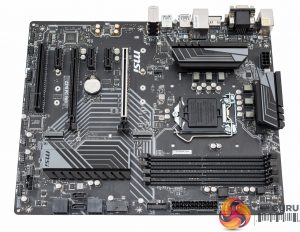
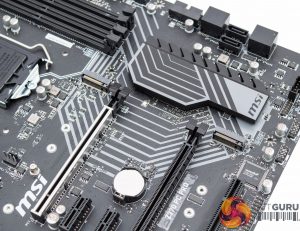
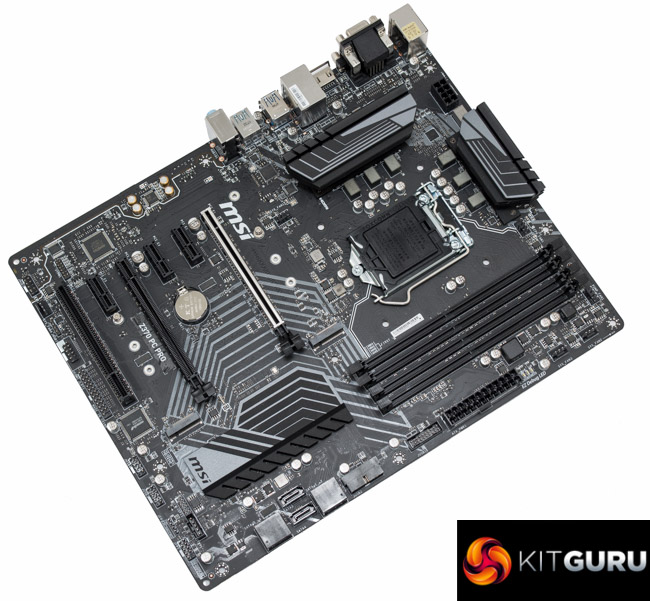
MSI's design with the Z370 PC Pro is relatively plain and neutral enough to fit into most system builds. The colour scheme is predominantly black with grey accenting across the PCB and heatsinks.
MSI provides single-zone RGB lighting that goes around the entire motherboard but is most prominent around the isolated audio PCB. There are a full range of RGB colour adjustments with numerous lighting modes, all controlled through MSI's Mystic Light application which we'll go through later on. RGB lighting can be expanded through the onboard 12V GRB header.
The placement of SATA ports and USB headers along the long-edge of the motherboard is a little messy, MSI has mixed right-angle and vertical connections with some recessed and some not. This isn't going to be a motherboard for the fussy “cable-manager”.
MSI provides a legacy PCI port, something we've not seen in a while, through ASMedia's ASM1083 chip that shares bandwidth with a PCIe 3.0 1X slot. At the end of the motherboard there's also the optional RGB header (12v GRB).
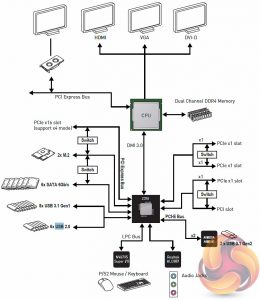
On the subject of bandwidth sharing the above block diagram demonstrates the various bandwidth sharing constraints present on this motherboard. The main bandwidth switching (either/or) is between:
- The two M.2 slots, when in SATA mode, and two SATA III ports
- The M.2 slot M2_2, when in PCIe mode, and the PCIe X4 electrical slot
- All three PCIe X1 slots and the PCI slot, max usage scenarios of 1 x PCI and 1 x PCIe X1 or 2 x PCIe X1
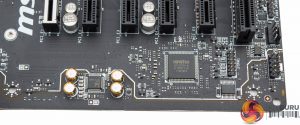
The Realtek ALC887 audio codec sits on an isolated PCB and uses Chemicon audio capacitors, and there's no sign of a headphone amplifier or other audio extras which reflects the price point of this motherboard.
The rear I/O is more than sufficient for the price point and covers all the important bases. We find it important to indicate that the native audio channel support of the rear I/O is only 5.1, despite MSI advertising 7.1. Technically, 7.1 channel is possible but requires a “teaming” of sorts of the rear audio ports and front audio panel via the Realtek driver.
Along the top of the motherboard is a couple of fan headers, one CPU and one PUMP, with two more SYS fan headers nearby in case of additional fan header demand for a multi-fan CPU cooler.
The two M.2 slots fit between various PCIe lanes with the end-most M.2 slot supporting up to 80mm drives while the middle-most M.2 slot supports up to 110mm drives.
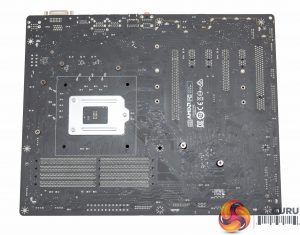
The underside of the motherboard is fairly sparse and uses cross-head screws throughout. There a few nondescript ICs underneath related to the CPU VRM that probably assist with voltage smoothing and stabilisation.
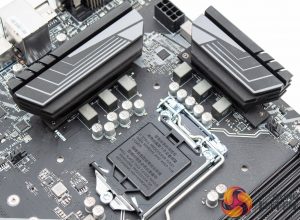
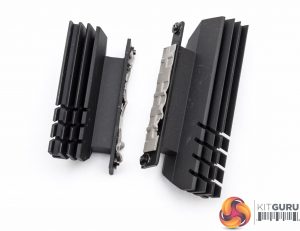
The CPU VRM has a couple of aluminium heatsinks on cooling duties which make contact with thermal pads. They will be sufficient for basic to moderate overclocking but anything significant should be done on a higher-end motherboard.
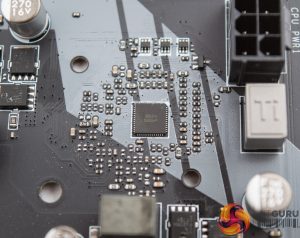
The CPU VRM makes use of a uP9508Q PWM controller which we also saw on the MSI Z370 Gaming Pro Carbon AC. There is a publicly available data sheet for a uP9508 controller, see here, that indicates a maximum of a 3+2 phase solution but it seems it can be made to operate in 4+1 phase mode on many motherboards, or the uP9508Q is a separate variation that supports a 4+1 configuration.
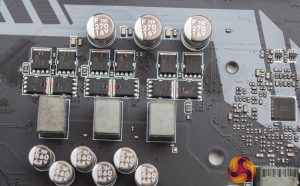
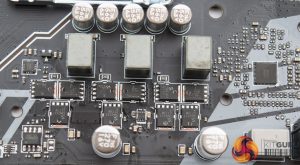
For the four CPU (Vcore) phases there are two Sinopower SM4337 and 4503NH MOSFETs on the high- and low-side, respectively, for a total of 16 MOSFETs. Each of the two iGPU phases (VccGT) has one Sinopower SM4337 and two 4503NH MOSFETs on the high- and low-side, respectively, for a total of 6 MOSFETs. A uP1961S phase doubler appears to be doubling 1 VccGT phase into two, which would suggest a 4+1 actual and 4+2 effective phase configuration.
The overall CPU VRM implementation is definitely entry-level and anyone looking to apply a substantial overclock should consider looking elsewhere. However, for moderate overclocking the MSI Z370 PC Pro will do the job.
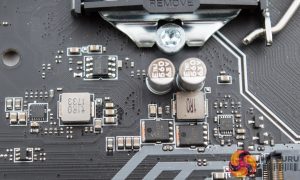
The VCCSA and VCCIO phases appear to be comprised of a further mix of Sinopower SM4337 and 4503NH MOSFETs as well as a GSTek GS7133 driver, there is also another GS71113 driver located near the iGPU phases.
The memory phases use Nikos PK632BA and PK618BA MOSFETs as well as myriad of other components, it's likely a single phase solution.
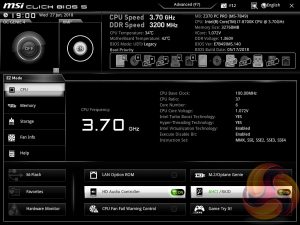
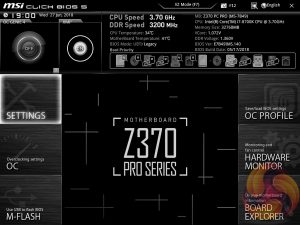
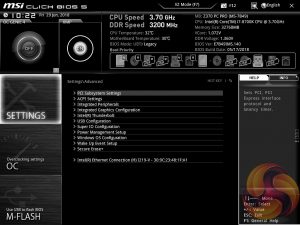
MSI’s UEFI has remained relatively consistent across its range of high-end motherboards for Intel platforms for the last few years. The MSI Z370 PC Pro sports version 5 of MSI’s Click BIOS which launches into an EZ Mode splash screen with an option to head into the advanced mode with the press of F7.
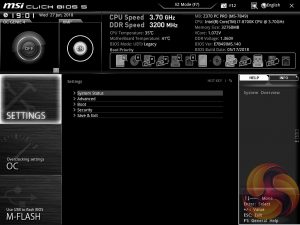
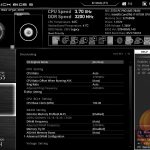
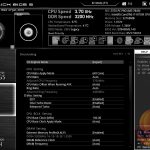
Settings has a number of useful settings for booting and integrated peripherals. The Advanced entry has the most sub menus and options to play with including the ability to toggle various different compatibility modes for storage and USB devices.
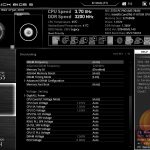
Note: if the above gallery is not displaying properly, you may need to disable your ad block software as it is known to interfere with our display code.
The real substance of the BIOS for most users is found in the OC tab where frequency and voltage settings related to the CPU, DRAM and other system components is found. It is advisable to toggle the “OC Explore Mode” into Expert straight away since the Normal mode does hide some useful options.
The most important of those is the ability to pick how CPU voltage is applied, by enabling Expert mode you can pick from a number of voltage modes including Adaptive, Override, Offset, Adaptive + Offset or Override + Offset.
The range of LLC options is extensive too, with Mode 1 (most aggressive) to Mode 8 (least aggressive) as well as an option for no overvolting, which is even less aggressive on the voltage than Mode 8. From our testing mode 4 offered almost perfect voltage stability under load, mirroring the voltage specified in BIOS, while auto actually delivered the same behaviour. The visual diagram MSI provides within the BIOS is useful in ascertaining the behaviour of each CPU LLC mode.
We noted some strange CPU Turbo behaviour when overclocking to 5GHz. The system would boot at this frequency but under load it quickly throttled down to 4.3GHz or less and we could see that this wasn't due to any thermal throttling of the VRM or Turbo rules, but rather strict power limits. MSI commented to us that this motherboard has by default a “95W Power Limit and 200A Current Limit” which it implements on all its “four phase CPU Core VRM” Z370 motherboards.
By increasing the settings for Long Duration Power Limit(W), Long Duration Maintained(s), Short Duration Power Limit(W) and CPU Current Limit(A) to a very high level the MSI Z370 PC Pro doesn't throttle the CPU frequency anywhere near as much. However, those power limits are implemented by MSI for a reason – because the VRM isn't capable of delivering high levels of power output for prolonged periods of time.
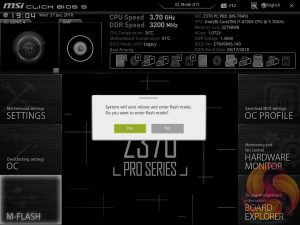
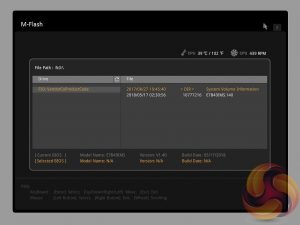
M-Flash forces you to reboot to enter the flashing process, and it is somewhat tedious though in practice all motherboard vendors will eventually reboot multiple times during the flashing process to apply the updates. However, you can’t view any of the M-Flash options or interface without conducting a reboot, whereas most vendors will at least allow you to navigate around in the interface, see what options are available to you and even start the flash, before a reboot is eventually required.
Unlike some rival solutions you can’t view local drives in M-Flash to source the update file or update directly over the internet; MSI would benefit from bolstering the functionality of it’s M-Flash utility with local drive and internet-based updates.
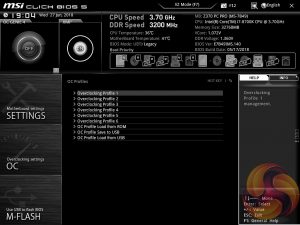
The OC Profile section hasn’t changed a great deal in successive generations, it still allows you to save OC profiles to blank slots, load in OC profiles from a USB stick or export them to a USB stick. It’s a useful capability that should facilitate sharing of decent OC profiles on forums and across the internet more generally.
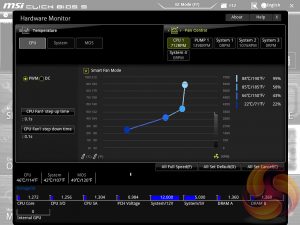
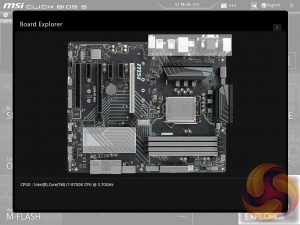
The last two tiles of the MSI UEFI refer to visual tools. Board Explorer is a visual interface for seeing what is connected to the various sections of the motherboard and some information about those connected entities. Hardware Monitor has more practical use in that it’s the primary method of changing fan profiles within the UEFI environment for each of the six fan headers.
The fan controls are adequate for this motherboard allowing you to change the temperature source for each temperature-guided fan profile and the “step-up” time between each of the adjustment thresholds (hysteresis).
The only concern is that there isn’t an easily accessible set of fan profiles – there’s a default (auto-type) option or full speed and the ability to pick between DC or PWM. However, some more traditional pre-calculated fan profiles like Quiet, Normal, Turbo and Full-Speed would be well founded and make fan tuning an easier task.
A summary of UEFI changes made in the session is presented to the user before they exit which is helpful and intuitive.
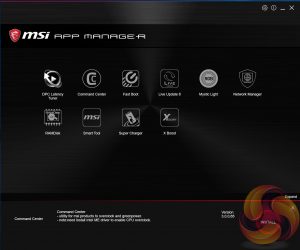
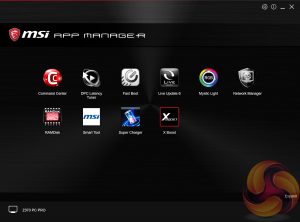
MSI has made a wise move for its software portfolio by introducing the MSI “App Manager”. It is a sensible idea to have a single application that pulls together MSI’s wide range of optional motherboard utilities. Gigabyte has long done something similar with its “APP Center” software and now that MSI has joined in on the action we’d be surprised if ASRock and ASUS didn’t follow suit.
MSI App Manager will detect all installed MSI applications and display them in a tiled dashboard-style interface. All the icons are displayed by default but are “greyed out” and are “coloured in” as each utility is installed. Applications must be double clicked to launch and you can install or uninstall by right clicking on each icon.
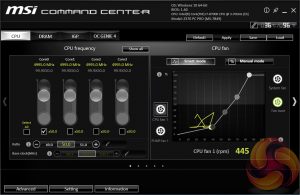
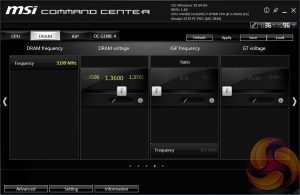
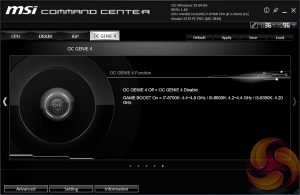
Command Center is the Windows performance tuning software for the MSI Z370 PC Pro with on-the-fly overclocking tools for the CPU, DRAM and iGPU, as well as fan controls. The virtual Game Boost button can also be toggled from within here but we find for the effort required users are better off doing some quick research to overclock their CPU since MSI has to overestimate the voltage to account for variations across all CPUs which usually results in considerably more voltage than is necessary being applied.
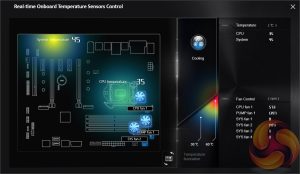
Under the Advanced sensor settings there is a nice visualisation provided of temperatures across the motherboard, there’s also more detailed recording and monitoring functionality available including system alerts under the Setting and Information sections.
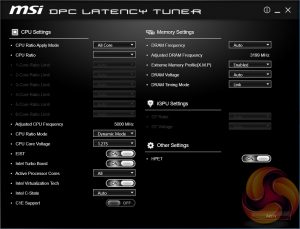
DPC Latency Tuner feels redundant since the majority, if not all, of the functionality is already embedded within Command Center. Any options or functionality that are unique to DPC Latency tuner should be embedded within the Command Center App to cut down on clutter. This is one of the utilities that you may want to omit.
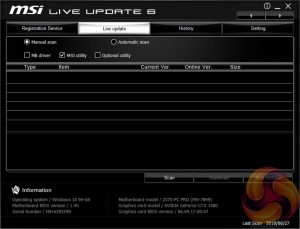
Live Update 6 will keep itself, other MSI software and core motherboard drivers up to date on your behalf. It can be programmed to check for updates on schedule or only when asked by the user. It’s a fairly powerful tool for those who don’t have the time to manually check for updates themselves. MSI might benefit from baking the functionality of Live Update 6 into its App Manager to further reduce unnecessary software clutter.
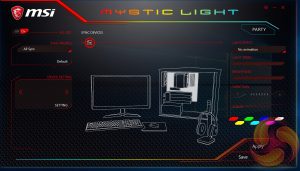
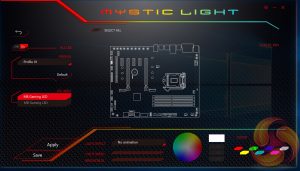
MSI Mystic Light is the main LED controlling functionality for this motherboard. The user is able to access a wealth of additional lighting modes and colours by expanding out to the secondary window by selecting the “Setting” option under the Device Setting on the launch page. This motherboard has just a single RGB zone for configuration but an optional 12v GRB RGB strip can be added through the provided header. There is a long list of different lighting modes for controllable zones including ‘Off’, ‘Breathing’, ‘Flashing’ and so on.
We had previously referred to “buggy behaviour” in MSI’s Mystic Light software that makes it difficult to access the secondary motherboard device setting page. After further analysis we discovered the culprit to be the following:
The Mystic Light application will only open the motherboard device setting page when the “MB” icon under “Sync Devices” is white. This means even if you have MB selected in the “Device Setting” box and click the “Setting” button it will not work without that white MB Icon under Sync Devices.
The unintuitive user interface aside, the core functionality and controls are all there for MSI’s software to effectively control the onboard LEDs.
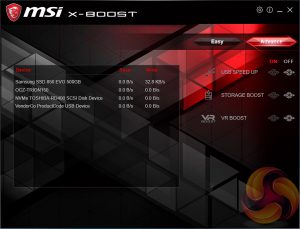
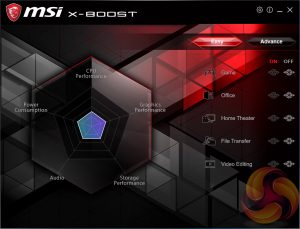
X-Boost seems to be a new MSI utility which functions similarly to something like the ASUS EPU/TPU power & performance profiles. MSI offers five different profile presets (Game, Office, Home Theater, File Transfer, Video Editing) which adjust the priority given to one of five key areas (CPU Performance, Graphics Performance, Storage Performance, Audio or Power Consumption).
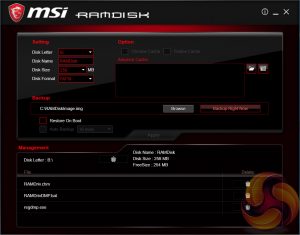
RAMDisk is probably more useful on X299 where up to 128GB of RAM is supportable making RAM Disks of genuinely useful capacities possible. However, we tested this with a 4GB RAM Disk in a previous review and achieved read and write speeds in the realm of 14GB/s, for reference the fastest M.2 NVMe drives will do around 3.5GB/s (for now, at least).
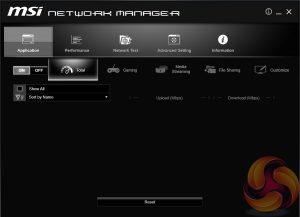
MSI’s Network Manager, called Gaming LAN Manager on Gaming series products, is a repackaged cFos product that lets you enable packet prioritisation rules for software on the host system. It has a number of baked-in profiles for different usage scenarios including streaming, gaming and file sharing.
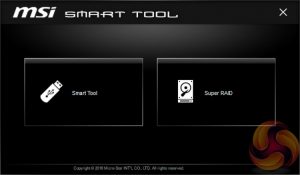
MSI Smart Tool is used to create a Windows 7 installation on a USB flash drive or configure a software RAID that doesn’t include the system disk.
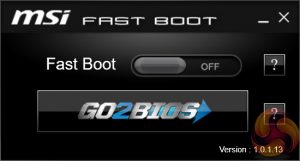
MSI Fast Boot toggles a number of UEFI settings that speed up the POST of the motherboard during booting.
Super Charger has no visible interface to display since it just speeds up USB charging for Apple devices.
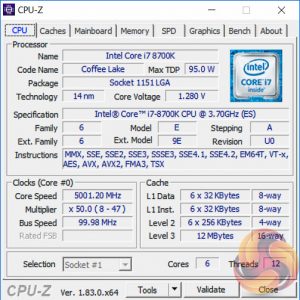
We will be outlining the MSI Z370 PC Pro motherboard's performance with the Intel Core i7-8700K CPU, 32GB* of 3,200MHz** G.Skill Trident Z DDR4 memory and a Gigabyte GTX 1080 G1 Gaming.
*16GB for mini-ITX motherboards.
**3,200MHz for Z370, B360/H370 is limited to 2,666MHz.
H370/Z370 Motherboard Test System:
- Processor: Intel Core i7 8700K (Default Intel Turbo Behaviour – 6C @ 4.3GHz, 4-5C @ 4.4GHz, 3C @ 4.5GHz, 2C @ 4.6GHz & 1C @ 4.7GHz).
- Memory: 32GB (4x8GB*) G.Skill Trident Z XMP (3,200MHz** 16-18-18-38 @ 1.35V), *2x8GB for mini-ITX motherboards **2,666MHz on B360/H370 Motherboards.
- Graphics Card: Gigabyte GeForce GTX 1080 G1 Gaming.
- System Drive: Samsung 850 EVO 500GB SSD
- CPU Cooler: Corsair H100i V2 with Two ML120 Pro Fans.
- Power Supply: Seasonic Platinum 760W SS-760XP.
- Operating System: Windows 10 Pro 64-bit
Comparison H370/Z370 Motherboards:
- ASRock Fatal1ty H370 Performance
- ASRock H370M-ITX/ac
- ASUS ROG Maximus X Formula (Z370)
- ASUS ROG Strix H370-F Gaming
- Gigabyte Z370N WiFi
- MSI B360 Gaming Pro Carbon
- MSI Z370 PC Pro
Drivers and UEFI:
- Intel Chipset 10.1.1.44 (Z370) and Intel 10.1.16.3 (B360/H370)
- Intel ME 11.7.0.1045 (Z370) and 1805.12.0.1097 (B360/H370)
- Nvidia GeForce 390.77 VGA drivers.
- MSI UEFI Version 7B49v14 (1.40) (21/05/2018)
Tests:
- Cinebench R15 – All-core CPU benchmark (CPU)
- SiSoft Sandra 2017– Processor Arithmetic Test (CPU) and Memory Bandwidth Test (Memory)
- 7-Zip 18.01 x64 – Built-in 7-Zip benchmark test (CPU)
- AIDA64 Engineer 5.95 – System cache & memory benchmark and stress test (Memory and Power Consumption)
- 3DMark v2.4.4264 – Time Spy (1440p) test (Gaming)
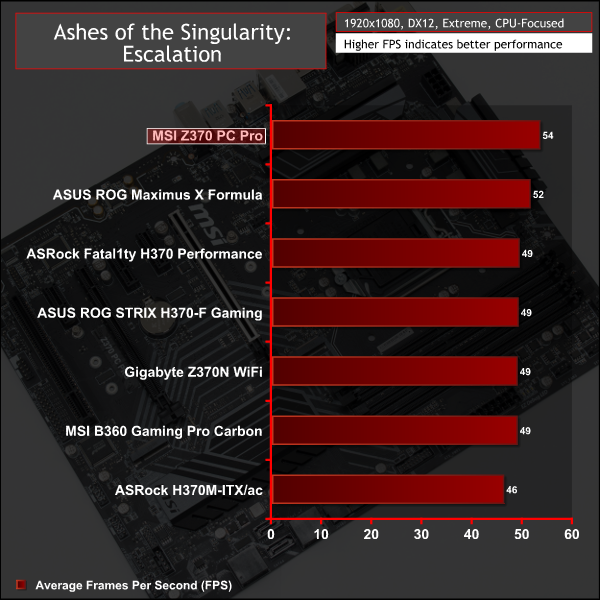
- Ashes of the Singularity: Escalation – Built-in benchmark tool CPU-Focused test, 1920 x 1080, Extreme quality preset, DX12 mode (Gaming)
- Deus Ex: Mankind Divided – Built-in benchmark tool, 1920 x 1080, Ultra quality preset, DX12 mode (Gaming)
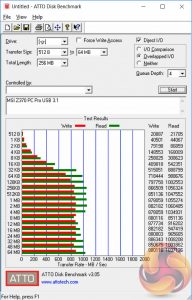
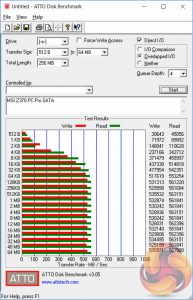
- ATTO 3.05 – M.2, USB 3.0, USB 3.1, and SATA 6Gbps transfer rates (Motherboard)
- Rightmark Audio Analyzer 6.4.1 – Record and playback test using a line-in to line-out loopback with a 3.5mm audio cable (Motherboard)
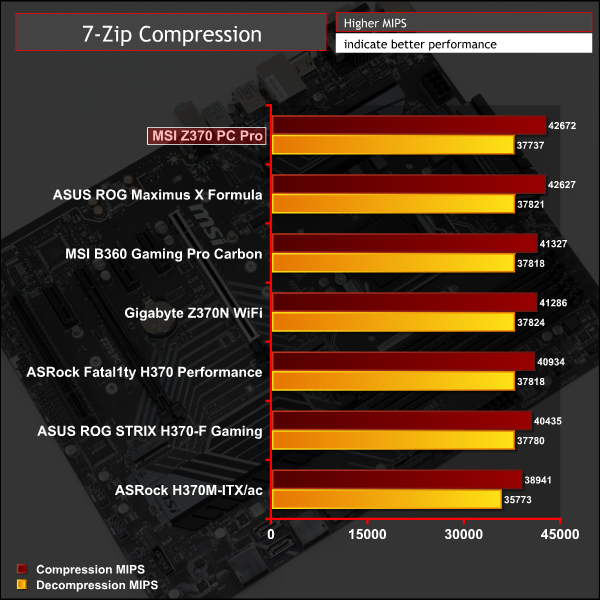
7-Zip
7-Zip is an open source Windows utility for manipulating archives. We measure the Total Rating performance using the built-in benchmark tool. The test stresses all CPU cores to 100% and shows an affinity for memory bandwidth.
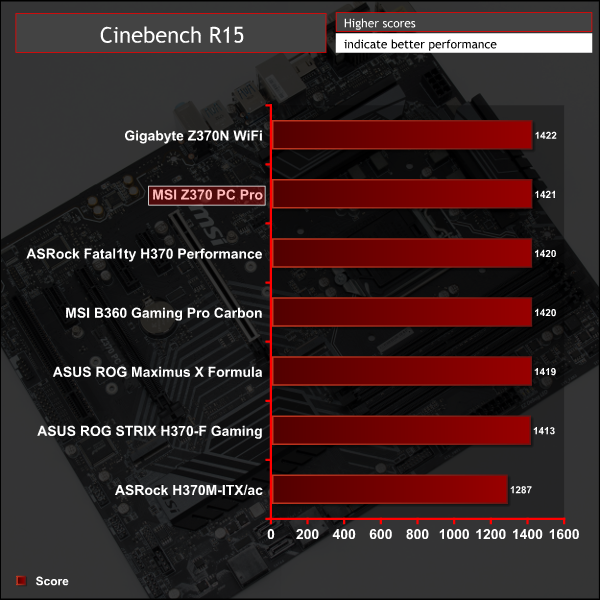
Cinebench R15
Cinebench is an application which renders a photorealistic 3D scene to benchmark a computer’s rendering performance, on one CPU core, all CPU cores or using the GPU. We run the test using the all core CPU mode.
Sandra Processor Arithmetic
SiSoft Sandra 2017 is a multi-function utility program that supports remote analysis, benchmarking and diagnostic features for PCs, servers, mobile devices and networks. We run the application’s processor arithmetic test to gauge the CPU performance on each tested motherboard.
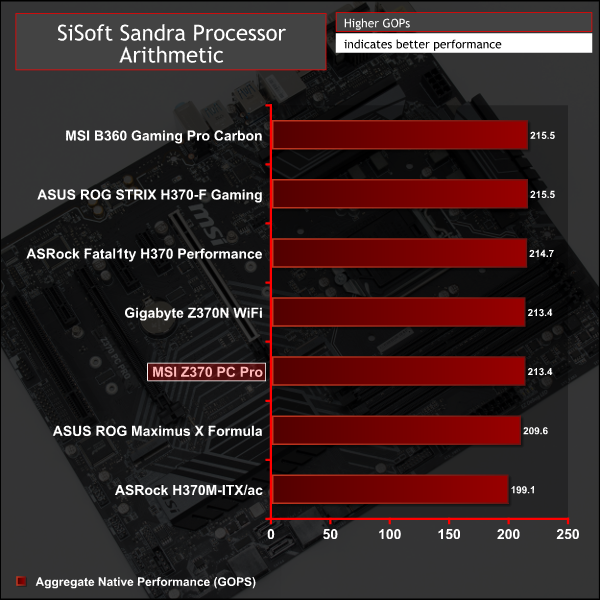
Stock CPU behaviour is as expected and is aligned with what most Z370 motherboards will achieve.
AIDA64 Engineer
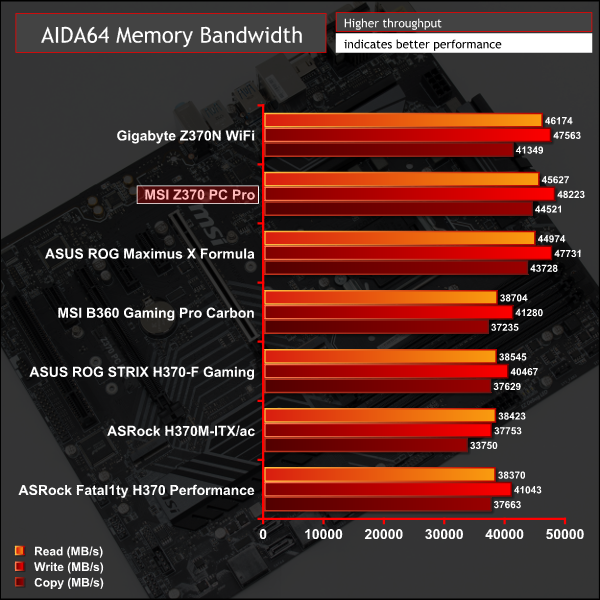
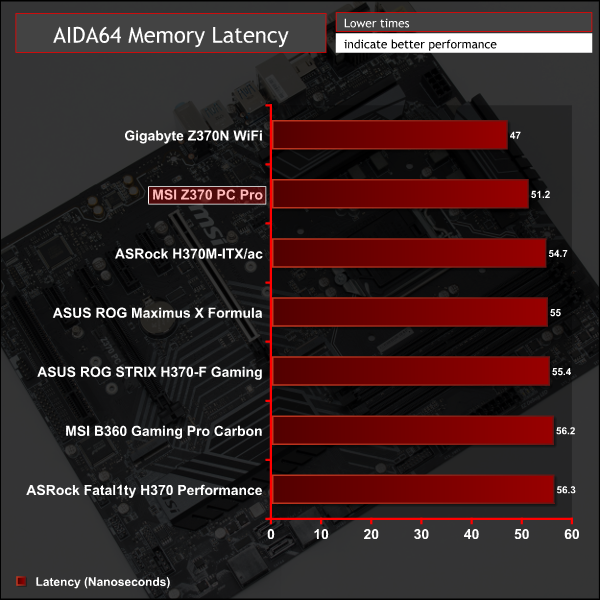
AIDA64 Engineer is a multi-featured software suite for diagnostics, stress testing, benchmarking, software auditing and various other measurement parameters. We use AIDA64 Engineer to benchmark memory throughput and latency.
Sandra Memory Bandwidth
SiSoft Sandra 2017 is a multi-function utility program that supports remote analysis, benchmarking and diagnostic features for PCs, servers, mobile devices and networks. We use the SiSoft Sandra memory bandwidth test to provide a set of memory bandwidth results.

Memory performance is also as expected, note the advantage over H370 and B360 from being able to use faster 3,200MHz memory. H370 and B360 are limited to 2,666MHz.
3DMark
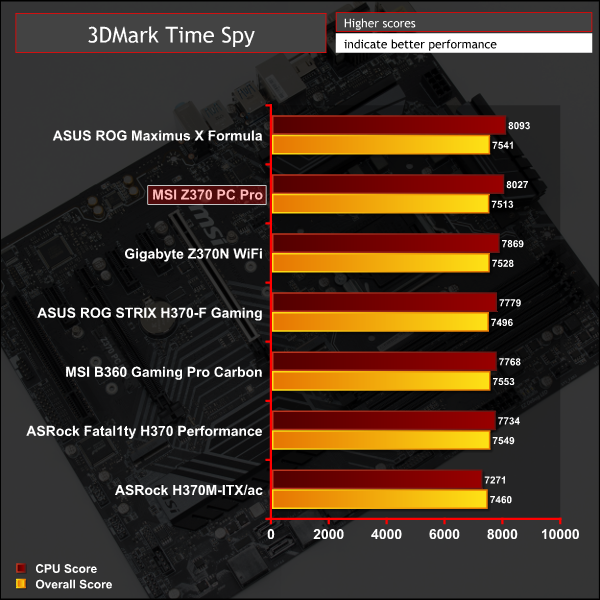
3DMark is a multi-platform hardware benchmark designed to test varying resolutions and detail levels of 3D gaming performance. We run the Windows platform test and in particular the Time Spy benchmark, which is indicative of high-end 1440p PC Gaming.
Ashes of the Singularity: Escalation
Ashes of the Singularity: Escalation is a Sci-Fi real-time strategy game built for the PC platform. The game includes a built-in benchmark tool and was one of the first available DirectX 12 benchmarks. We run the CPU-focused benchmark using DirectX 12, a 1080p resolution and the Extreme quality preset.
Deus Ex: Mankind Divided
Deus Ex: Mankind Divided is an action role-playing stealth video game released in August 2016. A built-in benchmark utility is included and we test using the Ultra quality preset and the DirectX 12 API at a 1080p resolution.
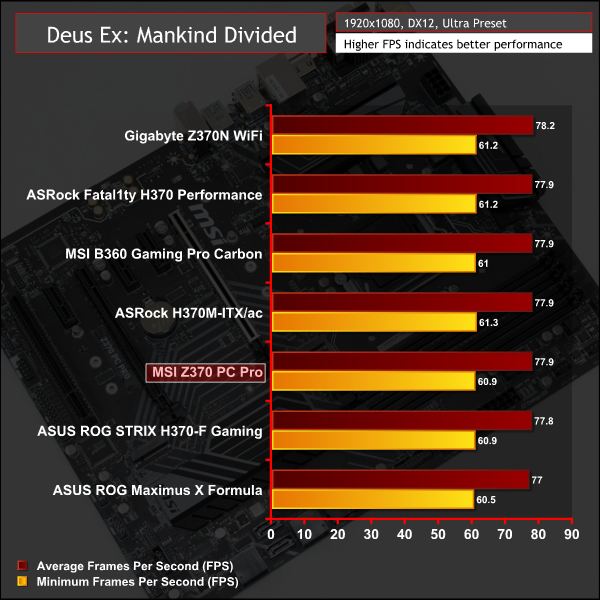
3D Gaming performance reflected the fact that this Z370 does not restrict the default CPU Turbo behaviour or memory performance in any way.
ATTO Disk Benchmark
The ATTO disk benchmark is a Windows-based utility for testing storage performance of any storage drive or controller. We use the default benchmark setup.
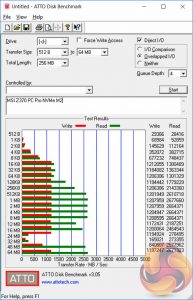
M.2 PCIe Performance
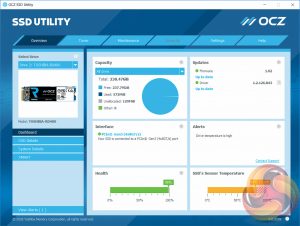
For M.2 testing we use a Toshiba OCZ RD400 256GB M.2 PCIe NVMe SSD.
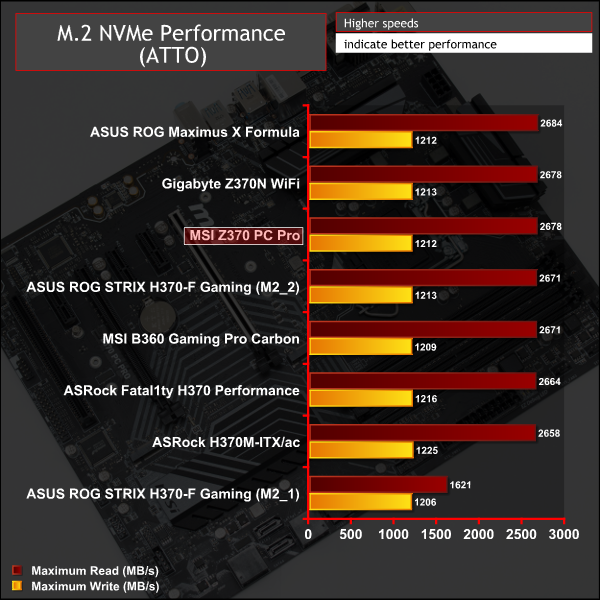
M.2 performance is as expected for this drive in PCIe 3.0 X4 32Gbps slot, and both M.2 slots on this motherboard operate at this speed. There is no M.2 shield provided so our M.2 drive experienced thermal throttling.
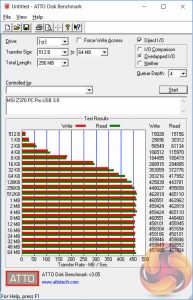
USB Performance
We test USB 3.0 and 3.1 performance using a pair of Transcend SSD370S 512GB SSDs in RAID 0 connected to an Icy Box RD2253-U31 2-bay USB 3.1 enclosure powered by an ASMedia ASM1352R controller.
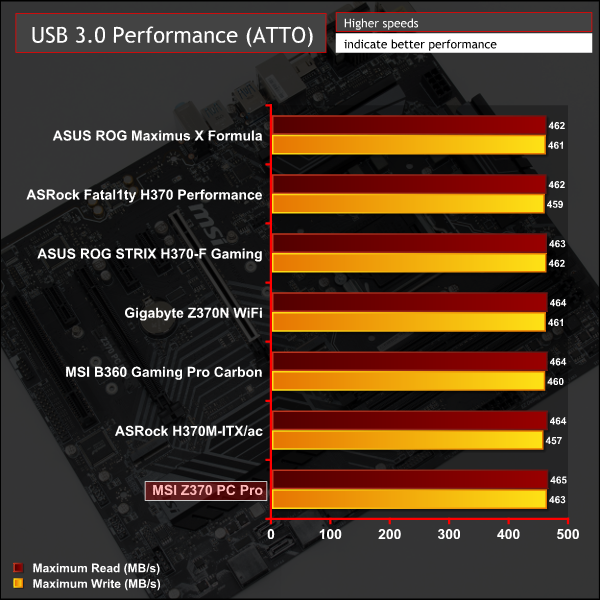
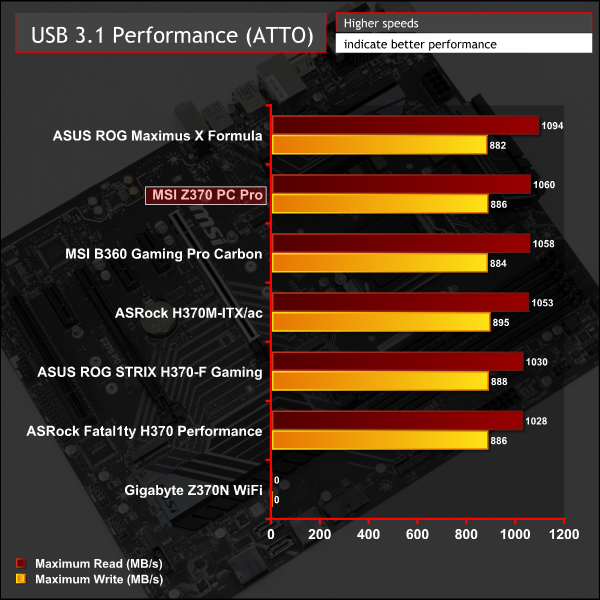
USB 3.1 and 3.0 performance was standard fare.
SATA 6Gbps Performance
For SATA 6Gbps testing we use an OCZ Trion 150 480GB SSD.
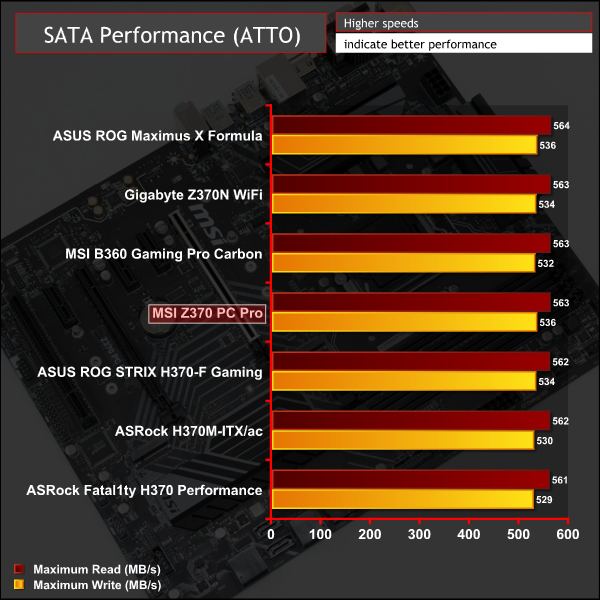
SATA performance was as expected.
Audio
Rightmark Audio Analyser is a freeware benchmarking utility designed to objectively test the performance characteristics of audio solutions. We setup a line-in line-out loop and execute the record/playback test before generating the results report you see below. A sampling mode of 24-bit, 192 kHz is tested where available. If unavailable the closest alternative operating mode available is used and clearly marked.
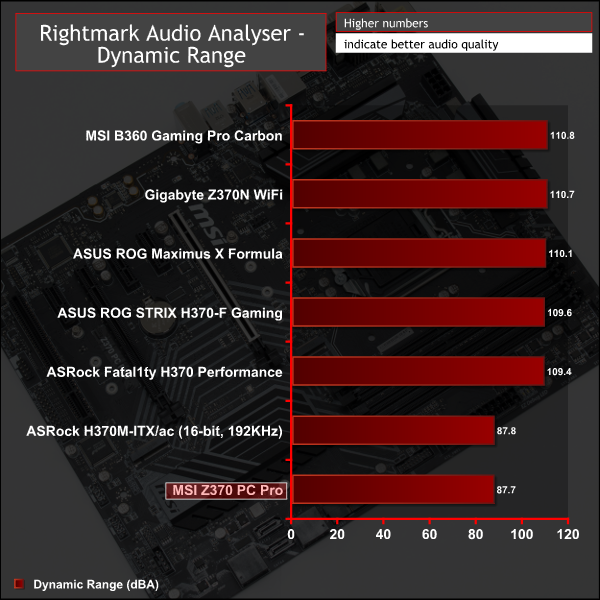
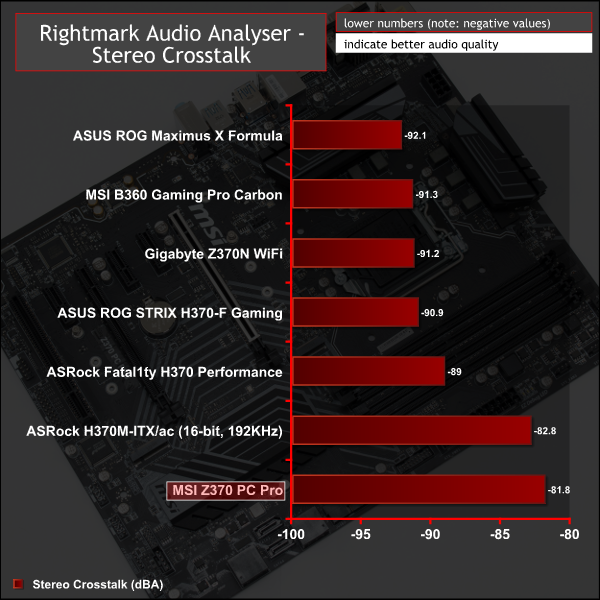
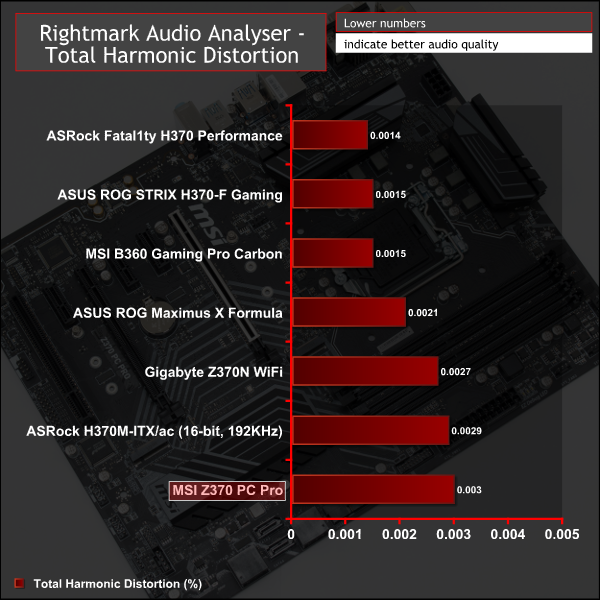
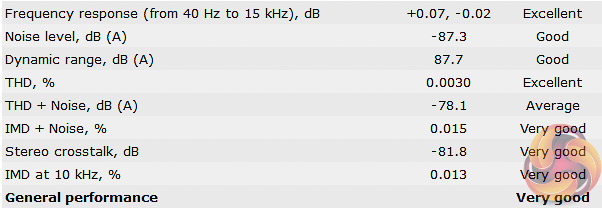
Audio performance reflects the codec used, Realtek ALC887, and performance results were similar to the ASRock H370M-ITX/ac which uses Realtek ALC892. Keep in mind that Realtek ALC887 is almost a decade old now whereas most modern mid-range to high-end motherboards are using the new Realtek ALC1220 codec.
Manual CPU Overclocking:
To test the MSI Z370 PC Pro motherboard’s CPU overclocking potential, we set the CPU vCore no higher than 1.3V and push for the highest stable clock speed. We maintain the DRAM frequency at 3200MHz to take memory stability out of the overclocking equation. Once the highest clock speed for 1.3V is achieved we see if there is potential to roll back on the voltage while maintaining system stability.
Overclocking delivered peculiar results on the MSI Z370 PC Pro. Firstly, with regards to frequency there were no issues achieving 5GHz using 1.275 volts as we have done on almost all other Z370 motherboards, we tried backing the voltage down further but experienced instability and 5.1GHz wasn't possible without exceeding our chosen 1.3v limit.
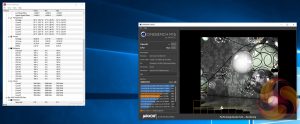
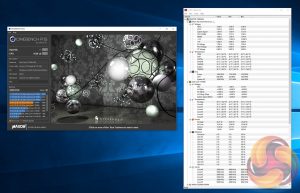
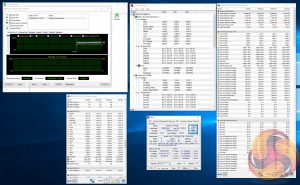
However, performance when overclocked to 5GHz @ 1.275 volts was actually worse than with stock Turbo behaviour and we regularly saw Cinebench results around 1380 points at this frequency, when our stock testing achieved 1421 points. As the above left image demonstrates this is because of frequency throttling, during the Cinebench run the frequency dropped as low as 3.9GHz despite being overclocked to 5GHz.
The explanation for this is that the throttling was power-based throttling and by choosing an overclocked voltage of 1.275 volts, which is higher than the stock Turbo voltage of about 1.2 volts, the frequency has to be reduced further to stay within power constraints. Thus the best result we could achieve, that improved upon stock Turbo performance, was by using 4.8GHz with 1.22 volts.
MSI commented to us that this motherboard has by default a “95W Power Limit and 200A Current Limit” which it implements on all its “four phase CPU Core VRM” Z370 motherboards when using “95W CPUs”. It does so to prevent VRM overheating which it says can happen when using 4.8GHz and 1.275v vCore or higher under extreme stress tests like Prime 95 small FFTs.
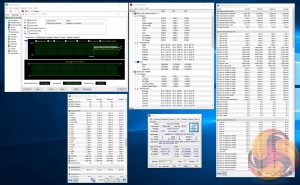
By applying some “potentially unsafe in the long-term” modifications to the power limit we were able to circumvent MSI's restrictions and achieve normal 5GHz performance results in Cinebench (see above right). This is, however, not recommended as MSI sets these power limits for a reason – it knows what the VRM implementation is capable of.
Motherboard Sensors
In terms of VRM thermal sensors there was a “MOS” sensor indicated in the UEFI which seemed to map to TMPIN5 within Windows. As a general rule the VRMs didn't get hot – they barely surpassed 70 degrees Celsius. We verified that the frequency throttling wasn't caused by overheating VRMs too by disabling the over-temperature protection on the VRMs in the BIOS, which had no impact on performance.
The above images of 4.3GHz stock Turbo performance (left) and 5GHz @ 1.275v (right) show the frequency throttling that takes place in an interesting way. For the 10-minute AIDA64 system stability test the average frequency for the stock scenario (4.24GHz) was actually higher than the overclocked scenario (4.11GHz).
Overclocked Performance
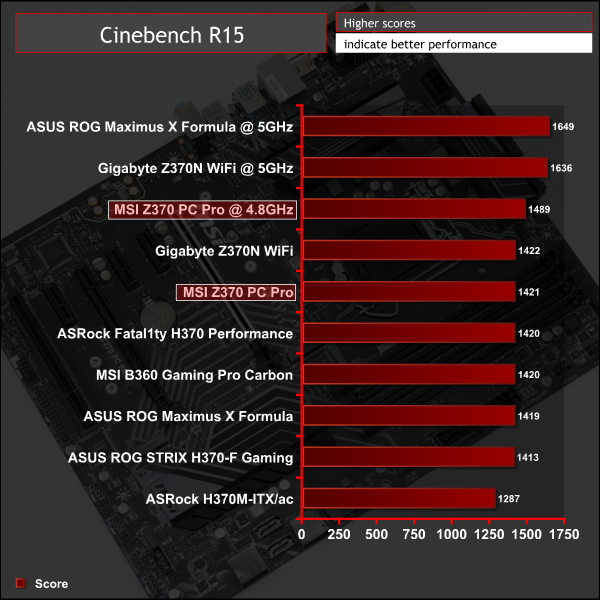
Overclocked performance reflects the Turbo and power behaviour we've outlined above.
Power
We leave the system to idle on the Windows 10 desktop for 5 minutes before taking a reading. For CPU load results we run AIDA64 CPU, FPU, Cache and Memory stress tests and take a reading after 5 minutes. The power consumption of our entire test system (at the wall) is shown in the chart.
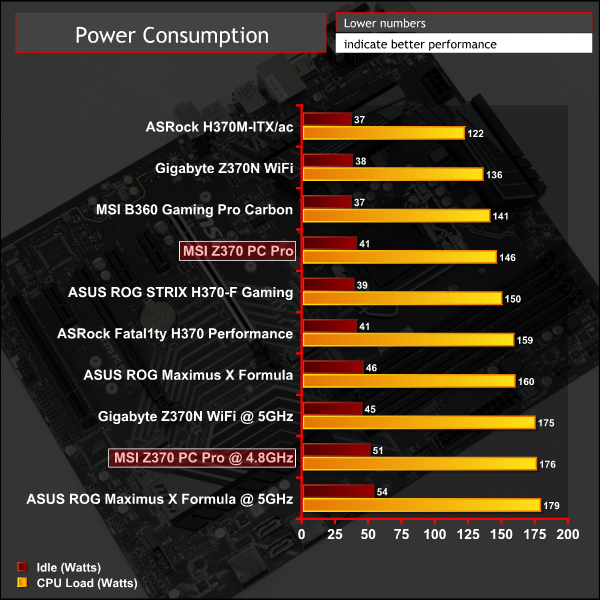
Power consumption reflects the voltages used for stock and overclocked load scenarios and aligns to other Z370 motherboards.
There may be a new Intel chipset on the horizon for 8th Generation Core Series processors, rumoured to be called Intel Z390, but for here-and-now buyers Z370 is still the Intel platform of choice for cost-effective builds that support overclocking. Consumers not requiring overclocking would do well to consider H370, B360 and H310 options not to mention numerous AMD alternatives for all price points and for overclocking.
Products like this MSI Z370 PC Pro are less sensitive to new launches because they are more about price and less about cutting-edge technology or innovation. Therefore Z390 will not make this product irrelevant since its price is what makes it relevant.
Our technical analysis of MSI's Z370 PC Pro has revealed it to be a competent entry-level Z370 motherboard so prospective buyers need to be realistic about what can be had for their money as this motherboard certainly has its drawbacks as well as its strengths.
MSI has done well to provision core Z370-platform connectivity with dual M.2, USB 3.1 10Gbps, Intel Gigabit and a generally ample rear I/O. The overall aesthetics are pleasing too, with a neutral colour scheme that's enhanced by single-zone RGB lighting and an optional RGB header. Performance when not overclocking is excellent and easily competes with other more expensive Z370 options.
MSI's Z370 PC Pro has drawbacks, though, which prospective buyers need to be aware of. The primary issue is its overclocking behaviour. KitGuru's testing showed significant power-limit-based throttling that cancelled out almost all gains from overclocking. Only by manually editing the UEFI settings to remove all power limits, which are implemented by MSI for safety and longevity, was normal overclocking performance possible.
The above goes hand-in-hand with the entry-level CPU VRM that has just 4+2 phases with middling-quality components. The power-based throttling (95W CPU Power Limit, 200A CPU Current Limit) was a calculated decision by MSI to ensure the long-term longevity of the motherboard and its VRM components against excessive heat output. In any case owners of unlocked i5 processors or lower are much less likely to encounter these power limits – we've tested with the flagship i7 8700K which is the “worst case scenario” for power usage.
Even with the power-based overclocking limits, MSI's Z370 PC Pro stands up to the competition and has more features than cheaper or similarly priced rivals like the ASUS Prime Z370-P, ASRock Z370 Pro4 and Gigabyte Z370P D3 – including onboard RGB lighting, a better Gigabit controller, USB 3.1 10Gbps and dual M.2.
In the end prospective buyers need to identify which features are essential before making a purchase decision. For the primarily price-minded individuals MSI makes cheaper alternatives to the Z370 PC Pro including the Z370 Tomahawk and Z370A-PRO. However, anyone looking for a motherboard with a better quality VRM, better connectivity and more features will quite simply have to part with more cash, regardless of the motherboard vendor.
MSI’s Z370 PC Pro has a retail price of £119.99 in the UK and is sold with a 3 year warranty as standard.
In the USA it can be had for $128 at Amazon with a post-purchase rebate of $20 available, bringing the price down to $108, and a 1 year warranty.
Pros:
- Dual M.2.
- USB 3.1 10Gbps and USB Type-C.
- Onboard RGB lighting with optional RGB header.
- Competitive pricing.
- Clean aesthetics.
- Intel Gigabit.
- Shielded PCIe slot.
Cons:
- Entry-level VRM with power-limit throttling of CPU frequency under overclocked loads.
- Decade-old ALC887 codec.
- Cheaper Z370 motherboards are available if price is the primary purchasing criteria.
KitGuru says: MSI's Z370 PC Pro is a highly affordable Z370 motherboard with ample features and capable of casual overclocking. Serious overclockers, however, should consider looking higher up the MSI range.
 KitGuru KitGuru.net – Tech News | Hardware News | Hardware Reviews | IOS | Mobile | Gaming | Graphics Cards
