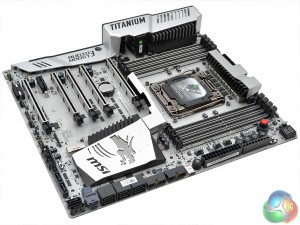
The MSI X99A XPower Gaming Titanium is a real eye-catcher with its shimmering silver colour scheme. MSI refuses to conform to the tired red-and-black theme for gaming motherboards which is a refreshing break for consumers. There is no standard RGB lighting setup for further design customisation but instead an RGB header to facilitate the usage of a third-party LED strip.
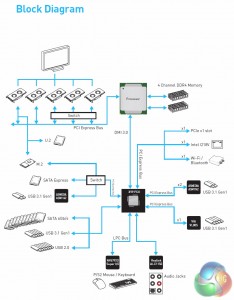
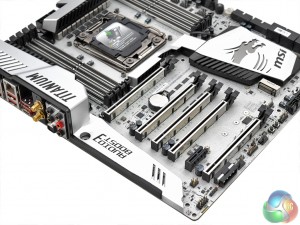
MSI has geared the XPower Gaming Titanium to be capable of 4-Way GPU configurations with each (shielded and strengthened) PCIe slot conforming to a dual-slot spacing requirement. PCIe lane configurations are CPU-dependant, the MSI X99A XPower Gaming Titanium supports X16 or X16/X16 or X16/X16/X8 or X16/X8/X8/X8 with a 40-Lane CPU and X16 or X16/X8 or X8/X8/X8 or X8/X8/X8/X4 with a 28-Lane CPU.
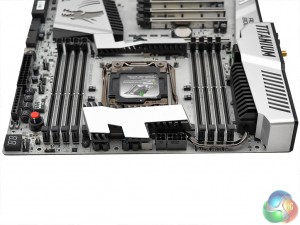
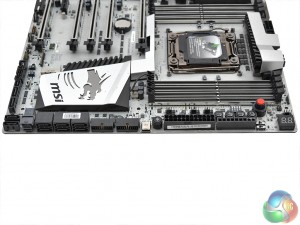
Along the top of the motherboard MSI provides a CPU 8 pin EPS and 4 pin that feed the 12 phase VRM. This topology uses a “Titanium Choke” for each phase and a similar number of “Dark CAPs”. The VRM is digital with an Intersil ISL6388 PWM controller. Extreme overclockers, particularly those using LN2 or phase change, may find it useful to take necessary of the extra power supplied by the supplementary CPU 4 pin.
Only one 4-pin fan header is provided at the top of the motherboard with the rest residing near the 24pin, along the side.
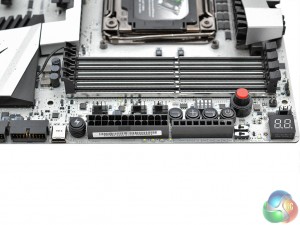
The 24 pin area on the XPower Gaming Titanium is considerably busier than on your average motherboard with a large amount of connectivity that reflects this motherboard's XPower positioning.
Near the 24 pin you will find a 2-digit code reader, a power button, reset button, BCLK + & – buttons, an auto-OC button, PCIe DIP switches for each of the 4 main PCIe lanes, a slow-mode switch, a BCLK ratio switch, a discharge button (which quickly drains the MB of power) and debug LEDs.
An internal USB 3.0 (3.1 Gen 1) type-C port is also found though it's not immediately obvious what it might be used for.
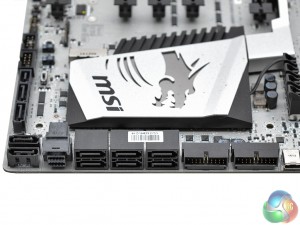
Further down the side of the motherboard you'll find the ten SATA III ports, with SATA Express, a U.2 connection and a pair of right-angled USB 3.0 headers. The mish-mash of right-angled and vertical SATA ports is somewhat confusing and MSI should maintain some consistency in choosing one or the other.
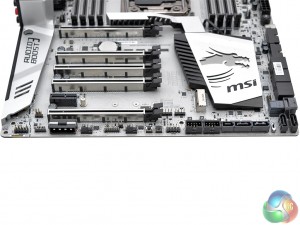
Along the bottom edge of the motherboard is an equally impressive level of connectivity. Some of the more interesting connections include an RGB header, a supplementary molex connector for running intensive-GPU configurations, a dual-BIOS switch, the M.2 port and two OC function buttons (OC Retry and Force Enter UEFI).
There is also a HDD activity LED and a rather strange selector switch (SE_USB_SW1) to determine whether to active JUSB4 (the second internal USB 3.0 header) or SE1_65 (the SATA Express function), JUSB4 is the default option.
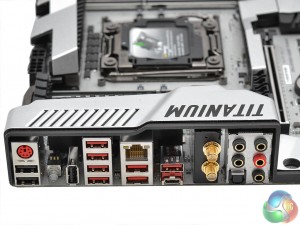
Rear I/O connectivity options are as plentiful as the rest of the board with USB 2.0, 3.0 and 3.1 (type A and C), PS/2, Gigabit and analogue or digital audio. The vertically mounted USB port supports the USB flashback function whereby you copy a BIOS file onto a USB stick, power the board with standby power and let it update – you can do this without a CPU or memory.
- 1 x PS/2 keyboard/ mouse combo port
- 2 x USB 2.0 ports
- 1 x BIOS FLASHBACK+/ USB 2.0 port
- 1 x Clear CMOS button
- 1 x USB 3.1 Gen2 port
- 1 x USB 3.1 Gen2 Type-C port
- 6 x USB 3.1 Gen1 ports
- 1 x LAN (RJ45) port
- 1 x Optical S/PDIF OUT connector
- 5 x OFC audio jacks
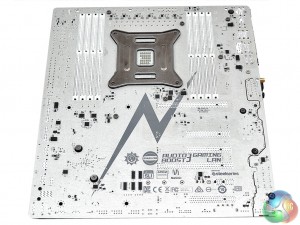
Underneath the MSI motherboard you will find standard Philips-head screws for all heatsinks making cleaning and modification that bit easier to work with. There are no under-board reinforcement plates to speak of but MSI claims the PCB is “Titanium reinforced”, thus shouldn't need additional support anyway.
 KitGuru KitGuru.net – Tech News | Hardware News | Hardware Reviews | IOS | Mobile | Gaming | Graphics Cards
Why that 6800K stuck at 4.2 ???
Using MSI’s command center and turning off hyperthreading, I’m able to hit a stable & usable 4.6ghz on the X99A Titanium with a 5930k & 32Gb of Corsair RAM @ 2400Mhz. Extended gaming or video encoding with a Corsair H110i GT, the cpu never gets warmer than 58C. This is some very nice gear. I’m quite satisfied with how it all works together, and it looks stunning inside the Enthoo Luxe chassis.
My X99A gaming pro carbon was able to clock the 6800k to 4.2 GHz at 1.251 volts, and 4.1 GHz at 1.194 volts, but 4.3 GHz at 1.3 volts, Windows would crash after booting up. I haven’t tried 1.315 or 1.32 volts yet.
What voltage are you using for the CPU @4.6ghz?