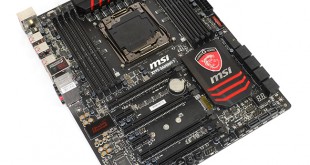
While the X99 platform and its plentiful PCIe connectivity form a strong gaming foundation, the cost of an LGA2011-3 motherboard, DDR4 memory, and the Haswell-E CPU will put a considerable dent in any buyer's pocket. So when we see a gaming-orientated motherboard offering 3-way graphics capability, eight-core CPU support, and an enhanced audio solution, features take precedence and make the HEDT platform seem a more alluring investment.
Hitting the entry-level cohort of X99's product range, can MSI's £200 X99S Gaming 7 prove that the HEDT platform's motherboard is at least one area where money can be saved?
Towards the end of Intel's Z77 life-cycle, and from the beginning of Z87, MSI has pushed its Gaming series parts to various segments of the marketplace. From entry-level Z87 boards like the G43 Gaming, to flagship-status parts such as the Z97 Gaming 9 AC, MSI has driven its red-and-black boards into the spotlight for enthusiastic gamers. And it has worked.
Making an appearance for the LGA2011-3 socket, we take a look at MSI's X99S Gaming 7. Can 3-way graphics support, PCIe-fed storage lanes, Audio Boost 2 sound, and capacity for DDR4-driven eight-core CPUs prove that the X99S Gaming 7 is more than a well-priced piece of X99 eye-candy?
Features:
- Turbo M.2
- OC Engine.
- Audio Boost 2.
- USB Audio Power.
- Sound Blaster Cinema 2.
- Killer Ethernet.
- Click BIOS 4.
- OC Genie 4.
- XSplit Premium License.
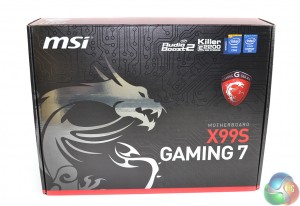
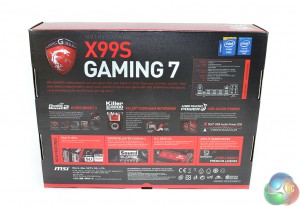
The MSI X99S Gaming 7 is housed in packaging that is typical for MSI's Gaming series parts. A red-and-black box featuring the dragon branding outlines key features and specifications for the LGA2011-3 motherboard.
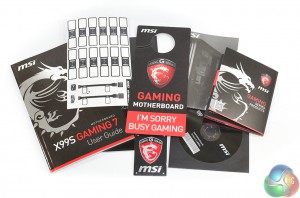
A combination of manuals and installation guides form the supplied documentation. Also provided is MSI's door hanger, cable labels, and a well-sized case badge.
We must commend MSI for the quality of its user guide. The company adds a block diagram to show the board's controller layout and also explains the PCIe lane allocation in a clear manner.
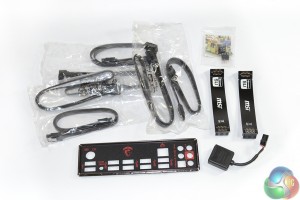
Six latching SATA cables, MSI's convenient M-connectors, the rear IO shield, two SLI ribbons, and an audio power cable form the supplied accessories. The audio power cable is used to feed current directly from the PSU to MSI's Audio Boost 2 system. This helps to ensure that the correct voltage levels reach the audio hardware, rather than watered-down voltages that may have traversed the entire motherboard PCB.
MSI oddly includes only two SLI ribbons meaning that 3-card users will have to take a quick trip to eBay for one additional bridge. This is an implication that MSI expects 1- or 2-card users to make up most of the X99S Gaming 7 motherboard's audience. On the plus side, both ribbon cables are a dark shade of black, rather than the ugly brown colour that is used all too often (yes I'm looking at you, Asus).
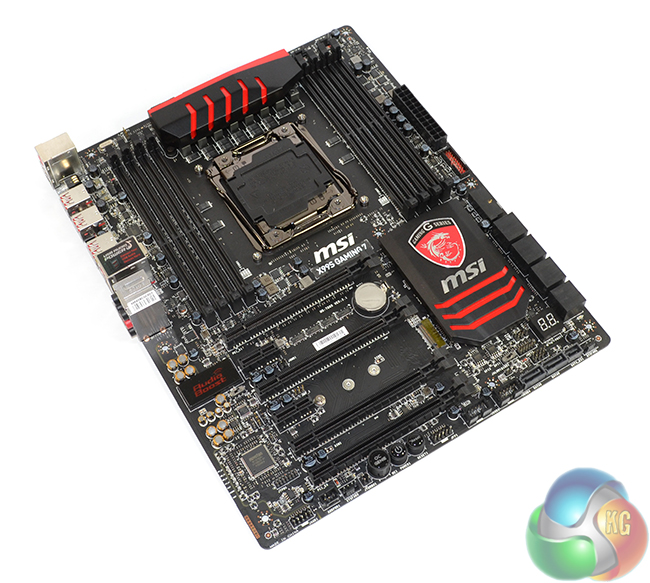
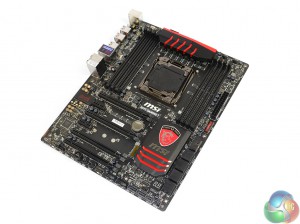
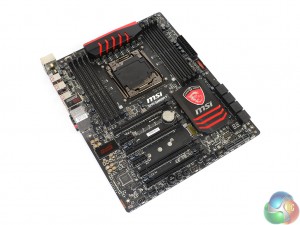
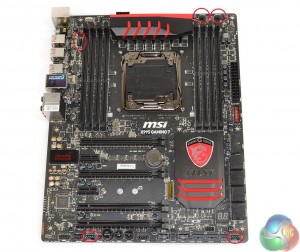
The company's tried-and-tested red-and-black colour scheme is used for the MSI X99S Gaming 7. MSI pretty much cracked the styling code with its Z87 and Z97 Gaming series motherboards, so the X99 part builds on that well-received appearance.
Small but well-positioned hints of red contrast the dark black PCB to create an eye-catching theme. Such is the component-heavy nature of MSI's board, the white writing and silver traces of solder accommodate large PCB sections and dampen the X99S Gaming 7's appearance slightly. There's very little that can be done to contest that reduced attractiveness issue.
As for colour-coordination, red or black memory kits are the ideal compliments for MSI's styling. Equally fitting from a styling perspective would be one (or multiple) of MSI's new Twin Frozr V-cooled graphics cards.
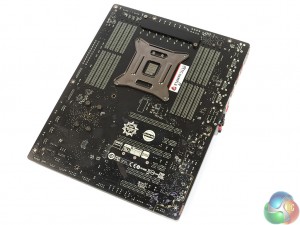
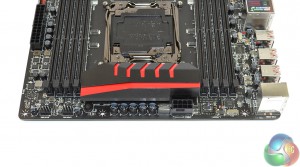
A small strip heatsink cools the MOSFET rear connection points, while a sturdy backplate provides structural rigidity for times when heavy CPU coolers are installed.
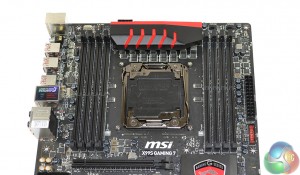
MSI’s somewhat bare LGA 2011-v3 CPU socket is sandwiched between two DIMM banks. The reason for the socket’s bare appearance is because, as previously pointed out, MSI incorporates the pre-mounted CPU cooler backplate behind the motherboard rather than surrounding the socket. This keeps clutter to a minimum around the socket area.
Up to 64GB (using current – 8GB – modules) of DDR4 memory can be installed in the motherboard's eight slots. MSI quotes maximum frequency support for 3333MHz DDR4 memory via overclocking, although the real-world limit will be tied to BIOS implementations and a CPU's Integrated Memory Controller (IMC) strength.
Space between the CPU socket and VRM heatsink is tight and has the potential to cause interference with wide, low-hanging CPU coolers. Thankfully, heatsinks touching up against the PCB of a graphics card installed in the top slot is not going to be an issue with the X99S Gaming 7 – its first slot actually sits in the board's second position.
An Intersil ISL6388 6-phase PWM controller manages the CPU power phases, while two Powervation PV3203 controllers are in charge of the memory and its accompanying system voltages. While there are eight physical phases near the CPU, with an additional one seeming to hide behind the MOSFET heatsink, the controller usage implies that six phases are feeding the processor while the remaining provide for memory-related voltages.
All of the electronic components for CPU power delivery are positioned above the CPU socket. This minimises the length of path that current has to flow on and can therefore improve power delivery.
The power delivery system comprises MSI's Military Class 4 electronic components. Hi-c capacitors, with an efficiency rating of up to 93%, work with Super Ferrite Chokes (SFC) and aluminium-core Dark capacitors to deliver electrical power.
Two 4-pin fan headers and the 8-pin power connector are found along the motherboard's upper edge. MSI allocates one of the headers for CPU fan duties, while the other runs from a SYS_FAN control channel.
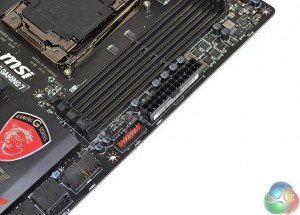
Sat next to the 24-pin power connector is an outwards-facing USB 3.0 header. A few centimetres down from that is an additional header in the right-angled orientation.
The JUSB1 header supports MSI's Super Charge application. Both USB 3.0 headers' ports derive from the X99 chipset.
Despite featuring enough slots (and CPU links with a 40-lane chip) to feed 4-way setups, MSI does not add the necessary controller to enable any more than 3-way SLI or CrossFire. Thinking sensibly though, up to a trio of graphics cards working together is going to suffice for almost all users buying a £200 motherboard.
According to MSI's manual, PCIe connections for a 40-lane CPU are allocated as (from top to bottom full-length PCIe slots): x16 for a single card, x16/x16 for two cards, and x16/x16/x0/x8 for three cards. The one- and two-card configurations support PCIe 3.0 x4 for the M.2 connector, but three graphics cards will drop that link to PCIe 2.0 x2. That's a big bandwidth hit on the storage front; we would have preferred MSI to drop one of the three cards to x8 link speed and maintain the PCIe 3.0 x4 connection for a high-speed M.2 drive.
Using a 28-lane chip is a little different. Obviously a single card runs at x16, but two operate via sixteen and eight PCIe 3.0 links, respectively, and three cards all get eight PCIe lanes each. PCIe 3.0 x4 for the M.2 connector is preserved throughout.
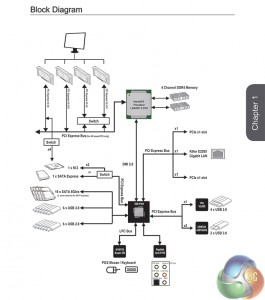
Now here's where the fun and games start. That third full-length PCIe slot that shares sixteen lanes with the first connector can, despite MSI's advice, be used with a 40-lane chip. Sticking graphics cards in the first, second, and third full-length slots should, in theory, result in an x8/x16/x8 + PCIe 3.0 x4 configuration. MSI's documentation doesn't highlight it, but we see no reason as to why that wouldn't be supported (as backed up by the above block diagram).
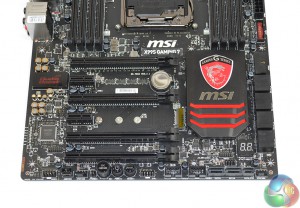
Expansion slot layout is good. I would have preferred MSI to use the first and third full-length PCIe slots for two x16 graphics cards, rather than the first and second. Back-to-back boards always present a cooling headache. 3-way SLI or CrossFire with a 40-lane CPU sees a potential cooling gap left between the second and third cards (assuming dual-slot coolers), but this also makes the SATA Express connection impossible to use due to its large connector.
Along the motherboard's bottom edge we find the usual affair of front panel, USB 2.0, and audio headers. MSI also equips the X99S Gaming 7 with onboard power, reset, and OC Genie buttons which are always useful in times of on-the-table troubleshooting. A two-digit LED display is sat above the outwards-facing SATA Express connector, just a few centimetres from the multi-BIOS switch.
As already pointed out, the 10Gbps SATA Express connector is going to be rendered inaccessible as soon as a long graphics cards is installed in either of the lower two PCIe slots. MSI should have changed its orientation or positioning to avoid such inconveniences.
We also want to point out the header that provides MSI's Audio Boost 2 system with its discrete source of power. The supplied molex power adapter connects to the header that is positioned just right of the front panel audio connection.
MSI implements a ‘Turbo M.2' connector that runs off four PCIe 3.0 lanes from the CPU to provide up to 32Gbps of data transfer speed. Taking its lanes from the CPU means that an M.2 device can be used at the same time as a SATA Express drive. If all of the CPU's PCIe 3.0 lanes are being used by expansion cards, the M.2 connector can steal the SATA Express port's two chipset-fed PCIe 2.0 lanes to provide a 10Gbps connection.
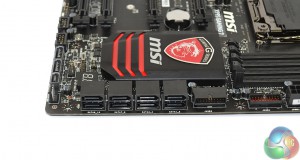
Eight right-angled SATA 6Gbps ports all operate from the X99 chipset. The remaining two connections are bundled together to help form the SATA Express port.
Placing one of the USB 3.0 headers in a right-angled orientation is one of my favourite moves for a motherboard vendor to make. Hiding the cumbersome front panel USB 3.0 cable is a far simpler task when it doesn't stick vertically out of the board.
MSI continues to steam ahead with its tried-and-tested Audio Boost 2 system on Gaming series motherboards. The gaming-orientated solution has received positive feedback amongst users.
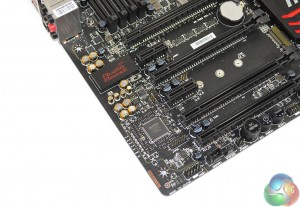
Based around the Realtek ALC1150 and its 115 dB Signal-to-Noise Ratio (SNR), MSI's Audio Boost 2 system also calls upon Nichicon power-smoothing capacitors and Texas Instruments' OPA1652 amplifier. We know that the TI OPA1652 is perceived as a particularly potent operational amplifier, capable of driving high – up to 600 Ohm – headphones.
Just beneath the branded shield for Realtek's ALC1150 audio codec is the switch to toggle between motherboard-fed current or voltage from the discrete audio power connector. Also worth mentioning is MSI's USB Audio Power delivery system that, the company says, feeds USB-driven headphones and DACs with a stable five volts, rather than fluctuating levels that can derive from traditional solutions.
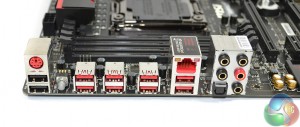
Without the onboard video connections of Z97 boards, USB ports form the vast majority of the X99S Gaming 7's rear IO. The two USB 2.0 ports and accompanying PS/2 connector are part of MSI's Gaming Device Port system. MSI suggests that the ports can help deliver smoother gameplay, although we're sceptical of that claim without a clear-cut way to obtain scientific results.
Eight red-coloured USB 3.0 ports are supplied through a combination of sources. Although it is not listed in MSI's manual which ports operate from which controllers, our empirical testing gives an insight into where the connections derive. Two ports beneath the LAN connector operate from Intel's X99 chipset. The two directly to the left of those are provided by ASMedia's PCIe 2.0 x2-fed ASM1042AE host controller. The remaining four operate from a PCIe x1 VIA VL805 host chipset.
It is important to know how the ports are fed their bandwidth because, as our testing later will show, there are noticeable speed differences between each of the USB 3.0 host controllers.
MSI continues to use Killer's E2205 NIC thanks to its suggested performance benefits in dealing with small and large data packets (gaming and streaming, respectively). Perhaps a bigger factor for MSI's commitment to the Killer NIC is its excellent Network Manager software that dynamically allocates network bandwidth in the preferable (or user-defined) locations.
Completing the rear IO are gold-plated audio connectors, an optical sound output, and the ever-useful clear CMOS button. MSI installs a blue LED in the clear CMOS button to make it easy to locate when shuffling around the rear side of a system.
Five 4-pin fan headers are handled by Nuvoton's excellent NCT6792D+ Super IO chip. The reason we like Nuvoton's chip so much is because, using a Z97 motherboard with onboard voltage reading points, we have tested its voltage readings to be highly accurate when compared to the levels read from a multimeter.
Distribution of the five fan headers is generally good. One of the CPU connectors is found above the right-hand DIMM bank, alongside a system fan header, while the other resides near to the rear IO.
We always recommend placing a fan header to the top-left of the primary expansion slot, allowing it to cater for a rear chassis fan with the minimum length of cable laying about. MSI instead takes this header and places it along the motherboard's bottom-edge. I don't agree with the decision, personally, although some users may find this location more convenient.
Firstly, we are pleased to report that our NZXT Avatar S mouse worked to its usual standard in the MSI X99 UEFI.
MSI equips its X99 motherboards with a UEFI implementation that is, as far as I can tell, identical to its Z97 variant. Evidently some of the platform-specific settings differ between the two interfaces, but the general layout is identical. As such, our analysis is very similar to that provided for MSI's Z97 boards featuring Click BIOS 4.
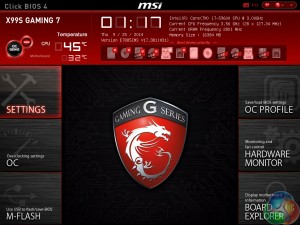
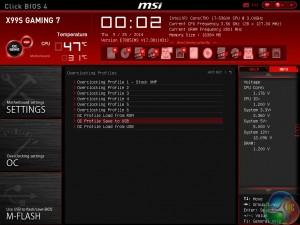
MSI’s UEFI is formed of six key sections, all of which are listed on the frame’s left and right sides. Basic system information is constantly displayed at the top of the screen.
Boot device priority can be quickly adjusted by dragging the relevant drive into its start-up position. The same easy application is true for OC Genie and XMP modes – simply click the relevant buttons in the frame’s top-left corner.
It's quickly noticeable that MSI's interface is heavily reliant upon the function of a mouse, even more so than the systems used by competing vendors. As such, mouse compatibility becomes particularly important. We've found our NZXT Avatar S to be the most troubling mouse with UEFI support, so when it functions correctly in the interface, that is usually a good sign for overall mouse support.
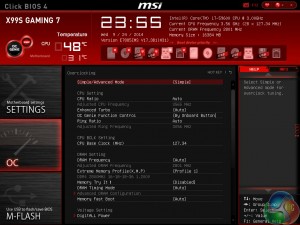
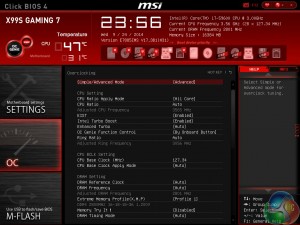
In the Advanced mode, MSI provides plenty of adjustable voltage, frequency, and power settings which give users a good degree of control over their system. The Simple mode features fewer adjustable parameters and is better suited to practising overclockers.
As the X99 implementation of MSI's Click BIOS 4 is largely identical to the version used for Z97, our same feedback still applies – the layout could benefit from a clean-up. A number of readouts are still mixed together with input parameters which makes the interface seem more disordered than it actually is.
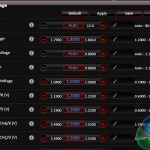
Particularly relevant for the overclocking-geared HEDT platform are the UEFI's power and voltage options. We are happy with the voltage adjustment options that MSI provides – they are going to be sufficient for pushing a chip when using ‘normal' 24/7 cooling.
The same can be said for the board's power options. The only thing we miss is a clear load-line calibration parameter.
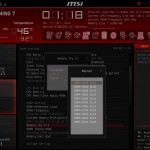
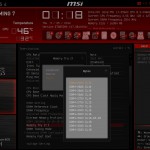
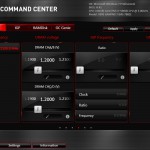
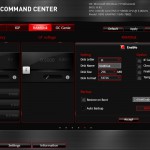
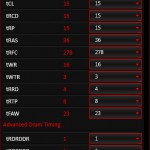
In addition to adjustable system voltage and power parameters are dedicated memory sections. Memory Try It! allows users to apply tweaked overclocking settings to their Hynix- or Micron-based memory kits. Timings can be manually tweaked to a user's preference and the memory kit's XMP support can be displayed.
The XMP information is particularly useful because many modern kits are shipping with multiple profiles. For example, our Corsair Vengeance LPX 2800MHz memory kit features a 2800MHz XMP as well as a barely-documented 3000MHz profile.
Up to six OC profiles can be saved and named. This is a good number to provide as it gives users flexibility when testing out different overclocking configurations. Profiles can also be imported and exported through a USB drive for backup and sharing purposes.
One of the actions that MSI has taken to tidy its UEFI is adding an Info section on the right side. The section is used to display basic information relating to voltages, irrelevant of the parameters that are being tweaked.
Had MSI used this ‘add-on’ section approach throughout its BIOS, displaying information relevant to the parameter that is currently being tweaked, the interface would have a much tidier feel to it. Some frequency readings would be welcomed too.
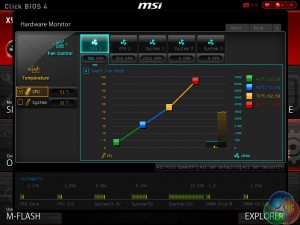
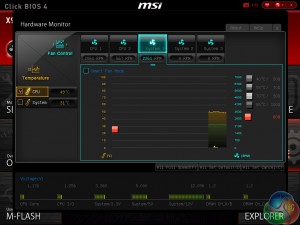
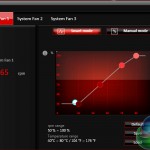
MSI employs a graphical interface that permits for tweaking of fan speeds inside the X99 UEFI.
Four points on a speed against temperature curve can be adjusted to change the fan’s operation. For CPU fans, the minimum point can be set as low as 12.5% speed with a 40°C lower threshold. The same flexibility is provided to system fans, although the minimum speed level is increased to 50%.
For users who prefer a static fan speed level, un-checking the Smart Fan Mode box allows a continuous fan speed percentage to be set.
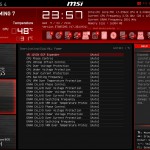
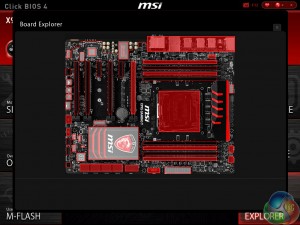
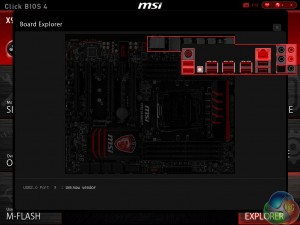
One of the most useful features in MSI’s UEFI is Board Explorer. The tool displays an image of the board which highlights the components that are installed. Hovering over the certain sections displays information regarding the connected components or devices.
The tool has great potential as a troubleshooting measure. For example, a faulty memory stick can be easily identified if its function isn’t highlighted in the board explorer tool.
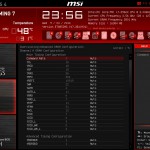
The PCI Subsystem Settings section is going to be particularly useful to users who install multiple graphics cards alongside an M.2 SSD.
MSI’s M-Flash BIOS updating tool continues to refuse to enter folders in a USB flash drive. This is a negative point because users are forced to mess up their flash drive’s organisation by putting the BIOS file in the root folder. Competing motherboard vendors have tools that are able to navigate storage drives and USB memory sticks with ease. MSI is lagging behind in this respect.
Users are free to add some of their commonly accessed parameters to the Favourites profile. The default home page can also be changed.
UEFI Summary:
MSI’s Click BIOS 4 interface has a strong underlying ease-of-use aspect. Novice overclockers are given additional information and assistance as they learn about specific settings, and they can even apply a constricted ‘simple’ mode if they are worried about configuring damaging settings.
The Board Explorer tool and comprehensive, user-friendly fan control system are particular highlights of the interface.
The UEFI still has its issues though, and further updates are required if MSI is to compete more closely with the excellent implementation used by Asus. Some of the layout options still result in a messy appearance. While many of the issues are small, arguably negligible points, they can add up quickly and have the potential to dampen the experience of using MSI’s Click BIOS 4 interface.
As is commonly the case with early BIOSes, MSI still has some work to do in maintaining stability for its implementation. We experienced a number of random system lock-ups when taking screenshots in the UEFI. We are, however, confident that these bugs will be ironed out with future BIOS updates.
The software MSI supplies is the same across its Gaming series motherboards (both Z97 and X99), feature dependent. As such, our analysis is the same and some of the images are taken from our review of MSI's Z97 Gaming 9 AC.
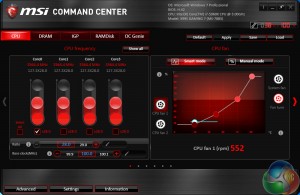
MSI's Command Center opens the CPU page during launch. The current multiplier and base clock levels can be viewed with ease in an eye-catching manner.
We did suffer some ‘flaky' behaviour by Command Center – the software would regularly crash and close after a few seconds of usage. Future updates are highly likely to fix any bugs.
MSI's Command Center software is a comprehensive tool that can be used for a surprisingly diverse range of tasks. General overclocking and frequency-related duties can be handled via the software suite, and a RAM disk can also be created.
Even though the IGP section is left over from the software's Z97 past, there are no settings inside the section.
Additional sections at the bottom of each main page allow users to launch specific subsections. Some of the main subsections include windows for adjusting system voltages and fan speeds, as well as a segment dedicated to configuring one's computer as a media streamer.
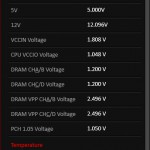
We would strongly recommend using MSI's Command Center software for voltage readings. We have previously certified its recorded levels with a multimeter connected to a board's voltage reading points and found the software tool's accuracy to be excellent. Third party software (such as CPU-Z) can sometimes display incorrect readings on MSI's and other vendors' motherboards.
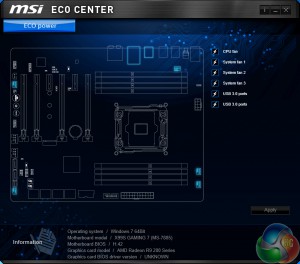
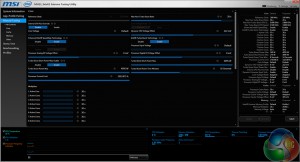
Eco Center allows users to switch off specific components to cut power usage. Intel's Extreme Tuning Utility gives a more in-depth set of voltage and power parameters than MSI's Command Center suite.
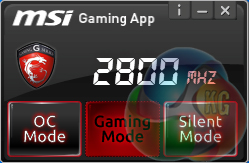
MSI's Gaming App can be used to rapidly switch between speed profiles that are tweaked to specific usage scenarios.
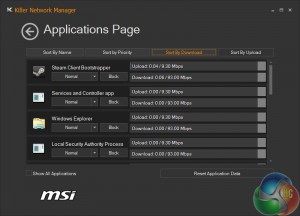
Killer Network manager is one of the key reasons that Killer's NICs are popular choices for gaming motherboards. The software allows users to control their system's network operations so that gaming, or other tasks, can be given priority. This can help to ensure that a sufficient level of network bandwidth is delivered where it is required.
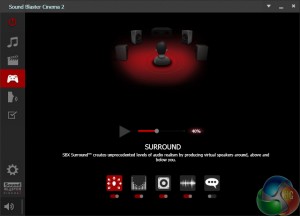
Creative's Sound Blaster Cinema 2 software features a number of audio presets which allow users to quickly optimise their sound system's operation to the relevant task. Settings such as the virtual surround implementation can be adjusted.
One more piece of software that MSI supplies (well, sort of), is an XSplit license. MSI includes a 6-month premium license to the Gamecaster and Broadcaster streaming and recording software with its Gaming series motherboards.
We will be outlining the MSI X99S Gaming 7 motherboard's performance with the Core i7 5960X CPU at its stock frequency (3.56GHz due to forced turbo and the XMP memory's adjusted base clock). Overclocked performance will be outlined later in the review.
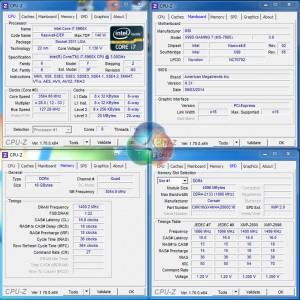
By default, the MSI X99S Gaming 7 motherboard applies multi-core turbo (MCT) and forces the 5960X to a constant 3.56GHz when the BCLK-adjusting XMP mode of our Corsair 2800MHz memory is enabled. This will be displayed as the ‘stock’ setting.
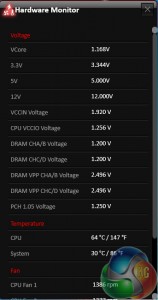
While all CPU cores operate at 3.56GHz with a maximum VCore of 1.168V under load, the CPU drops to 1.53GHz with 0.6-ish volts when idling. We recommend trusting MSI's Command Center readings over those displayed by CPU-Z or HWMonitor. We have tested Command Center‘s accuracy in the past and found it to be very close to readings from a multimeter.
Due to issues running G.Skill's 3000MHz Ripjaws4 memory at its rated XMP setting (as we will outline later in the review), we resorted to using a 16GB Corsair Vengeance LPX 2800MHz memory kit. This memory's 2800MHz XMP uses a base clock of 127.3MHz base clock which skews linked frequencies, such as the CPU and Cache (Ring) speed.
As such, the MSI-based system's 64MHz CPU frequency advantage and 55MHz greater Cache speed may give it an unfair advantage over Asus' X99 Deluxe. Conversely, the 3000MHz memory speed used by Asus' board may result in better benchmark results. We will outline areas where these subtle changes are having effect in our written analysis.
X99 Motherboard Test System:
- Processor: Intel Core i7 5960X ES (3.56GHz forced turbo & XMP).
- Memory: 16GB (4x 4GB) Corsair Vengeance LPX 2800MHz CL16 DDR4 @ 1.20V.
- Graphics Card: Asus R9 280X Matrix Platinum 3GB.
- System Drive: 500GB Samsung 840.
- CPU Cooler: Corsair H100i.
- Case: NZXT Phantom 630.
- Power Supply: Seasonic Platinum 1000W.
- Operating System: Windows 7 Professional with SP1 64-bit.
Compared X99 Motherboards:
- Asus X99 Deluxe (BIOS 0801) – with 16GB (4x4GB) G.Skill Ripjaws4 3000MHz 15-15-15-35 DDR4 @ 1.35V.
Software:
- MSI X99S Gaming 7 BIOS v17.3B1 (latest at the start of testing).
- Catalyst 14.4 VGA drivers.
Tests:
- 3DMark 1.3.708 – Fire Strike (System)
- SiSoft Sandra 2014 SP2 – Processor arithmetic, memory bandwidth (System)
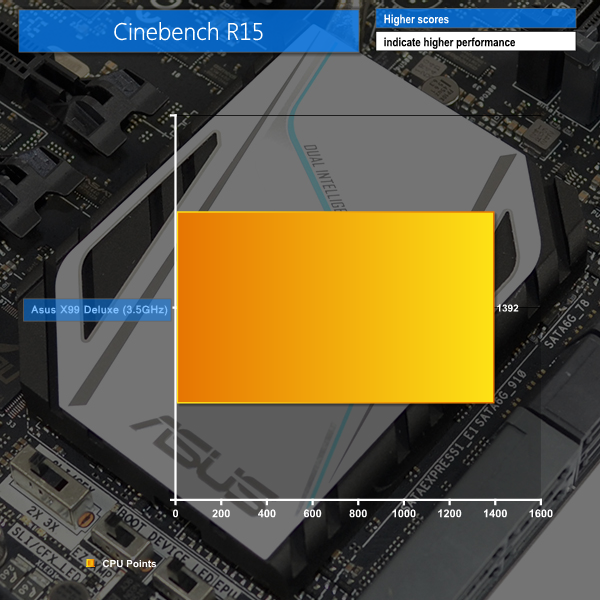
- Cinebench R15 – All-core CPU benchmark (CPU)
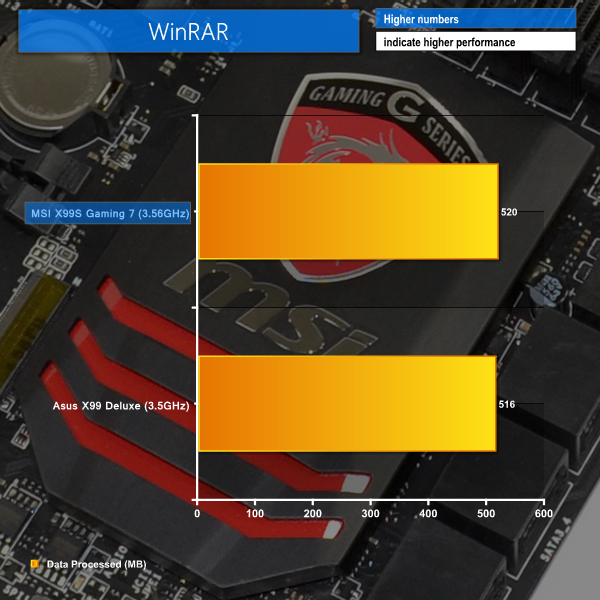
- WinRAR 5.10 – Built-in benchmark (CPU)
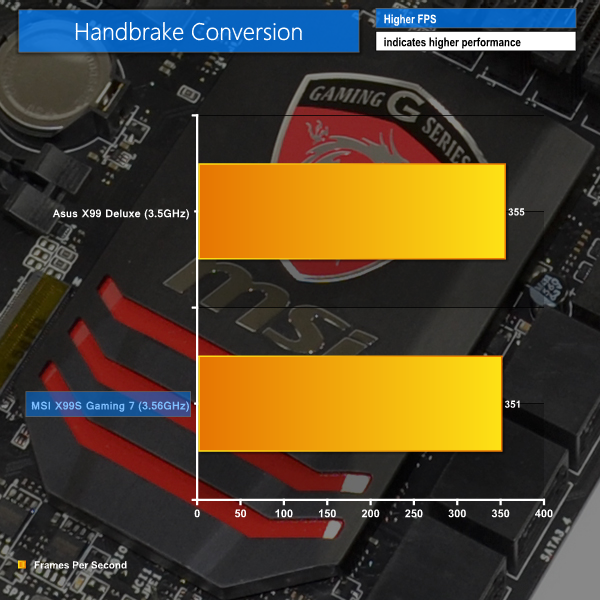
- HandBrake 0.9.9 – Convert 4.36GB 720P MKV to MP4 (CPU)
- ATTO – SATA 6Gbps, USB 3.0, M.2 transfer rates (Motherboard)
- RightMark Audio Analyzer – General audio performance test (Motherboard)
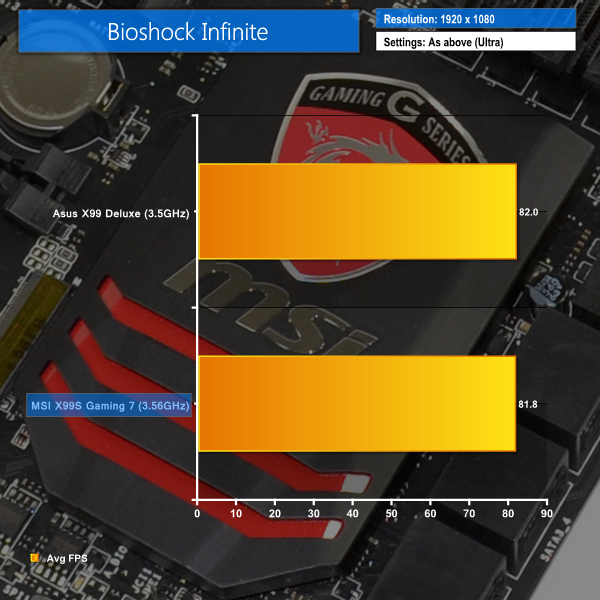
- Bioshock Infinite – 1920 x 1080, ultra quality (Gaming)
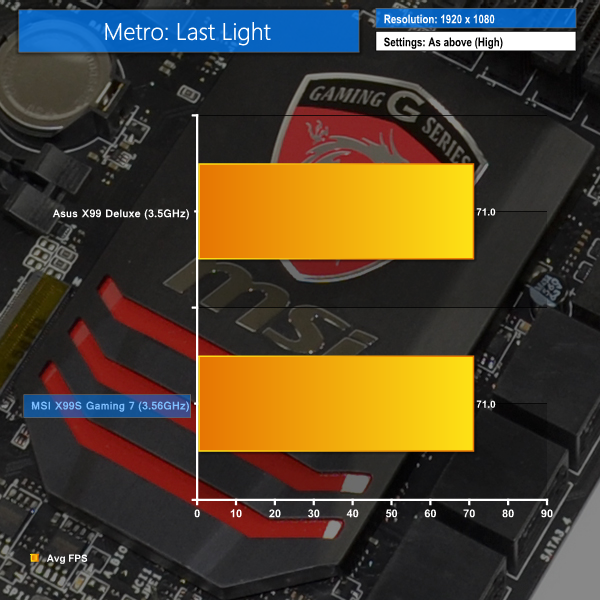
- Metro: Last Light – 1920 x 1080, high quality (Gaming)
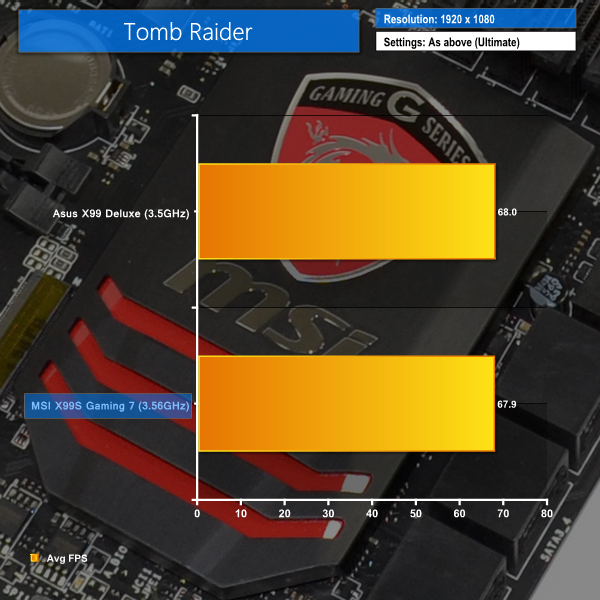
- Tomb Raider – 1920 x 1080, ultimate quality (Gaming)
3DMark
We used 3DMark‘s ‘Fire Strike’ benchmark which is designed to be used on gaming PCs. We opted for the Normal setting, NOT the Extreme mode.
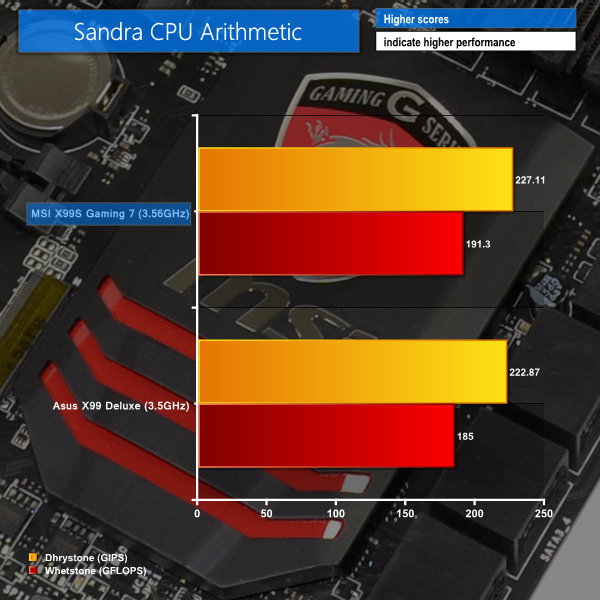
Sandra Processor Arithmetic
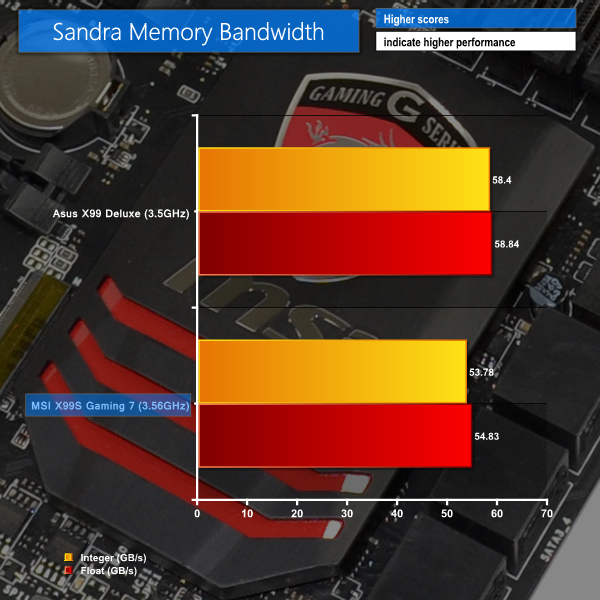
Sandra Memory Bandwidth
MSI's marginally higher CPU frequency gives it performance advantages in 3DMark's physics test and Sandra's CPU arithmetic benchmark. The close results between the Asus and MSI boards show that the CPU speed boost alone is to thank for performance differences.
Unsurprisingly, Sandra's memory bandwidth test shows that MSI's X99S Gaming 7 and its 2800MHz CL16 memory cannot compete with Asus' X99 Deluxe and the 3000MHz CL15 RAM that accompanied it.
Cinebench
We used the ‘CPU’ test built into Cinebench R15 .
WinRAR
WinRAR’s built in benchmark and hardware test can help us outline the performance differentials between each motherboard. We record the amount of data processed after a 30-second run.
Handbrake Conversion
We measured the average frame rate achieved for a task of converting a 4.36GB 720P MKV movie to 720P MP4 format.
Cinebench shows a benefit of 21 points with the MSI board's 60MHz CPU speed increase. WinRAR also shows a slight improvement with the faster CPU frequency used by MSI's board.
Handbrake, on the other hand, prefers Asus' X99 Deluxe and its 3GHz memory over MSI's X99S Gaming 7 and its slightly faster CPU. With that said, the difference between each board is a little over 1%.
Bioshock Infinite
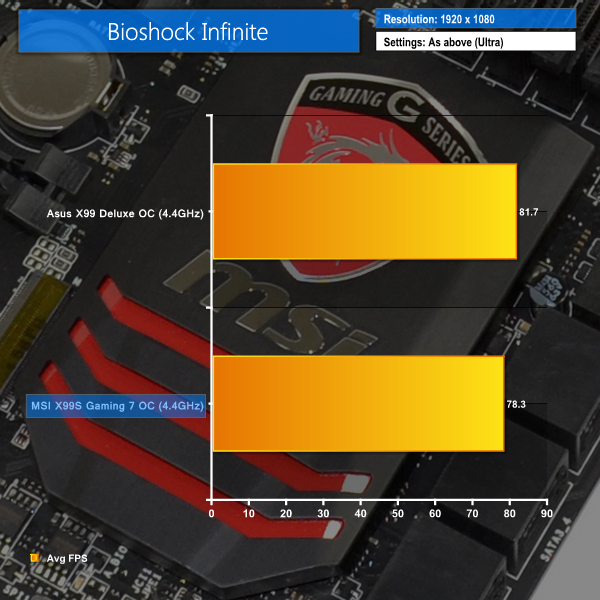
We used the Bioshock Infinite demanding ‘Ultra’ setting and a 1920×1080 resolution to push today’s gaming hardware. Our data was recorded using a section of the game, not the built-in benchmark.
Metro: Last Light
We used a 1920×1080 resolution and the Metro: Last Light built-in benchmark set to ‘High’ quality to offer an intense challenge for the gaming hardware while also making playable frame rates a possibility.
Tomb Raider
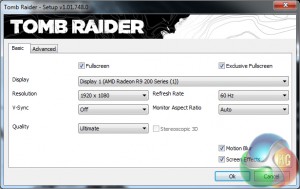
We used a 1920×1080 resolution and the Tomb Raider built-in benchmark set to ‘Ultimate’ quality.
MSI's X99S Gaming 7 offers solid gaming performance. The biggest frame rate difference between itself and the Asus X99 Deluxe is a minor 0.2 of a frame in Bioshock Infinite.
Graphics configurations and processor performance have greater effect on gaming frame rates than motherboards.
M.2 connector
We use Plextor‘s fast M6e 256GB M.2 SSD to test the speed of a motherboard's M.2 connector. We reviewed the 512GB Plextor M6e (and its PCIe x2 adapter card) HERE. Unfortunately we do not have access to a PCIe 3.0-based SSD to fully test the M.2 connector's performance limits.
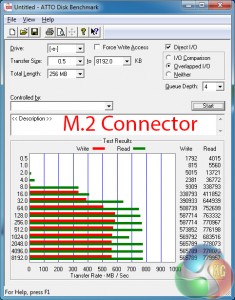
Plextor's M6e M.2 SSD is able to run at its full speed through MSI's Turbo M.2 connector.
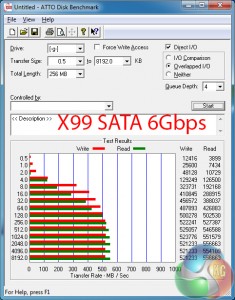
SATA
For SATA 6Gb/s testing we use a Kingston HyperX 3K (SandForce SF-2281) SSD.
SATA 6Gbps ports act as we would expect them to on MSI's X99S Gaming 7. There should be no concerns about the X99-fed ports limiting the speed of a SATA 6Gbps SSD.
USB 3.0
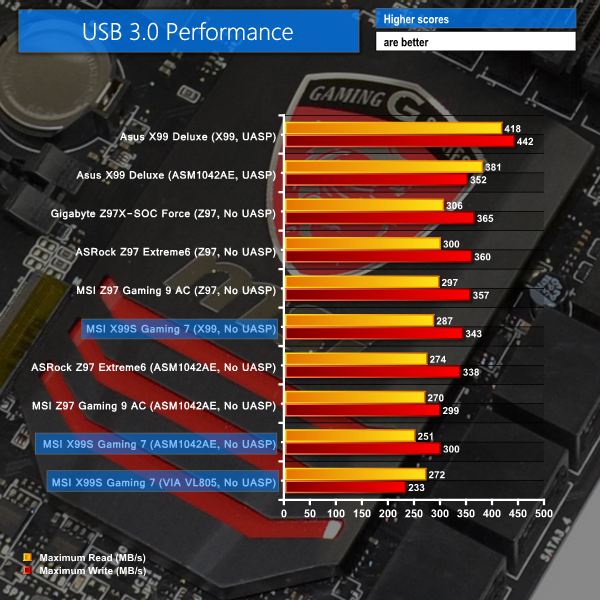
We tested USB 3.0 performance using the Kingston HyperX 3K SSD connected to a SATA 6Gb/s to USB 3.0 adapter powered by an ASMedia ASM1053 controller.
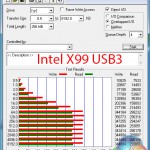
Intel's X99 USB 3.0 ports are the fastest ones equipped on MSI's X99S Gaming 7. Whether you're using them through the front panel of a case or the rear of a motherboard, MSI's X99 ports still aren't as fast as their Z97 counterparts.
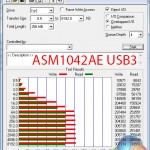
Second place on the X99S Gaming 7 goes to ASMedia's ASM1042AE USB 3.0 ports. Using two lanes of PCIe 2.0 bandwidth, the ASMedia ports show an overall speed improvement over the VIA VL805-based quartet.
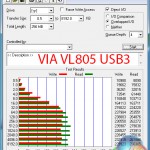
And on the topic of VIA's VL805 host controller, with four USB 3.0 ports being fed by a single 5Gbps PCIe 2.0 lane, the transfer speeds will only decrease as more devices are connected and eating into that bandwidth.
MSI does not offer support for UASP to Windows 7 users. While that clearly hurts its USB 3.0 ports' transfer rates, it is unlikely to cause major concern for users such as gamers who are unlikely to regularly transfer large amounts of data.
Audio
We use RightMark Audio Analyzer (RMAA) to analyse the performance of the motherboard’s onboard audio solution. A sampling mode of 24-bit, 192 kHz was tested.
Based around the Realtek ALC1150 and its 115 dB Signal-to-Noise Ratio (SNR), MSI's Audio Boost 2 system also calls upon Nichicon power-smoothing capacitors and Texas Instruments' OPA1652 amplifier. We know that the TI OPA1652 is perceived as a particularly potent operational amplifier, capable of driving high – up to 600 Ohm – headphones.
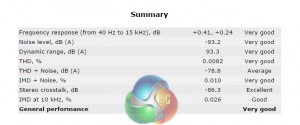
According the RMAA, MSI's X99S Gaming 7 delivers ‘Very Good' audio performance. The stereo crosstalk performance is particularly strong, which could be thanks to MSI's shielding and signal segregation measures.
We tested both with and without the discrete audio power connected and found it to have no difference on our test results. The difference may come from using high-end headphones that demand high impedance levels.
Automatic CPU Overclocking:
With a push (or click in the software method) of the OC Genie button, MSI's X99S Gaming 7 is presented with a 3.7GHz CPU frequency and 2400MHz memory speed. Cache frequency is maintained at the typical stock level of 3.0GHz.
While a 200MHz CPU speed boost is not much to get excited about, the fact that MSI uses a lower-than-XMP core voltage of 1.05V is impressive. Put simply, you get an extra 200MHz CPU speed over XMP and decrease power consumption and heat by using a 100-150mV lower VCore.
It is, however, disappointing to see the memory frequency dropped as low as 2400MHz, especially when our kit features a 3000MHz XMP setting. Decreasing the memory to 2666MHz (for the point of keeping the BCLK at nominal levels) would have been preferable.
I like MSI's decision to dial in specific voltage levels for the CPU VCore and DRAM. While it may not be the most efficient way of ensuring optimum voltage levels between different chips, it does alleviate the potentially-high settings that can materialise from an ‘Auto' voltage configuration.
Setting the DRAM voltage to 1.350V seems needlessly high though. A quick look at OverclockersUK's selection of DDR4 memory kits shows us that 1.20V is deemed appropriate for 2400MHz speeds, while some kits actually run faster with the same voltage level. Applying 1.350V on the memory is wasteful.
Manual CPU Overclocking:
The day before we commenced our overclocking tests, and after our stock-speed testing was complete, MSI provided us with an updated BIOS version. We used the newest version (v17.4B2 / H42) for overclocking testing as it is more representative of the board's long-term performance with a stable BIOS.
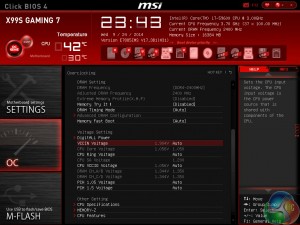
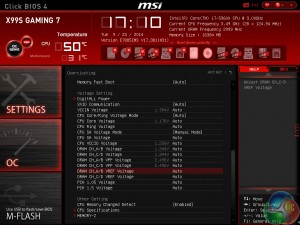
To test the MSI X99S Gaming 7 motherboard’s CPU overclocking potential, we first increased the CPU VCore to 1.30V, Cache voltage to 1.25V, CPU Input Voltage to 2.00V, and System Agent voltage to 1.20V. We also disabled SVID support.
We decreased the DRAM frequency to 2666MHz to take its stability out of the overclocking equation. Cache frequency was maintained at 3.0GHz.
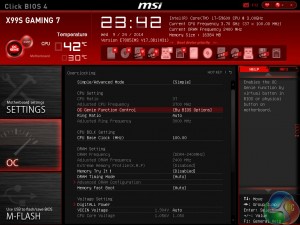
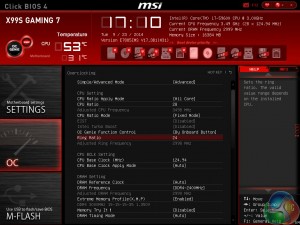
Overclocking in MSI's Click BIOS 4 UEFI is very easy. The interface's layout may be a little untidy, but all of the basic overclocking settings are easy to access and program.
For our overclocking session, we did little more than bump up the relevant ratios, set the memory speed to 2666MHz, and adjust some voltages.
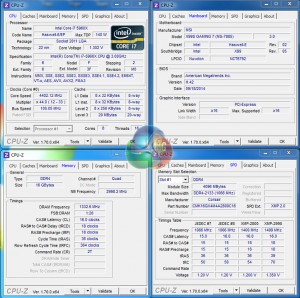
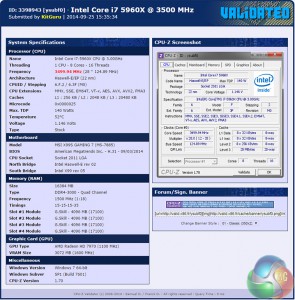
Our chip managed to hit 4.4GHz, which is the same limit that we hit with Asus' OC Socket-powered X99 Deluxe. Anything higher would cause a BSOD within a few seconds of loading the system.
Under load conditions, our BIOS-set VCore level of 1.30V was translated into a real-world voltage of 1.312V. That's a good enough level of accuracy for this calibre of motherboard, as far as we are concerned.
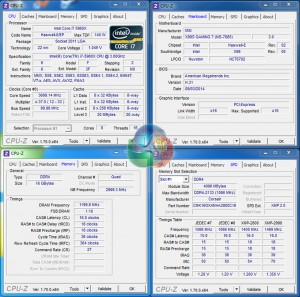
Our CPU-Z validation can be viewed here.
Memory Frequency Performance:
Memory frequency support was a clear issue for MSI's X99S Gaming 7 when we first started testing it before the X99 launch. At that point, the company did not have a stable BIOS that would accept our 3000MHz G.Skill Ripjaws4 memory kit at its XMP setting.
Many BIOS updates later and we still cannot get the 3GHz memory's XMP setting to function automatically, irrelevant of whether we use the Corsair Vengeance or G.Skill Ripjaws4 kit. Applying the XMP setting results in MSI's board attempting a boot and failing, before retrying and failing again. The cycle repeats.
We had a few suspicions as to what was causing the failed boot. One of our suggestions was the CPU and Cache registering the 125MHz BCLK and automatically selecting an inappropriate multiplier by mistake. Another was the BCLK itself, which was 30kHz over the desired 125MHz (yes, this was clutching at straws a little).
As such, we entered the relevant CPU and Cache ratios, before manually applying 3000MHz memory settings that mirrored those of the XMP configuration (apart from a 90kHz decrease to the base clock). Our adjustments worked for the V17.3B1 BIOS and saw the memory running with stability at 3GHz. Unfortunately, the tweaks did not work with the newer BIOS that MSI recently released to us.
So while the MSI X99S Gaming 7 still has its problems accepting a 3000MHz XMP setting, a little simple tweaking is enough to operate 3GHz memory with stability. But this is heavily dependent on the BIOS version. The BIOS that we updated to for a few overclock tests shortly before publishing this article would not accept the memory workarounds.
We would advise keeping an eye on the board's BIOS updates as we are told that MSI is still working hard to resolve the issues. If you plan on using 3GHz+ memory, the X99S Gaming 7 is not the board to buy at this point in time.
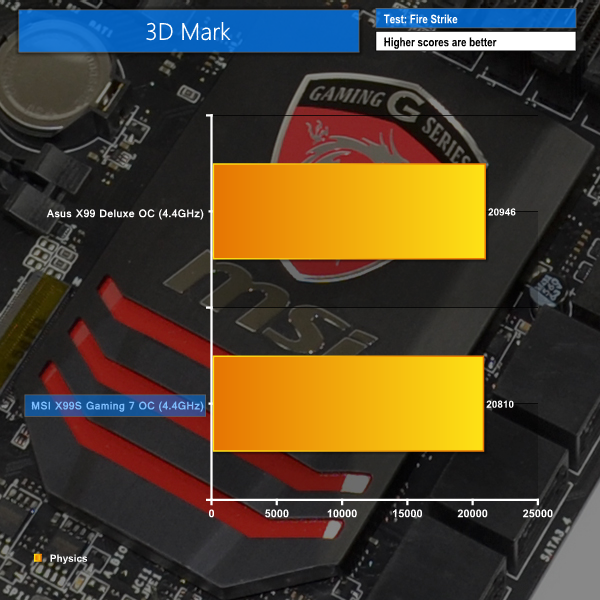
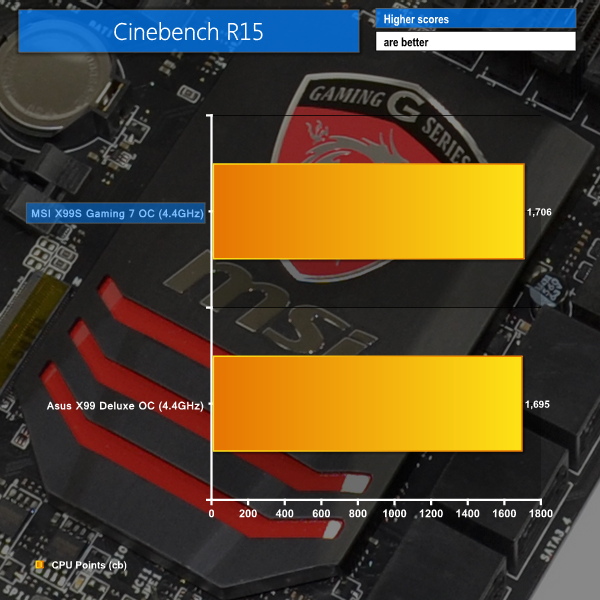
We will outline the performance increases that can be obtained from using the MSI X99S Gaming 7 motherboard to overclock our system. Our overclocked processor frequency was 4.4GHz and memory speed was 2666MHz.
As a performance comparison, we have included the overclocked results from Asus' X99 Deluxe motherboard. The maximum overclocked configuration achieved with the Asus board was a 4.4GHz processor frequency using 2666MHz memory speed.
MSI's X99S Gaming 7 trades blows in Cinebench and 3DMark with the Asus X99 Deluxe when both boards are overclocked to the same frequency.
Bioshock Infinite took a noticeable dip in frame rates when our overclock was applied. We retested this multiple times and the results were consistent. The reason for the 3+ FPS drop is unknown, but it was limited to Bioshock Infinite only; Tomb Raider and Metro: Last Light did not suffer the same performance hits.
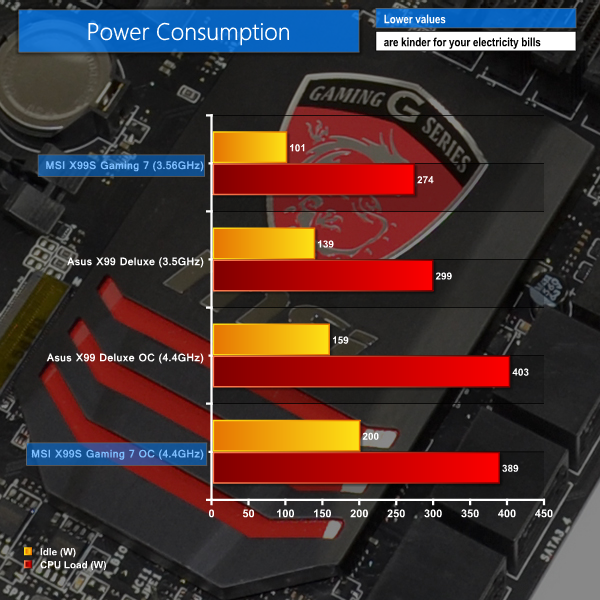
We measured the power consumption with the system resting at the Windows 7 desktop, representing idle values.
The power consumption of our entire test system (at the wall) is measured while loading only the CPU using Prime95′s in-place large FFTs setting. The rest of the system’s components were operating in their idle states, hence the increased power consumption values (in comparison to the idle figures) are largely related to the load on the CPU and motherboard power delivery components.
With its different XMP configuration that uses a lower CPU VCore, MSI's X99S Gaming 7 shows lower power consumption numbers than Asus' board at stock speeds.
When a 1.30V overclock is applied, the Asus motherboard manages to show its efficiency by using 41W less power at idle. MSI's board uses a static voltage that does not decrease when under low load, whereas Asus' board will drop the CPU's voltage at idle. When loaded, Asus' controller-heavy part uses 14W more than the MSI board.
Asking for an outlay of just £200, the MSI X99S Gaming 7 offers an alluring set of features to warrant its reasonable price tag. But it isn't just features that MSI's X99S Gaming 7 is good for – CPU overclocking performance is impressive, the supplied software is smart, and the board's styling is excellent.
Focusing first on overclocking performance, MSI's X99S Gaming 7 had no problem taking our chip to its 4.4GHz limit. We dialled in the relevant multiplier and voltage settings before hitting the chip's frequency limit with ease. What's more is that the X99S Gaming 7 managed to match our processor overclocking result that was achieved by Asus' X99 Deluxe and its OC Socket implementation.
Memory frequency performance, on the other hand, was not as pleasing. While MSI's board could handle 2666MHz and our Corsair kit's 2800MHz profiles without fuss, 3000MHz using built-in XMP configurations would not work. We had to manually tweak settings to reach the 3GHz memory frequency on one of the BIOS versions, which proves that the board is capable, but the BIOS settings have been poorly programmed.
Features are where the X99S Gaming 7 shines. Given its £200 price tag (which is cheap by X99 standards), MSI has done well to include a Killer E2205 NIC, Realtek ALC1150-based audio with a dedicated Texas Instruments amplifier, and a 32Gbps M.2 connection. In addition to the physical hardware are many worthwhile pieces of software, crowned by a 6-month XSplit premium license.
On the topic of software, MSI's Click BIOS 4 interface is simple to use and equipped with plenty of user-adjustable options. HW Monitor 2 is an excellent fan-control tool and the Board Explorer is useful. The layout is a little messy, though, and some of the tools (such as M-Flash) could be more functional. Click BIOS 4 is a good UEFI implementation, but it's not the best on the market.
The styling of MSI's X99S Gaming 7 is excellent. Eye-catching hints of red compliment the bold black theme to create an appearance that is easy to match with partnering components. Board layout is generally smart, except for the SATA Express connector's position that will be blocked by 3-way graphics configurations. We would have also preferred a cooling gap to be left between two-card graphics configurations.
Priced at £199.99 from OverclockersUK, the MSI X99S Gaming 7 motherboard offers very good value for money. There is deceptively stiff competition raging on at the £200 X99 motherboard price point, but the MSI X99S Gaming 7 offers the features, performance, and eye-catching appearance that make it a smart choice for an X99-based gaming system.
Discuss on our Facebook page, over HERE.
Pros:
- Plenty of gaming features – Killer NIC, Audio Boost 2, multi-VGA support, XSplit license.
- Great selection of supplied software.
- Good overclocking capacity.
- Eye-catching appearance and easy to match with other components.
- Easy-to-use UEFI.
- Reasonable price.
Cons:
- Three-card configurations may drop M.2 connector to 10Gbps PCIe 2.0 x2 or cause cooling headaches.
- Very limited function (if any) with 3GHz memory kits.
KitGuru says: A reasonably-priced motherboard that offers enthusiastic gamers a cost-effective route onto the X99 platform.
 KitGuru KitGuru.net – Tech News | Hardware News | Hardware Reviews | IOS | Mobile | Gaming | Graphics Cards












I think the best combination to satisfy all my needs specially getting out the juices of M.2 there is two option.
Option 1 (40 lanes) with Intel Core i7-5930K or Intel Core i7-5960X Extreme Edition:
2 way SLI (E1_3.0x16+E3_3.0x16) + 1 M.2 (3.0×4) and 1 SSD on SATA Express (2.0×2)
or
Option 2 (28 Lanes) with Intel Core i7-5820K:
3 way SLI (E1_3.0x8+E3_3.0x8+E5_3.0x8) + 1 M.2 (3.0×4) and 1 SSD on SATA Express (2.0×2)
^_^ Great review Luke.
Hi there. I saw you review to late.
I have the same issue, can’t make the RAM to run on 3000MHZ with a 5820k.
Have you found any solution? Already contacted manufacturers(Kingston/MSI/Intel)…still no luck, so maybe you can help.
Thanks, and nice review btw.