Automatic CPU Overclocking:
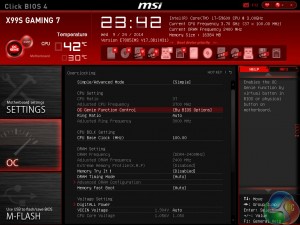
With a push (or click in the software method) of the OC Genie button, MSI's X99S Gaming 7 is presented with a 3.7GHz CPU frequency and 2400MHz memory speed. Cache frequency is maintained at the typical stock level of 3.0GHz.
While a 200MHz CPU speed boost is not much to get excited about, the fact that MSI uses a lower-than-XMP core voltage of 1.05V is impressive. Put simply, you get an extra 200MHz CPU speed over XMP and decrease power consumption and heat by using a 100-150mV lower VCore.
It is, however, disappointing to see the memory frequency dropped as low as 2400MHz, especially when our kit features a 3000MHz XMP setting. Decreasing the memory to 2666MHz (for the point of keeping the BCLK at nominal levels) would have been preferable.
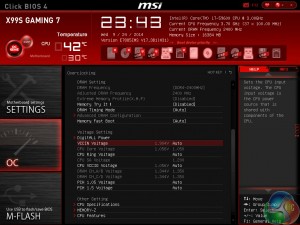
I like MSI's decision to dial in specific voltage levels for the CPU VCore and DRAM. While it may not be the most efficient way of ensuring optimum voltage levels between different chips, it does alleviate the potentially-high settings that can materialise from an ‘Auto' voltage configuration.
Setting the DRAM voltage to 1.350V seems needlessly high though. A quick look at OverclockersUK's selection of DDR4 memory kits shows us that 1.20V is deemed appropriate for 2400MHz speeds, while some kits actually run faster with the same voltage level. Applying 1.350V on the memory is wasteful.
Manual CPU Overclocking:
The day before we commenced our overclocking tests, and after our stock-speed testing was complete, MSI provided us with an updated BIOS version. We used the newest version (v17.4B2 / H42) for overclocking testing as it is more representative of the board's long-term performance with a stable BIOS.
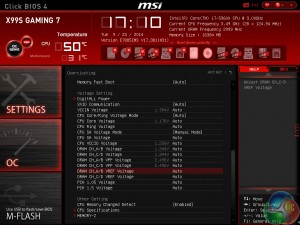
To test the MSI X99S Gaming 7 motherboard’s CPU overclocking potential, we first increased the CPU VCore to 1.30V, Cache voltage to 1.25V, CPU Input Voltage to 2.00V, and System Agent voltage to 1.20V. We also disabled SVID support.
We decreased the DRAM frequency to 2666MHz to take its stability out of the overclocking equation. Cache frequency was maintained at 3.0GHz.
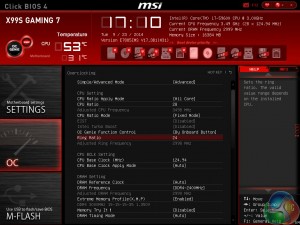
Overclocking in MSI's Click BIOS 4 UEFI is very easy. The interface's layout may be a little untidy, but all of the basic overclocking settings are easy to access and program.
For our overclocking session, we did little more than bump up the relevant ratios, set the memory speed to 2666MHz, and adjust some voltages.
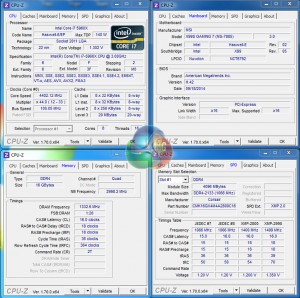
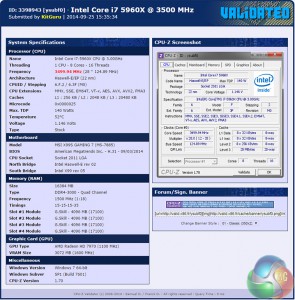
Our chip managed to hit 4.4GHz, which is the same limit that we hit with Asus' OC Socket-powered X99 Deluxe. Anything higher would cause a BSOD within a few seconds of loading the system.
Under load conditions, our BIOS-set VCore level of 1.30V was translated into a real-world voltage of 1.312V. That's a good enough level of accuracy for this calibre of motherboard, as far as we are concerned.
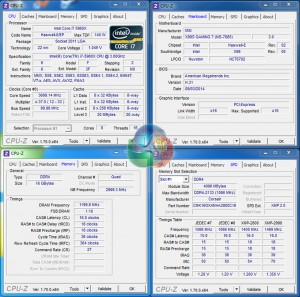
Our CPU-Z validation can be viewed here.
Memory Frequency Performance:
Memory frequency support was a clear issue for MSI's X99S Gaming 7 when we first started testing it before the X99 launch. At that point, the company did not have a stable BIOS that would accept our 3000MHz G.Skill Ripjaws4 memory kit at its XMP setting.
Many BIOS updates later and we still cannot get the 3GHz memory's XMP setting to function automatically, irrelevant of whether we use the Corsair Vengeance or G.Skill Ripjaws4 kit. Applying the XMP setting results in MSI's board attempting a boot and failing, before retrying and failing again. The cycle repeats.
We had a few suspicions as to what was causing the failed boot. One of our suggestions was the CPU and Cache registering the 125MHz BCLK and automatically selecting an inappropriate multiplier by mistake. Another was the BCLK itself, which was 30kHz over the desired 125MHz (yes, this was clutching at straws a little).
As such, we entered the relevant CPU and Cache ratios, before manually applying 3000MHz memory settings that mirrored those of the XMP configuration (apart from a 90kHz decrease to the base clock). Our adjustments worked for the V17.3B1 BIOS and saw the memory running with stability at 3GHz. Unfortunately, the tweaks did not work with the newer BIOS that MSI recently released to us.
So while the MSI X99S Gaming 7 still has its problems accepting a 3000MHz XMP setting, a little simple tweaking is enough to operate 3GHz memory with stability. But this is heavily dependent on the BIOS version. The BIOS that we updated to for a few overclock tests shortly before publishing this article would not accept the memory workarounds.
We would advise keeping an eye on the board's BIOS updates as we are told that MSI is still working hard to resolve the issues. If you plan on using 3GHz+ memory, the X99S Gaming 7 is not the board to buy at this point in time.
 KitGuru KitGuru.net – Tech News | Hardware News | Hardware Reviews | IOS | Mobile | Gaming | Graphics Cards


I think the best combination to satisfy all my needs specially getting out the juices of M.2 there is two option.
Option 1 (40 lanes) with Intel Core i7-5930K or Intel Core i7-5960X Extreme Edition:
2 way SLI (E1_3.0x16+E3_3.0x16) + 1 M.2 (3.0×4) and 1 SSD on SATA Express (2.0×2)
or
Option 2 (28 Lanes) with Intel Core i7-5820K:
3 way SLI (E1_3.0x8+E3_3.0x8+E5_3.0x8) + 1 M.2 (3.0×4) and 1 SSD on SATA Express (2.0×2)
^_^ Great review Luke.
Hi there. I saw you review to late.
I have the same issue, can’t make the RAM to run on 3000MHZ with a 5820k.
Have you found any solution? Already contacted manufacturers(Kingston/MSI/Intel)…still no luck, so maybe you can help.
Thanks, and nice review btw.