

Automatic CPU Overclocking:

The highest – 4.6GHz – CPU Upgrade profile functioned without hesitation using our retail 6700K processor. According to AIDA64, Gigabyte selects a voltage level of around 1.3V, which is fairly easy to control with modest cooling hardware.
The profile allows XMP to be manually selected and does not change any system parameters other than those linked to CPU speed and voltage.
Manual CPU Overclocking:
To test the Gigabyte Z170XP-SLI motherboard’s CPU overclocking potential, we first increased the CPU VCore to 1.40V, and checked that the PCH voltage was running at 1.10V. We also enabled ‘High' load-line calibration (LLC) in order to supply as close to our selected voltage level as possible. The cache ratio was set to 45x.
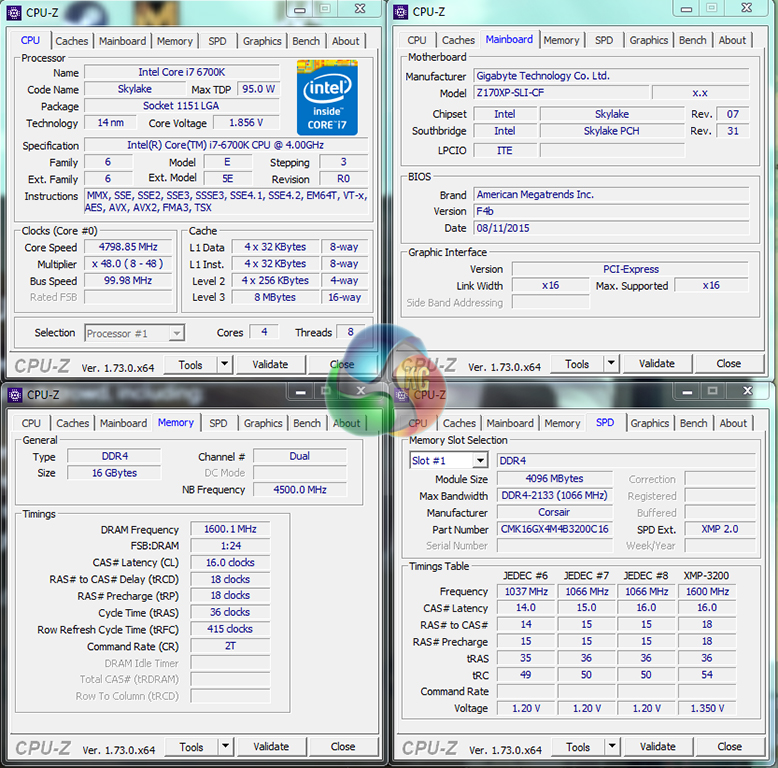
Manually overclocking the system was straightforward thanks to Gigabyte's easy-to-navigate UEFI. We hit 4.8GHz on the CPU without issue. Finding the cache ratio setting was a little trickier than usual, although the other CPU-related parameters were easy to locate.
The Low LLC setting resulted in a significant voltage drop, so we instead applied the High configuration. Dialling in 1.40V in the UEFI and applying the High LLC mode resulted in a VCore reading of 1.38V under CPU load. A 20mV drop is far from unnoticeable and should be considered when analysing voltage stability of a chip.

I fail to see how this board is slower than the other 2 as the frame testing is within margin of error.
When one activates the XMP profile it automatically activates a memory stability option that should be set to normal to regain those 10Gbps extra. I don’t remember exactly how that option is called but just search for a memory related option that says “compatibility” or “stability” and switch it to “normal” instead.