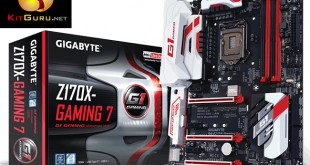
It is almost undeniable that performance is the primary currency when purchasing components for a pixel-pushing gaming machine. But in the same way that enthusiasts may appreciate a fast car for its sleek lines and eye-catching paint job, appearance is another of the important parameters to gamers building a system they are proud to sit next to.
Gigabyte equips the Z170X-Gaming 7 with the spectrum of features that one would expect from a higher-end Z170 offering. There is support for 2-card SLI and 3-card CrossFire, plenty of USB 3.0 and SATA connections, a pair of USB 3.1 ports provided by Intel's 32Gbps DSL6540 chipset, and an enhanced audio solution. Tweakers will be happy to see a number of overclocking-geared components such as the onboard buttons and healthy power delivery system.
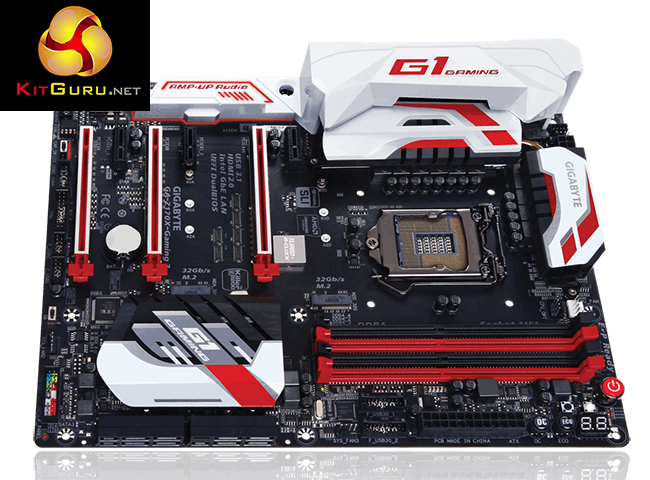
But it's the red, white, and black colour scheme coupled with an eye-catching design that may be the most appealing characteristic to gamers looking to pimp out their high performance rig. Is the performance sufficient to back-up the board's eye-catching looks?
Features:
- Dual Channel DDR4, 4 DIMMs.
- Intel® USB 3.1 with USB Type-C™ – The World's Next Universal Connector.
- 3-Way Graphics Support with Exclusive Ultra Durable Metal Shielding over the PCIe Slots.
- Dual PCIe Gen3 x4 M.2 Connectors with up to 32Gb/s Data Transfer (PCIe NVMe & SATA SSD support).
- 3 SATA Express Connectors for up to 16Gb/s Data Transfer.
- Integrated HDMI 2.0 support.
- Creative SoundCore™ 3D Gaming Audio.
- Killer™ E2400 and Intel® Gaming Networks.
- LED Trace Path with Multi-Color Choice.
- APP Center Including EasyTune™ and Cloud Station™ Utilities.
- GIGABYTE UEFI DualBIOS™ Technology.
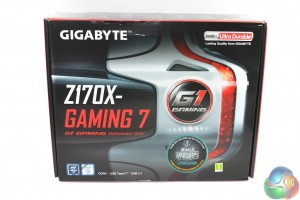
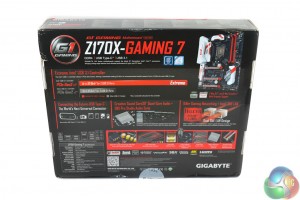
Gigabyte ships the Z170X-Gaming 7 in a box that highlights the board's core features and general specifications.
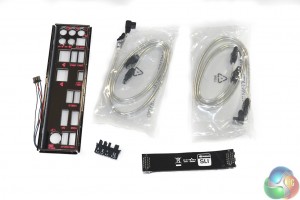
The decent bundle consists of four clear-coloured SATA cables, a black SLI ribbon, Gigabyte's chassis connector header, and an IO shield with active multi-colour lighting. I am happy to see Gigabyte supplying a plastic shroud that helps users connect the front panel chassis cables to their motherboard with relative ease.
The standard affair of documentation is supplied, in addition to a chassis sticker and a World of Warships poster (on relevant versions of this board).
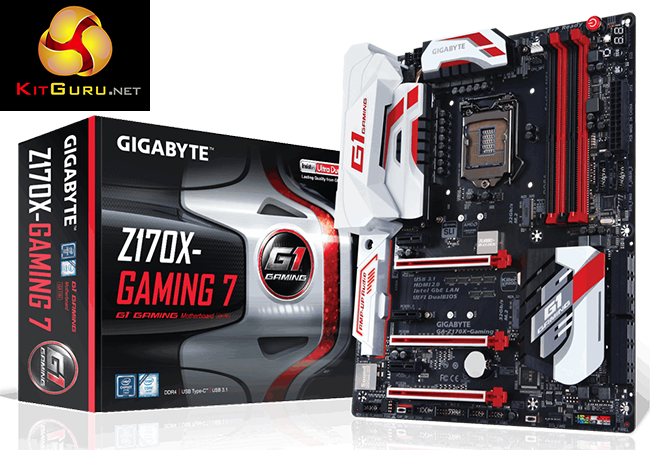
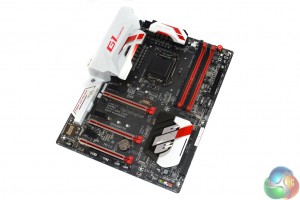
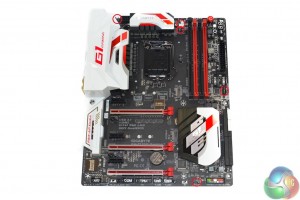
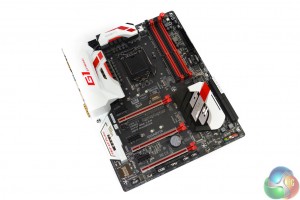
The first noticeable point for the Gigabyte Z170X-Gaming 7 motherboard is its red, white, and black colour scheme. Gigabyte has deployed a balance of colours that, in my opinion, works well to create a good-looking motherboard.
The bright white rear IO shroud and heatsinks act as eye-catching points of contrast against the dark black PCB. And red accents add a unique touch to the colour scheme.
Gigabyte outfits the board with a number of features that will be appreciated by overclocking users. There are onboard power, reset, clear CMOS, Eco mode, and OC buttons, all of which are useful when trying to find a stable overclock or quickly adjust the system's operation.
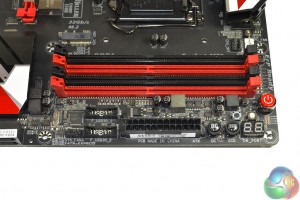
Close to those buttons is a 2-digit debug LED while voltage reading traces are found above the DIMM slots.
A pair of internal USB 3.0 headers is able to output up to four USB 3.0 ports thanks to a Renesas uDP720210 hub controller.
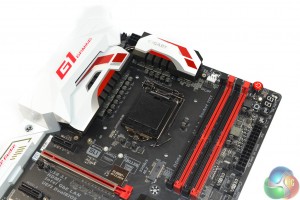
Up to 64GB of dual-channel DDR4 memory can be installed in the four single-latch DIMM slots. Gigabyte quotes supported frequencies of up to 3866MHz, although the actual speed capability depends on a number of other factors such as the CPU's IMC strength and the BIOS stability.
Spacing around the LGA 1151 CPU socket is sufficient for many large air coolers. Thanks to the relatively short stature of the VRM heatsinks, we had no interference issues or installation troubles when using the sizeable Noctua NH-D14 CPU cooler. A single 8-pin power connector drives the CPU and a Turbo B-Clock IC allows for significant changes to the CPU BCLK.
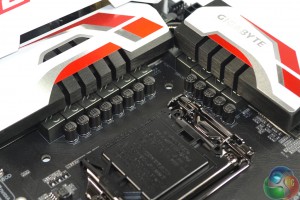
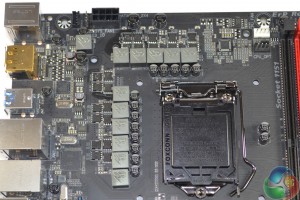
A total of twelve power delivery phases are responsible for feeding the LGA 1151 CPU and its associated iGPU, as well as general system voltages. Eleven of the MOSFET phases are cooled by a pair of solid metal heatsinks that are connected via a heatpipe.
Gigabyte doesn't shout particularly loudly about the power delivery components in the board's marketing materials, implying that the deployed hardware is there to simply serve a typical system load rather than push for extreme overclocks.
There's a hybrid digital Intersil ISL95856 PWM controller for overall management of the power delivery system. That 4+3 phase-capable controller is aided by a quartet of Intersil's ISL6625A phase doublers which implies that the CPU receives a total of eight power delivery phases with the remaining four being split off for other components.
The high- and low-side MOSFETs are marked RA12 WB W45K and RA18 CF T46K and seem to be manufactured by Vishay, although I can only find relatively little information about these components.
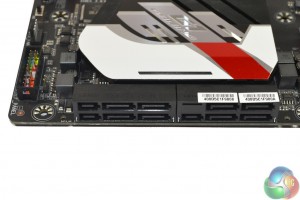
A total of eight SATA 6Gbps ports are provided, six of which can be utilised to double-up as a trio of 16Gbps SATA-Express connectors. All six of the SATA ports that can be used for SATA-Express duties are routed from the Z170 chipset.
The remaining two SATA 6Gbps ports are provided by an ASMedia ASM1061 host controller and are significantly slower than the Z170 alternatives. They should be reserved for use when other ports are unavailable.
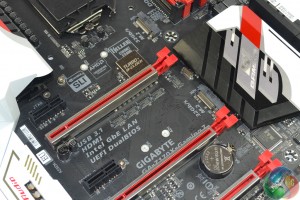
Plentiful bandwidth from the Z170 chipset allows Gigabyte to provide a pair of PCIe 3.0 x4 32Gbps M.2 connectors. Both can be used simultaneously, they support RAID over PCIe, and SATA M.2 SSDs can be installed. One downside is that the lower connector becomes unusable if an expansion card is positioned in the lowermost full-length PCIe slot.
Up to 2-card SLI (due to its requirement for PCIe x8 lanes) or 3-card CrossFire is supported by Gigabyte's Z170X-Gaming 7 motherboard. Gigabyte looks to have routed the lowermost full-length slot's lanes from the Z170 chipset (and shared them with the lower M.2 connector).
This translates into a PCIe lane distribution of x16/x0/x0 for a single card, x8/x8/x0 for two cards, and x8/x8/chipset x4 for three cards. I like this layout decision because it also allows users to install a pair of SLI graphics alongside a PCIe x4 expansion device (a RAID card or Intel SSD 750, for example) thanks to an x8/x8/chipset x4 PCIe configuration being possible.
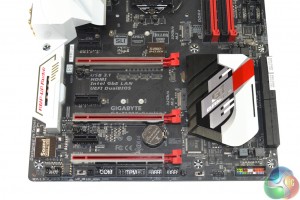
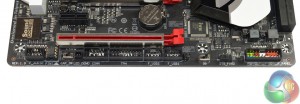
The three full-length PCIe slots feature steel shielding to improve their rigidity and (potentially) help reduce EMI. Without getting too technical, a steel covering helps to withstand shear loads that are applied by a graphics card and therefore reduce the likelihood of the PCIe slot being physically damaged. Slot spacing is also smart with users of two dual-slot cards being given a cooling gap.
A trio of PCIe 3.0 x1 connectors completes the expansion slot allocation.
The standard affair of ports is found along the board's bottom edge. In addition to front panel audio and chassis headers, as well as USB 2.0 outputs, Gigabyte includes TPM and COM headers.
Close to a fan header is the dual BIOS switch that allows users to change to the secondary BIOS if the primary version crashes – an excellent redundancy feature.
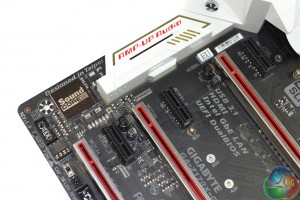
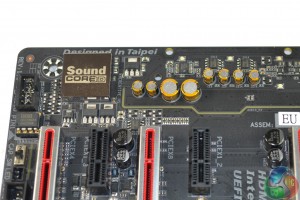
Gigabyte takes a different approach to that of competing motherboard vendors with its Amp-Up audio solution. The system is driven by a quad-core Creative Sound Core3D processor rather than Realtek's popular ALC 1150 codec. Used in tandem with Creative's SoundBlaster software, Gigabyte says that the dedicated audio processor removes a workload from the system's CPU.
Backing up the undeniably powerful audio processor are a removable Burr Brown OPA2134PA op-amp and a DRV632 pop-free stereo line driver, both manufactured by Texas Instruments. A pair of AS358M operational-amplifiers are also found in addition to two 220 microfarad (6.3V) Nichicon capacitors and a further six 50 microfarad (50V) units from the same company's Fine Gold series. Gigabyte says that all of these capacitors are from Nichicon's MUSE MW series.
Rounding off what is a particularly high-end onboard audio solution is a two-point audio gain switch for the removable op-amp. Gigabyte gives users control over the audio signal's track colouring and that of the LEDs positioned beneath the ‘AMP-UP Audio‘ text.
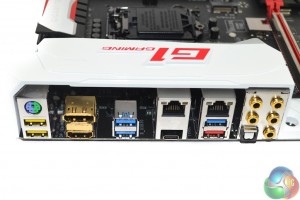
Star of the rear IO show are the two 10Gbps USB 3.1 connections (one of which is in Type-C form and one red port in Type-A form) that are provided via Intel's DSL6540 (formerly Alpine Ridge) controller. The 32Gbps PCIe 3.0 x4 controller is capable of powering a pair of 10Gbps USB 3.1 connections simultaneously – ASMedia's ASM1142 competitor used on most other vendors' boards is limited to 8Gbps of usable bandwidth.
Put simply, the DSL6540 controller provides USB 3.1 without bottlenecks meaning that Gigabyte is making use of the best solution on the market. A Texas Instruments TPS65982 controller is utilised for implementing the USB Type-C logic connector and for providing a capability for up to 3A of current using USB's Power Delivery specification.
Dual Gigabit NICs are provided, one of which uses a Killer E2400 chipset with the other relying upon Intel's I219-V controller. Especially when teaming is not supported, I don't really see the point of dual NICs on a gaming motherboard – it seems like Gigabyte couldn't decide between the Intel NIC and its lower CPU overhead or the Killer solution and its bundled network management software, so the decision makers just deployed both thus ramping up costs.
All three of the rear 5Gbps USB 3.0 ports derive from the Z170 chipset. Gigabyte advertises the yellow USB 2.0 connectors as USB DAC-UP ports, implying that they receive a cleaner power signal that helps to provide better performance to a USB DAC. The PS/2 connector is good to see for troubleshooting purposes. Gold-plated audio connectors help to reduce signal interference and aid port longevity.
The same can be said for the DisplayPort 1.2 and HDMI 2.0 (with HDCP 2.2) connectors, both of which support 4K 60Hz outputs from the integrated GPU. A MegaChips MCDP2800 LSPCON is responsible for video management duties relating to the conversion of a DisplayPort 1.2 connection to the HDMI 2.0 physical output.
While all of this added expense to deploy HDMI 2.0 on a gaming motherboard likely to be used with a discrete GPU may seem odd, there are some plausible use cases. For example, that HDMI 2.0 port and its HDCP 2.2 capability could be a big deal for gamers using a dedicated GPU without HDMI 2.0 capacity (I'm looking at you, R9 Fury series) who also want to connect their system to a 4K TV for media consumption.
Gigabyte spreads five 4-pin fan headers evenly around the board. Two connectors are allocated CPU control duties and a further two are still accessible from the CPU socket area. The final header found along the board's bottom edge is good for catering to a side or front panel fan.
ITE's IT8628E Super IO chipset is responsible for system monitoring and fan control duties.
UEFI
Firstly, we are pleased to report that our generic wireless mouse worked to its usual standard in the Gigabyte Z170 UEFI. We’ve found the wireless mouse to be troubling with UEFI support in the past, so when it functions correctly in the interface, that is usually a good sign for overall mouse support.
Those who have seen or used Gigabyte's 8- and 9-series motherboards will remember the company's high-resolution interface. This seems to have been abandoned, at least for this Z170 motherboard, and we don't really see that as a bad thing. The high-resolution interface was riddled with flaws and was inconvenient to navigate, so users are likely to be better served by the old style of UEFI layout that is equipped for the Z170 parts.
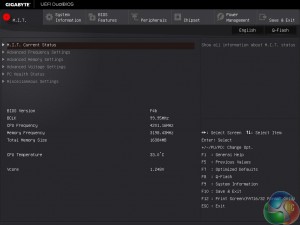
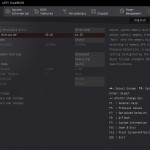
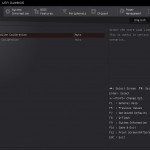
Entry point for Gigabyte's Z170 UEFI is the M.I.T page. This is the point where the main system operating functions, such as voltages, clock speeds, and fan controls, can be accessed.
The main system clock speeds are given their own page. Access to the more advanced CPU settings, such as the cache frequency, is given through a separate section.
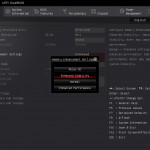
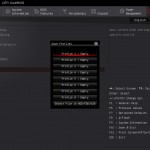
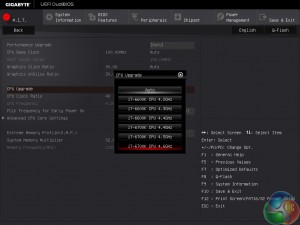
Gigabyte includes a number of Performance and CPU Upgrade pre-set profiles. The CPU Upgrade profiles worked well with our Core i7-6700K chip and used sensible voltage settings.
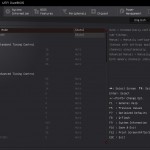
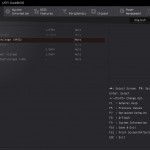
A memory ratio of up to 41.33x is supported in the Gigabyte UEFI. A multiplier this high may be useful for future memory kits or for tweaking the BCLK below 100MHz in order to stabilise a system overclock. A number of Memory Enhancement settings can be selected.
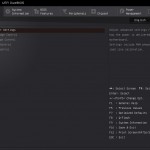
A select few power and voltage settings are provided throughout the UEFI. I was not impressed by Gigabyte's chosen input method for some of the selections. CPU VCore Loadline Calibration, for example, was given only two selections which were toggled using the – and + keys, rather than a drop-down list.
The PC Health Status page monitors system operating parameters, such as voltages, temperatures, and fan speeds. Gigabyte features two pre-defined fan speed profiles, while the third is for manual control and the fourth sets full speed.
The manual fan control method is terrible. An arbitrary number (to most people) which plots a section of the fan's PWM speed against a temperature reading is simply incomprehensible for most users. There should be a simpler method that uses clear fan speed percentages and temperatures for the listed values.
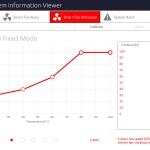
And if Gigabyte wants to make the setting of a fan speed curve possible (as the current list and units would suggest), an interactive graph should be used. Thankfully, the fan control method through Gigabyte's OS-based software is far better.
Up to eight configuration profiles can be saved while many more can be transferred to and from a storage device.
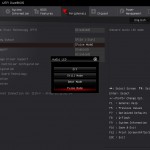
One of the convenient features of the Peripherals page is the ability to control the audio strip LED. This can be set to operate in different modes.
Gigabyte's UEFI is generally easy to navigate and is equipped with enough features for novice users, but it lacks the features and interactivity that we have seen from competing vendors' latest UEFI iterations. The segregation of voltage settings makes overclocking a simpler task for less experienced users as they are not inundated with a host of settings on a single cramped page.
The fan speed control settings, however, are dire and fail to make much sense. Gigabyte needs to use a list of fan speed settings that is more understandable for a wider user base, or simply utilise a graphical tuning option. Thankfully the OS-based software makes up for this shortcoming.
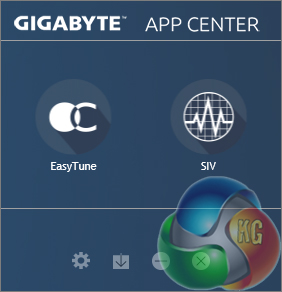
Gigabyte's App Center tool is the launch point for most of the utilities that one can download. Gigabyte allows users to choose which utilities they would like to install, rather than bundle some potentially unwanted tools inside a larger software suite.
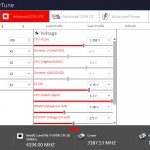
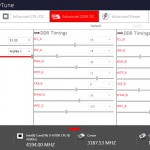
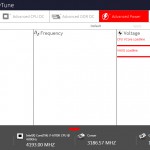
Parameters relating to the system and hardware operation are found in the EasyTune software. This is the location that can be used to alter certain settings via Gigabyte's OS-based software tool.
Gigabyte includes a variety of system operating modes that may suit those interested in efficiency, overclocked performance, or simply default speeds.
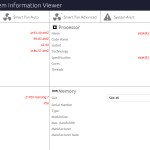
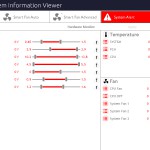
The System Information Viewer tool can be used to find much of the system's general information.
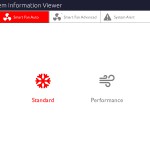
Gigabyte includes a number of fan speed pre-sets as well as a user-friendly graphical interface for plotting fan speed. These two points make up for the terrible fan control method deployed in the UEFI.
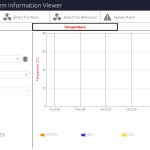
Users can set alerts to ensure that operating points such as certain temperature levels are not exceeded. This could be convenient to users who are trying to achieve a balance between system noise output and component temperatures by altering fan speeds.
There is also a recording page which is useful for tracking the system's operation over time.
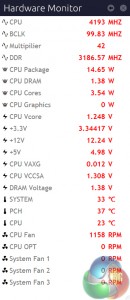
A breakout panel called Hardware Monitor contains much of the system's key information and displays it in a convenient form factor that requires very little on-screen real estate.
Intel's Skylake processors are just the latest Intel CPU architecture to see many of the critical system operations handled by the processor. As such, benchmarking a motherboard becomes more of a test to certify that the part operates correctly and meets the anticipated performance levels.
When XMP is enabled, many of the competing vendors’ motherboards automatically apply a CPU operating state that sees all cores running at their maximum turbo frequency (typically termed as Multi-Core Turbo, or MCT). Gigabyte, however, does not feature this setting on its Z170X-Gaming 7 motherboard.
We manually overclocked the CPU to its maximum turbo state of 4.2GHz and set the cache frequency to 4.1GHz. This allows us to keep the performance results and testing configuration consistent with data from ASRock’s, Asus’, and MSI's motherboards.
The CPU voltage, as read by a multimeter, sat around the 0.80-0.85V level whilst the system idled and 1.28V during Prime95 load.
Z170 Motherboard Test System:
- Processor: Intel Core i7-6700K (4.2GHz forced turbo).
- Memory: 16GB (4x4GB) Corsair Vengeance LPX 3200MHz 16-18-18-36 DDR4 @ 1.35V.
- Graphics Card: Nvidia GTX 980 Ti.
- System Drive: 250GB Crucial BX100 SSD.
- CPU Cooler: Corsair H100i.
- Case: NZXT Phantom 630.
- Power Supply: Seasonic Platinum 1000W.
- Operating System: Windows 7 Professional with SP1 64-bit.
Compared Z170 Motherboards:
- ASRock Fatal1ty Z170 Gaming K6+.
- Asus Maximus VIII Hero.
- Gigabyte Z170XP-SLI.
- MSI Z170A XPower Gaming Titanium Edition.
Software:
- Gigabyte Z170X-Gaming 7 BIOS F5e.
- GeForce 353.30 VGA drivers.
- Intel 11.0 ME drivers.
Tests:
- SiSoft Sandra 2015 SP2b (v2142) – Processor arithmetic and memory bandwidth (System)
- 3DMark 1.5.915 – Fire Strike Ultra (System)
- Cinebench R15 – All-core CPU benchmark (CPU)
- 7-Zip 15.05 beta – Manual video archival (CPU)
- HandBrake 0.10.2 – Convert 1.23GB 1080P game recording using the High Profile setting and MP4 container (CPU)
- Grand Theft Auto V – 1920 x 1080, near-maximum quality (Gaming)
- Middle Earth: Shadow of Mordor – 1920 x 1080, ultra quality (Gaming)
- Metro: Last Light – 1920 x 1080, very high quality (Gaming)
- Tomb Raider – 1920 x 1080, maximum quality, TressFX disabled (Gaming)
- ATTO – SATA 6Gbps, USB 3.0, M.2 transfer rates (Motherboard)
- RightMark Audio Analyzer – General audio performance test (Motherboard)
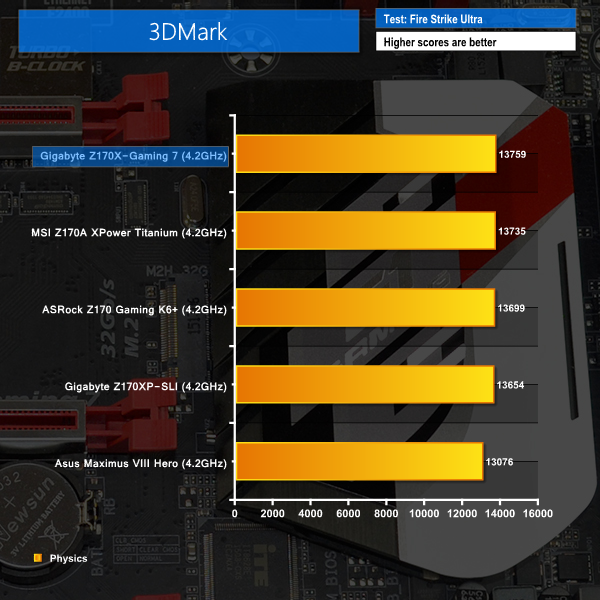
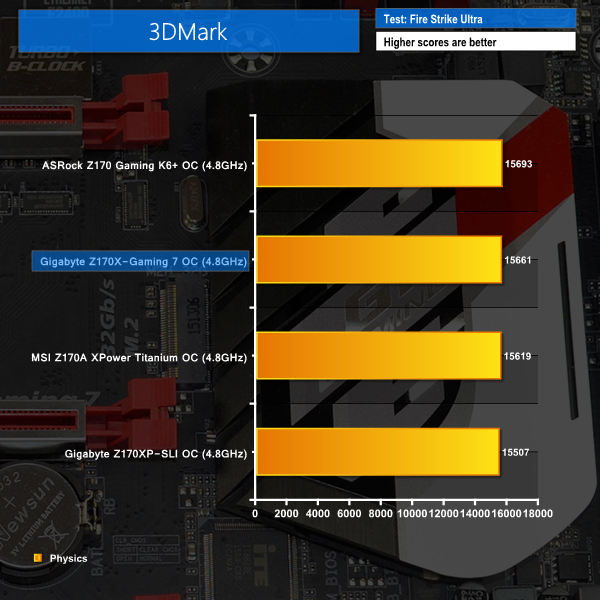
3DMark
We used 3DMark‘s ‘Fire Strike Ultra’ benchmark which is designed to be used on high-resolution gaming PCs.
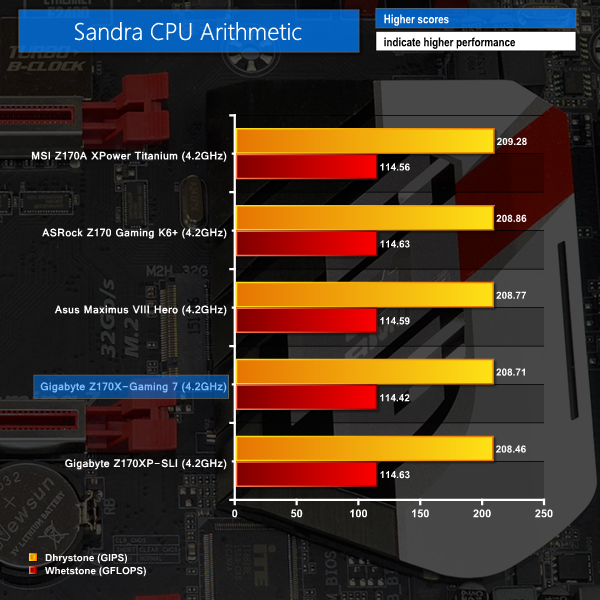
Sandra Processor Arithmetic
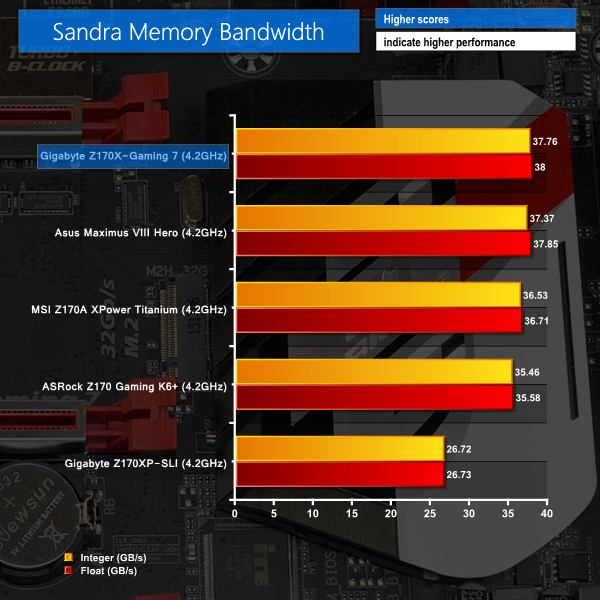
Sandra Memory Bandwidth
Gigabyte's Z170X-Gaming 7 motherboard shows good performance in our initial batch of synthetic tests. Chart-topping results are shown in 3DMark and Sandra's memory bandwidth test, the latter of which is typically a strength for Asus motherboards such as the one Gigabyte's part outperforms.
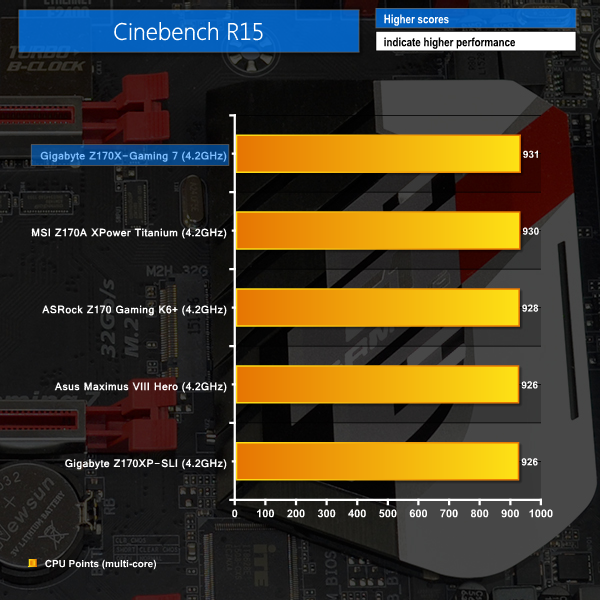
Cinebench
We used the ‘CPU’ test built into Cinebench R15 .
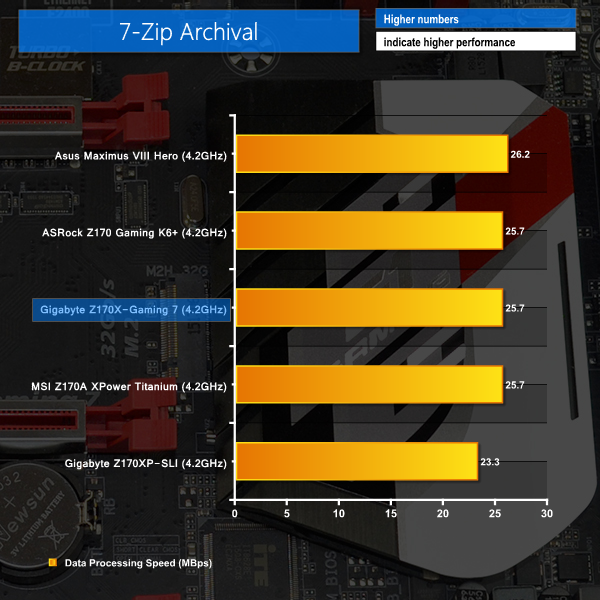
7-Zip
We manually archive a 1.23GB MP4 game recording to test the performance in 7-Zip.
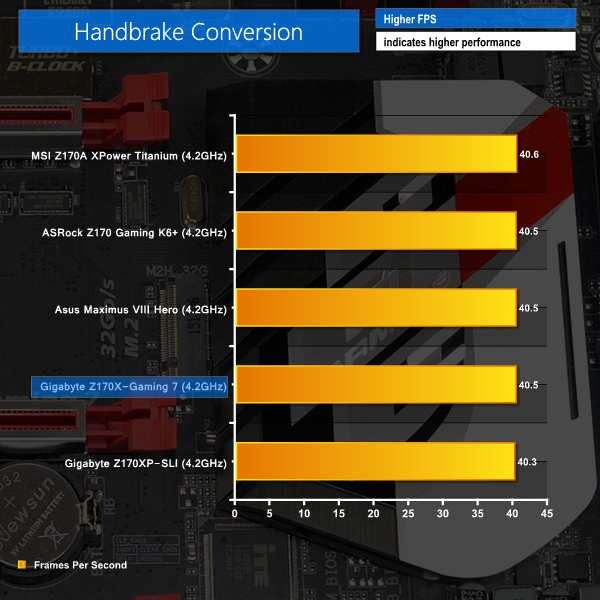
Handbrake Conversion
We measured the average frame rate achieved for a task of converting a 1.23GB 1080P game recording using the High Profile setting and MP4 container.
Performance in CPU-intensive operations is without concern. Gigabyte's board offers roughly the same level of performance as other functional Z170 boards when testing errors are discounted.
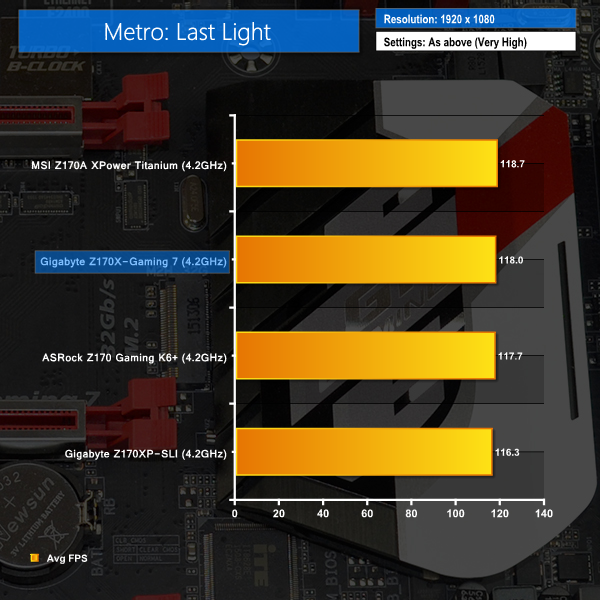
Metro: Last Light
We used a 1920 x 1080 resolution and the Metro: Last Light built-in benchmark set to ‘Very High’ quality to offer an intense challenge for the hardware.
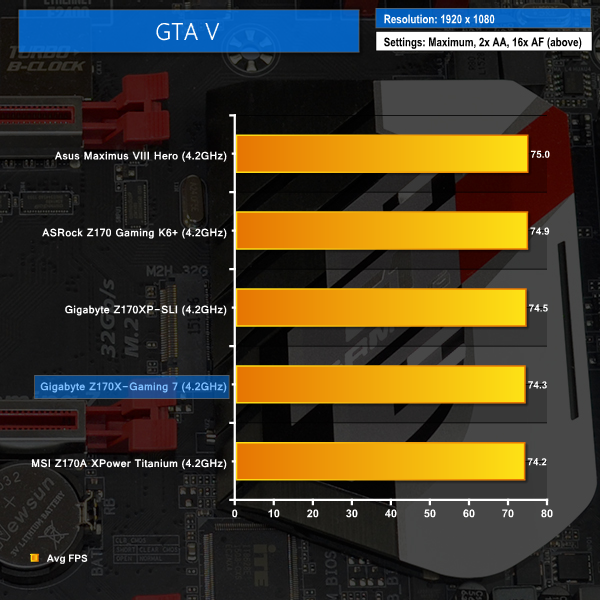
Grand Theft Auto V
We apply very near maximum settings in Grand Theft Auto V and a 1920×1080 resolution to push today’s hardware. Our data was recorded using the built-in benchmark.
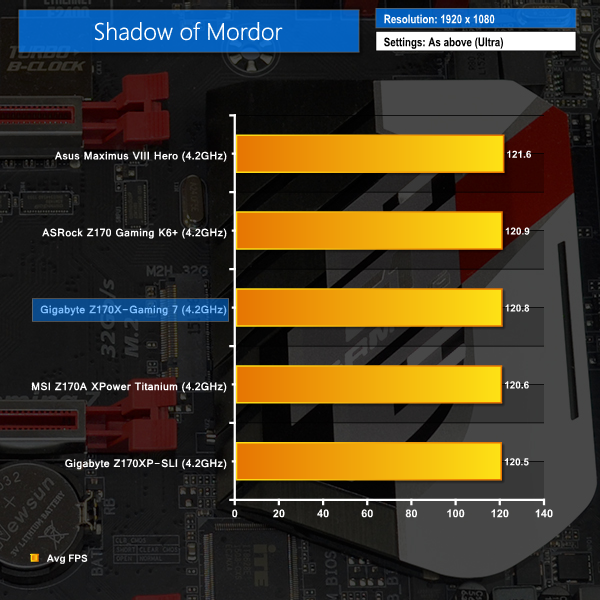
Middle Earth: Shadow of Mordor
We used a 1920×1080 resolution and the Middle Earth: Shadow of Mordor built-in benchmark set to ‘Ultra’ quality.
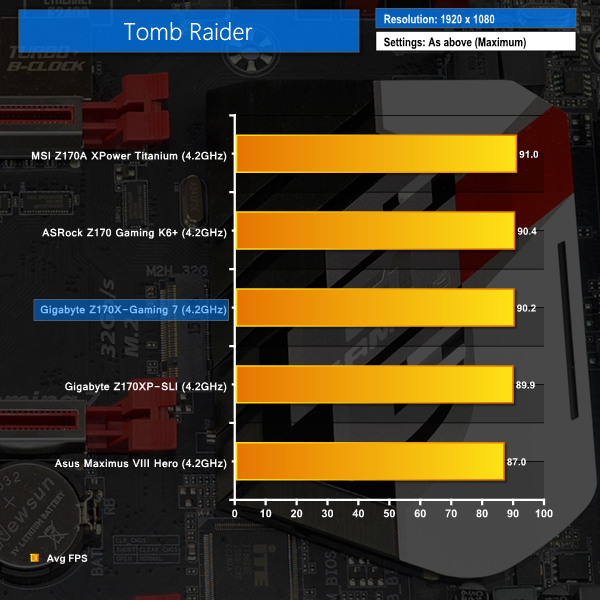
Tomb Raider
We used a 1920×1080 resolution and the Tomb Raider built-in benchmark set to maximum quality, with TressFX disabled.
The Z170X-Gaming 7 motherboard is a solid choice for gamers. We did not record any noticeable performance dips that would be representative of lessened gaming performance in comparison to other Z170 boards.
M.2 connector
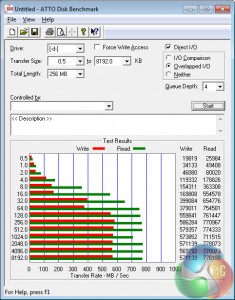
We use Plextor‘s fast M6e 256GB M.2 SSD to test the speed of a motherboard's M.2 connector. We reviewed the 512GB Plextor M6e (and its PCIe x2 adapter card) HERE. Unfortunately we do not have access to a PCIe 3.0-based SSD to fully test the M.2 connector’s performance limits.
The 32Gbps-capable M.2 port has no problem powering Plextor's PCIe 2.0 x2 M6e SSD without inducing bottleneck. A faster drive, such as Samsung's 950 Pro, would be perfectly functional in the slot without any slowdowns.
SATA
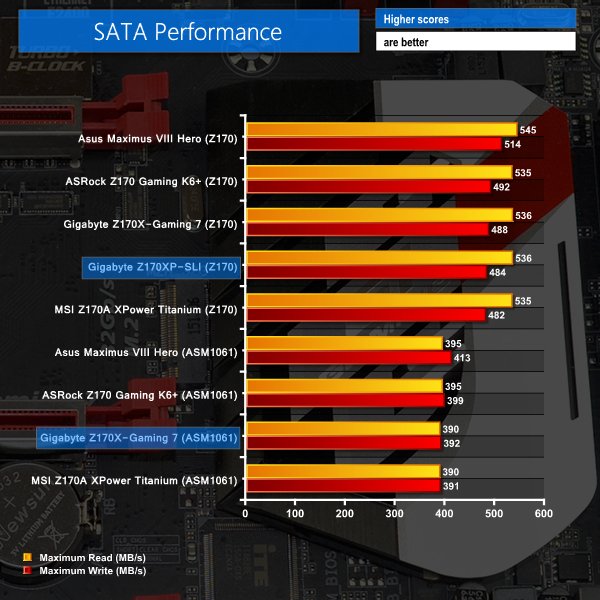
For SATA 6Gb/s testing we use a Kingston HyperX 3K (SandForce SF-2281) SSD.
SATA performance from Gigabyte's board is where we would expect it to be. A SATA 6Gbps SSD connected to the Z170 chipset ports is unlikely to suffer any noticeable slowdowns, while connecting a high-speed drive to the ASM1061 connections will cause a bottleneck.
The slower ASM1061 SATA 6Gbps ports should be reserved for mechanical storage or for when all of the other SATA connections are unavailable for use.
USB 3.0
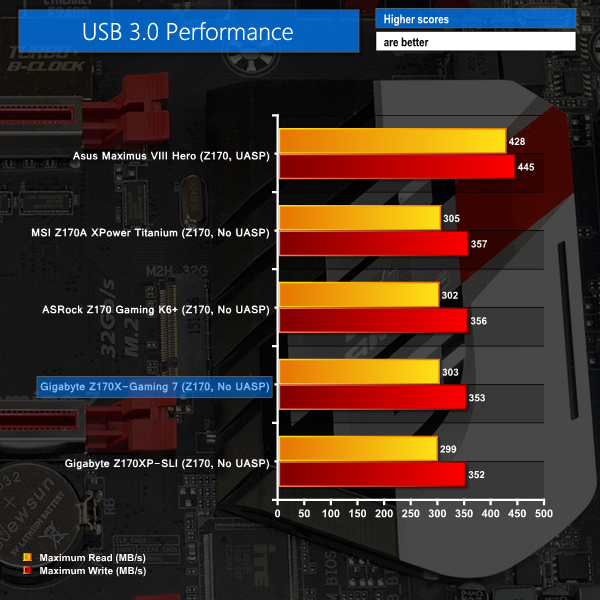
We tested USB 3.0 performance using the Kingston HyperX 3K SSD connected to a SATA 6Gb/s to USB 3.0 adapter powered by an ASMedia ASM1053 controller.
USB 3.0 transfer rates are what we would expect given the lack of UASP-activating software from Gigabyte for Windows 7 users. Windows 8.1 and Windows 10 users are likely to see USB 3.0 transfer rates closer to those of Asus' boards thanks to the built in UASP driver in those operating systems.
Audio
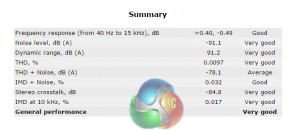
We use RightMark Audio Analyzer (RMAA) to analyse the performance of the motherboard’s onboard audio solution. A sampling mode of 24-bit, 192 kHz was tested.
Audio performance is ‘Very Good' according to RMAA. Noise level and dynamic range performance were two strengths for Gigabyte's Amp-Up audio solution.
My subjective testing agrees with RMAA's rating. I enjoy the powerful bass that Gigabyte's audio solution can deliver and the range of tones is a strong positive.
Automatic CPU Overclocking:
Gigabyte provides a number of CPU overclocking pre-sets through the UEFI although these use pre-defined settings rather than ones tweaked to an individual chip's capabilities.
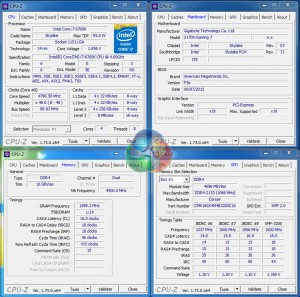
Using the Auto Tuning method in Gigabyte's EasyTune software our chip managed to run at 4.7GHz with stability. The software cycled the chip's frequency and rapidly stress-tested it until the system crashed. Upon reboot the previous information was used to run the CPU at a relevant stable frequency.
Core voltage for this automated overclock was a positive. The chip was set to operate at 4.7GHz with a core voltage of 1.288V under heavy load. This resulted in positive temperature and power consumption numbers. One disappointment, however, was that XMP was disabled.
Manual CPU Overclocking:
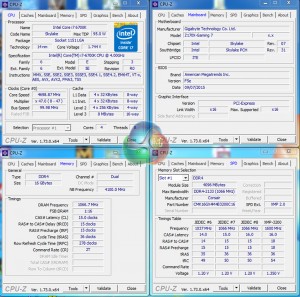
To test the Gigabyte Z170X-Gaming 7 motherboard’s CPU overclocking potential, we first increased the CPU VCore to 1.40V. We also enabled ‘High’ load-line calibration (LLC) in order to supply as close to our selected voltage level as possible. The cache ratio was set to 45x.
Gigabyte's Z170X-Gaming 7 motherboard had no problem pushing our i7-6700K chip to its stability limit of 4.8GHz when using 1.4V. Voltage accuracy using the High LLC setting could have been better – our multimeter recorded a VCore of around 1.385V whilst idling and around 1.37V when under heavy Prime95 load.
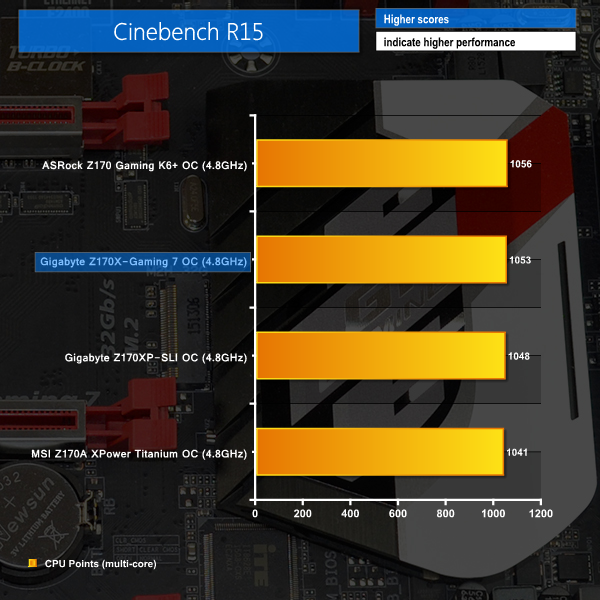
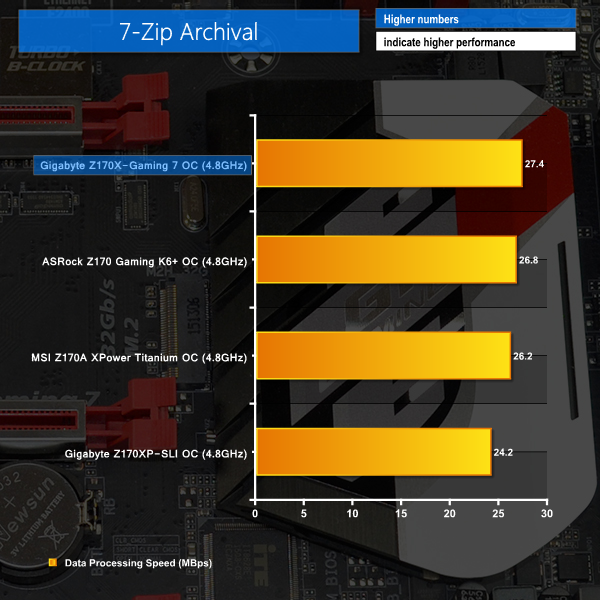
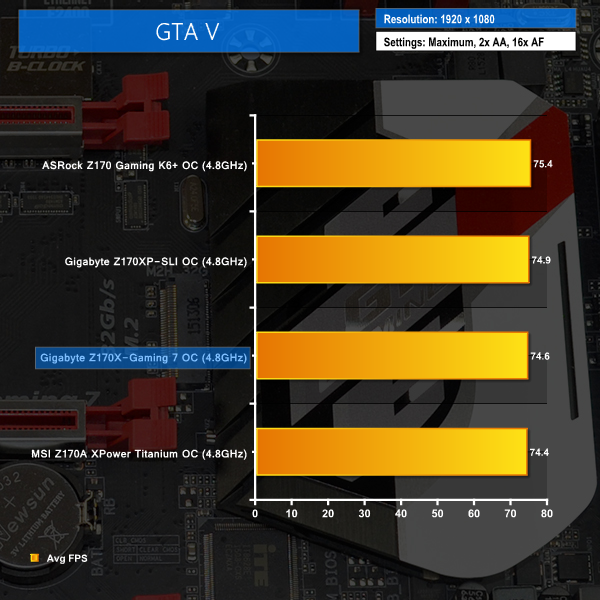
We will outline the performance increases that can be obtained from using the Gigabyte Z170X-Gaming 7 motherboard to overclock our system. Our overclocked processor frequency was 4.8GHz and memory speed was maintained at 3200MHz.
As a performance comparison, we have included the overclocked results from three other Z170 motherboards. The maximum overclocked configuration achieved with each board was a 4800MHz (48 x 100MHz) processor frequency and 3200MHz CL16 memory speed.
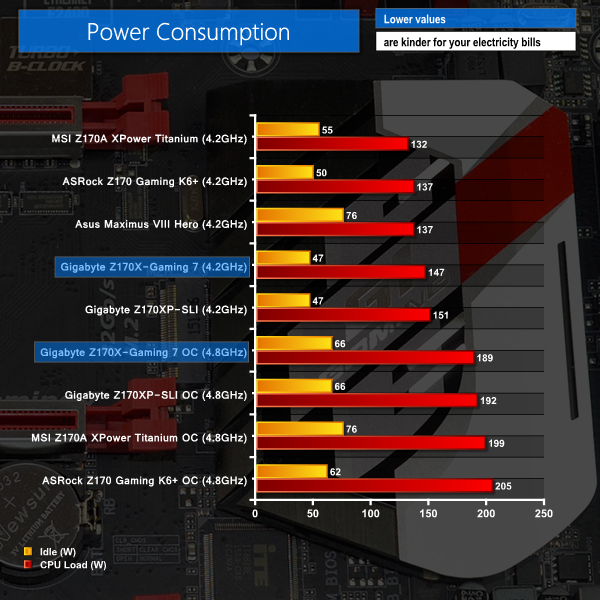
Using Gigabyte's Z170X-Gaming 7 to overclock the system garners solid performance improvements that are competitive with alternative Z170 motherboards. We measured the power consumption with the system resting at the Windows 7 desktop, representing idle values.
The power consumption of our entire test system (at the wall) is measured while loading only the CPU using Prime95′s in-place large FFTs setting. The rest of the system’s components were operating in their idle states, hence the increased power consumption values (in comparison to the idle figures) are largely related to the load on the CPU and motherboard power delivery components.
Power consumption for the stock-clocked board is slightly swayed by our manual workaround to enable MCT-level performance. With that said, the idle power consumption numbers shown by Gigabyte's board are particularly impressive.
Positive numbers are also shown by the Z170X-Gaming 7 when the system is overclocked, although this is to be expected given the core voltage undershoot previously highlighted.
The Gigabyte Z170X-Gaming 7 is a feature-friendly motherboard that shows good performance and offers boutique builders a unique styling option.
General performance from the motherboard is as good as expected. We also had no problem pushing our Core i7-6700K to its 4.8GHz limit, even though the board delivered a lower core voltage value than we asked for. The onboard buttons and reading points are good for overclockers who like to find their system's limits before mounting it inside a chassis.
Gigabyte's automated and pre-set overclocking options are also good for users who simply want to play games on their speed-boosted system without manually fine-tuning the clock frequency. The UEFI is stable and has a solid range of features, even if it is a bit dull and somewhat boring compared to other vendors' solutions. Thankfully Gigabyte provides some nice features through the OS utilities to make up for negatives like the UEFI's terrible fan control method.
The set of features chosen by Gigabyte is generally smart and should appeal to a enthusiast/gaming audience, especially with Intel's PCIe 3.0 x4 DSL6540 ‘Alpine Ridge' USB 3.1 controller. There's plenty of onboard storage connectivity, a choice of NIC vendors is good even if it is somewhat wasteful, and the audio solution is superb. Support for two high-bandwidth graphics cards in addition to a pair of PCIe 3.0 x4 SSDs (at least one via M.2) lays the foundation for a potentially strong gaming system.
Overall appearance is one of the Gigabyte Z170X-Gaming 7 motherboard's unique points. Many people will be drawn to the contrast of a largely black and white motherboard and the splashes of red may be to their taste. The styling is definitely unique and that's something that we like to see in a market that has been overly saturated by red and black components for a long time.

Priced at £175.99 from OverclockersUK, the Gigabyte Z170X-Gaming 7 is positioned in the premium price segment for a Z170-based gaming motherboard. Notable competitors at this price point include Asus' Maximus VIII Hero and the MSI Z170A Gaming M7.
Gigabyte offers a number of points on the Z170X-Gaming 7 that differentiate the board from similarly-priced competitors. The audio solution is particularly strong (and upgradeable), there's HDMI 2.0 onboard, and USB 3.1 is provided by Intel's superb DSL6540 ‘Alpine Ridge' controller.
Discuss on our Facebook page, over HERE.
Pros:
- Strong audio solution with good customisability.
- Intel DSL6540 ‘Alpine Ridge' controller for USB 3.1 connections.
- Smart layout decisions and chipset lane configurations.
- Good expansion options, especially in addition to two graphics cards.
- Unique appearance that breaks the mould.
- Onboard HDMI 2.0 capability could be beneficial.
Cons:
- Voltage accuracy when overclocked could be better.
- Dual NICs without teaming seems wasteful.
- UEFI could be more interactive.
KitGuru says: A well-balanced feature set makes Gigabyte's Z170X-Gaming 7 motherboard worth buying and some of those unique aspects may just boost it up towards the top of your shopping list.
 KitGuru KitGuru.net – Tech News | Hardware News | Hardware Reviews | IOS | Mobile | Gaming | Graphics Cards










Bought it and am loving it. The one complaint I have is that the mouse lags like hell in UEFI. I haven’t tried a different mouse with it yet though (currently using Cougar 550M). The SB audio is superb.
how the settings for memory on the mainboard? is it stable with xmp auto settings?