Manual CPU Overclocking:
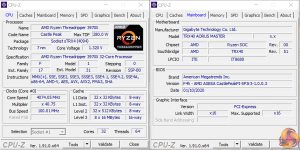
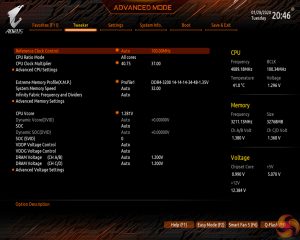
To test the Gigabyte TRX40 Aorus Master motherboard’s CPU overclocking potential, we set the CPU Core Voltage to 1.281V and applied the High LLC setting.
We managed to hit a stable frequency of our usual 4100MHz on the Threadripper 3970X CPU, but this result was far more difficult to achieve than with the ASRock and ASUS competitors.
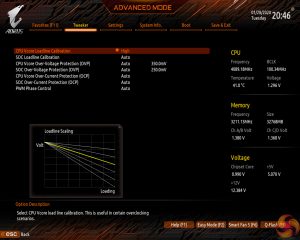
Firstly, Gigabyte’s Loadline Calibration (LLC) settings in the UEFI are somewhat difficult to understand, though there is a useful graphical display highlighting what each level does. Unfortunately, this seemed to be inaccurate, as our target voltage was far away from the recorded load voltage using both the High and Medium LLC settings.
We had to increase the CPU Core Voltage in the UEFI to 1.281V (higher than our usual 1.25V) with High LLC in order to get delivered power that was comparable to other solutions we have tested. This resulted in a 1.320V load voltage according to CPU-Z, but power draw from the wall was comparable to competing solutions running at around 1.25-1.275V. The implication here is that either Gigabyte’s reading data is managed differently or the motherboard’s VRM is vastly more efficient.
4100MHz with 1.281V UEFI voltage, which resulted in 1.320V software-read voltage with High LLC was stable and delivered solid results. However, the motherboard regularly refused to retain these settings upon system restart or clear boot from the powered down state. The board would aim to POST or boot into Windows, but it would fail, reduce the applied core voltage, and continue to fail to boot. This was circumvented by going into the UEFI and re-applying the intended CPU core voltage frequently.
As such, we reduced the operating frequency to 4075MHz with the same voltage and LLC settings as the failed POSTs and boots during system start up were significantly reduced.
Having to reduce the CPU frequency versus competitors is disappointing, especially as Gigabyte’s power delivery solution looked to be well designed for the task. We are confident that these issues are fixable with a BIOS update, but as of now, they are annoyances that users will have to circumvent or deal with.
Motherboard Sensors
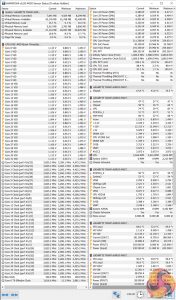
Gigabyte provides a good set of onboard monitoring data, including temperature sensors for the VRM, some PCIe slots, and the chipset. The VRM and chipset temperature sensors are important as they can be used to optimise the fan speed curves from Gigabyte’s onboard blowers.
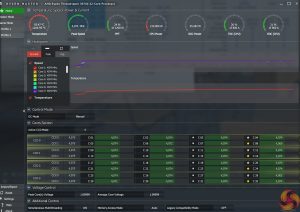
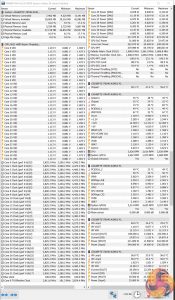
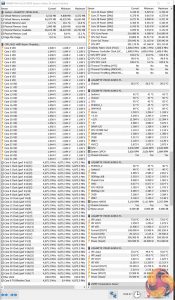
Data reported by HWiNFO and Hardware Monitor, such as CPU temperature and package power draw, tended to corroborate with the numbers displayed by Ryzen Master, which is good. We also checked the CPU core voltage using a multimeter connected to the onboard check points and found the software readings to be fit for purpose and close to the physical recordings.
Overclocked Performance
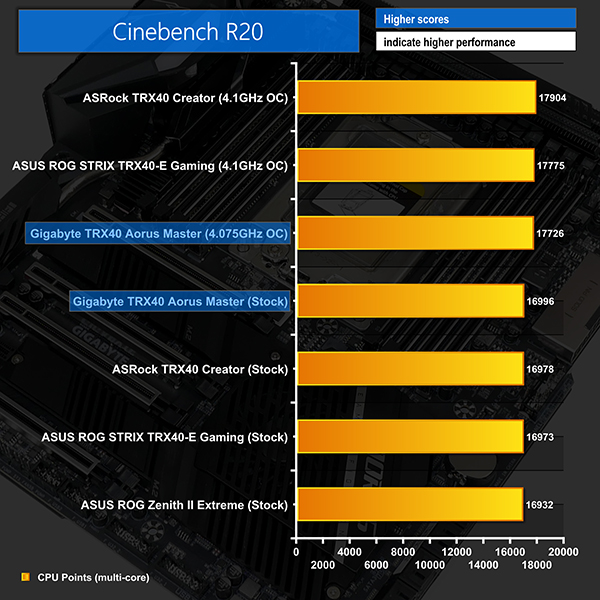
A performance boost of almost 750 points, or 4.4%, was obtained by overclocking the CPU to 4.075GHz. This is not quite as fast as the 4.1GHz overclocked competitors, but it is close enough that many users will not be overly disappointed.
Of course, Precision Boost Overdrive is still a smart choice if you want to keep your Threadripper 3000 CPU’s maximum boost clocks of 4.5GHz whilst trading down some of the all-core load frequency.
System Power Consumption
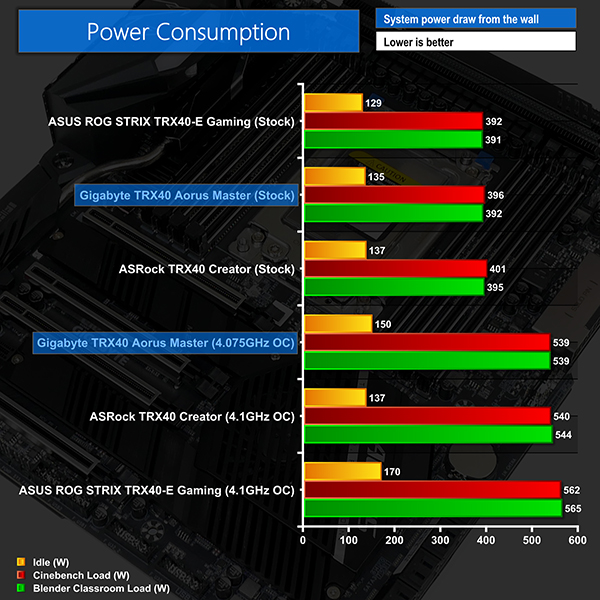
We leave the system to idle on the Windows 10 desktop for 10 minutes before taking a reading. For CPU load results we run Cinebench R20 nT and Blender Classroom stress tests and take a reading. The power consumption of our entire test system (at the wall) is shown in the chart.
Gigabyte’s stock voltage levels are sensible and the VRM solution is clearly efficient, so stock-clocked numbers are as reasonable as we would expect. Overclocking increases the load power draw significantly and our settings also pushed up the idle number by around 10%. In our testing, the 16+3-phase power delivery solution had no problems dealing with this level of load.
As we always suggest, a strong power supply like the Seasonic Prime TX-1000 unit that we used is an absolute requirement for a Threadripper system, especially with a power-hungry graphics card thrown into the mix.
System Temperatures
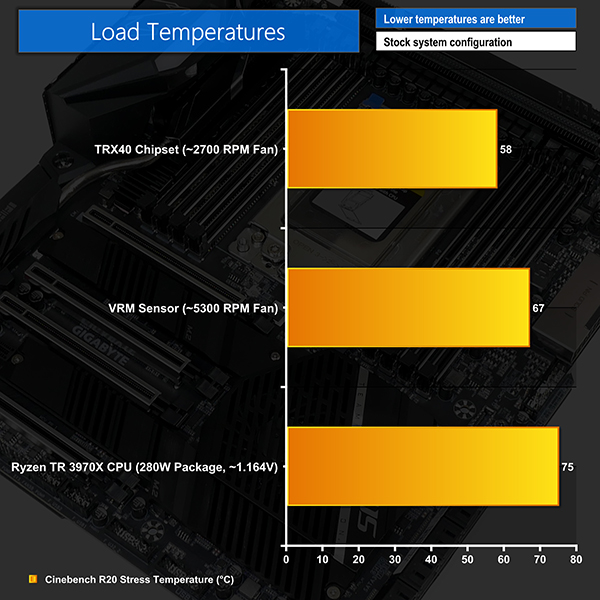
We run the Cinebench R20 nT test on loop for 1 hour while recording the system data using HWInfo. This data is then analysed to show the CPU temperatures and also the VRM MOSFET temperatures, when the sensor data is available.
Gigabyte’s VRM cooling solution does a stellar job at keeping the recorded temperatures in check. We saw the VRM sensor reading stay comfortably below 70°C at stock but Gigabyte achieves this by using a relatively high fan speed of around 5300 RPM. By comparison, the ASUS TRX40-E Gaming was able to stay at around 60°C MOSFET temperature without having to spin up its VRM cooling fans.
We were able to reduce the fan speed to 4200 RPM whilst still getting a 68°C VRM temperature reading. This was done by using a custom fan speed curve that set the blower to 0 RPM until 60°C was hit. Gigabyte’s superb UEFI fan control is to thank for this level of adjustment granularity.
Overclocking did not add significant additional temperature or fan speed to the VRM cooling solution for short, bursty workloads. This implies that Gigabyte’s heavily finned cooling design is efficient at shedding high heat loads, even if it does benefit from a decent amount of fan airflow at lower thermal loads.
Chipset cooling was very good, and this is thanks in large to Gigabyte’s robust chipset heatsink and the sizable fan. The 2700 RPM fan speed that we recorded under this load condition was not audible over the higher speed VRM heatsink fan. If you are happy with chipset temperatures around the 70°C level, our test setup managed this with the fan operating primarily under its zero RPM mode and complete silence.
 KitGuru KitGuru.net – Tech News | Hardware News | Hardware Reviews | IOS | Mobile | Gaming | Graphics Cards


