Automatic CPU Overclocking – OS-based EasyTune Auto Tuning:
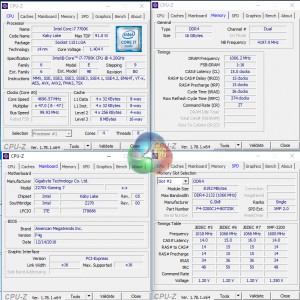
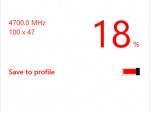
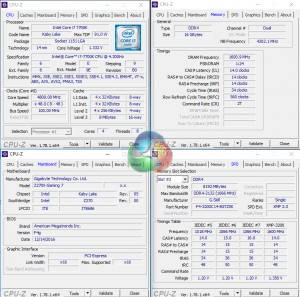
The OS-based auto tuning found inside EasyTune software worked, and that's about it. The speed bump was only 200MHz from a forced-turbo 7700K and 4.7GHz at 1.4V is a very conservative overclock that basically all 7700K CPUs should achieve. Realistically, that voltage could be dropped by at least 50mV while still maintaining stability.
XMP was also disabled, which is always disappointing as our memory speed was cut by a third as well as being given higher latency timings.
Automatic CPU Overclocking – UEFI-based CPU Speed Profile:
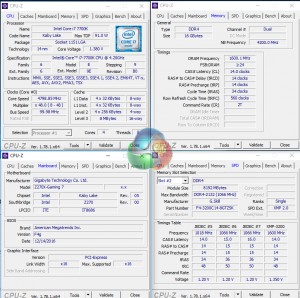
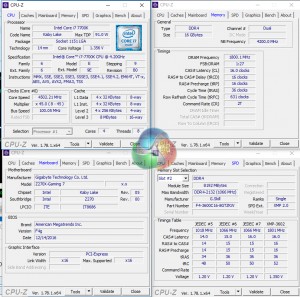
The 4.8GHz 7700K UEFI preset worked well. 4.8GHz at 1.38V under load is a fair setting that average Kaby Lake 7700K CPUs should be able to run at while also maintaining Prime 95-level stability. Thankfully, XMP was left enabled on our memory modules.
Manual CPU Overclocking:
To test the Gigabyte Aorus Z270X-Gaming 7 motherboard’s CPU overclocking potential, we first increased the CPU VCore to 1.35V and applied High LLC setting.
We maintained the DRAM frequency at 3200MHz to take its stability out of the overclocking equation. Cache frequency was maintained at its stock MCT value of 4.2GHz.
Gigabyte's Aorus Z270X-Gaming 7 managed to take our Core i7-7700K to its maximum Prime-stable overclock of 4.8GHz using 1.35V. The board actually did this with less than 1.35V (1.33 under load) by virtue of the poor LLC settings.
If you want a specific voltage level, the way to achieve it is by trial and error because LLC swings the load value either above or below the intended mark.
3600MHz XMP Memory:
We test the motherboard's ability to run G.Skill's high-speed 16GB DDR4 TridentZ kit at a 3600MHz XMP setting. High-speed XMP settings can prove a challenge for motherboard designers when optimising the settings for stability at the intended DRAM frequency.
3600MHz DDR4 worked without issue using the XMP setting.
Overclocked Performance
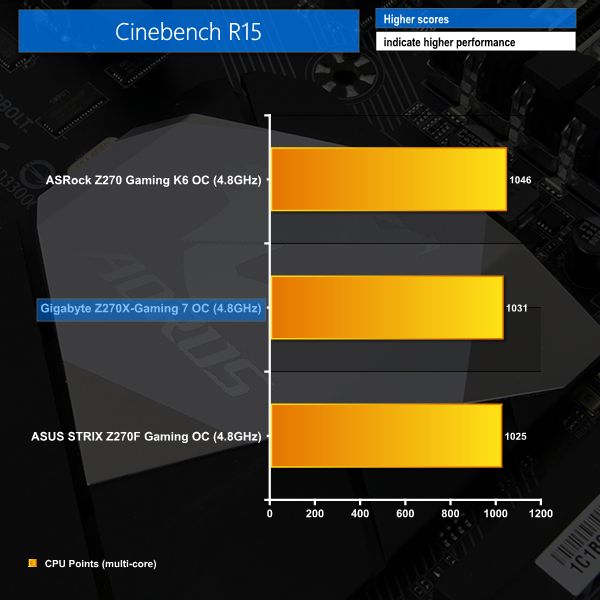
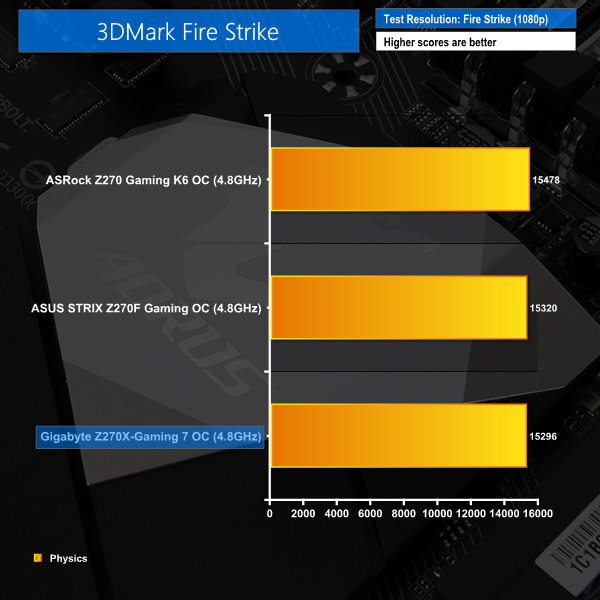
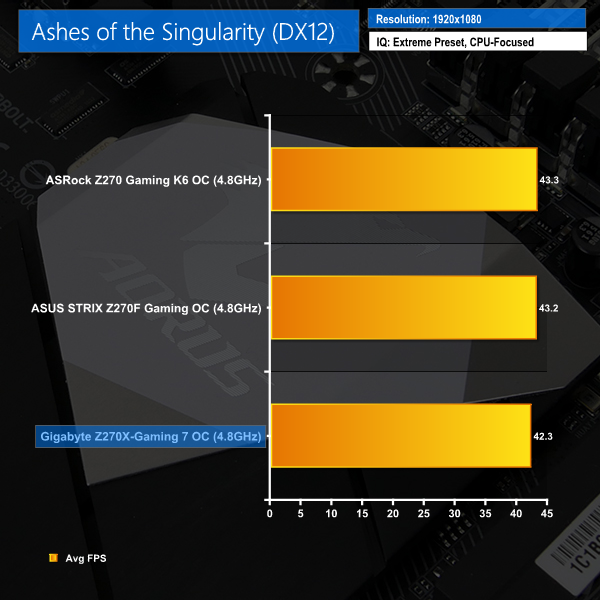
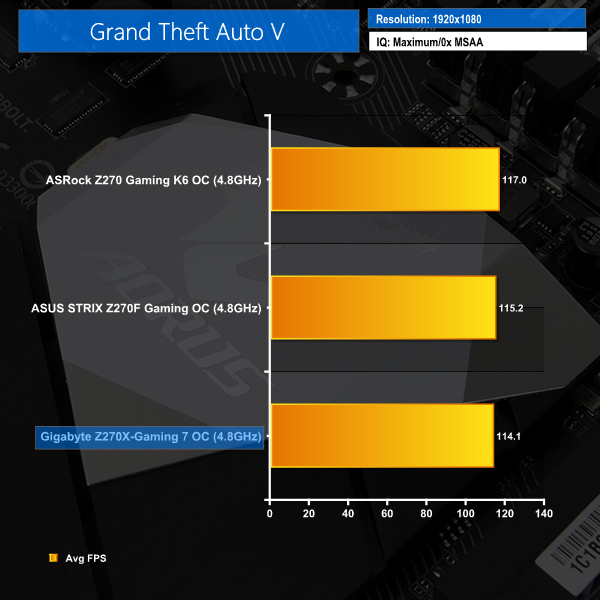
As a performance comparison, we have included the results from two other Z270 motherboards. The maximum overclocked configuration achieved with each board was a 4800MHz (48 x 100MHz) processor frequency whilst using 3200MHz CL14 memory.
Overclocking delivers a nice performance boost for the Aorus Z270X-Gaming 7.
Power
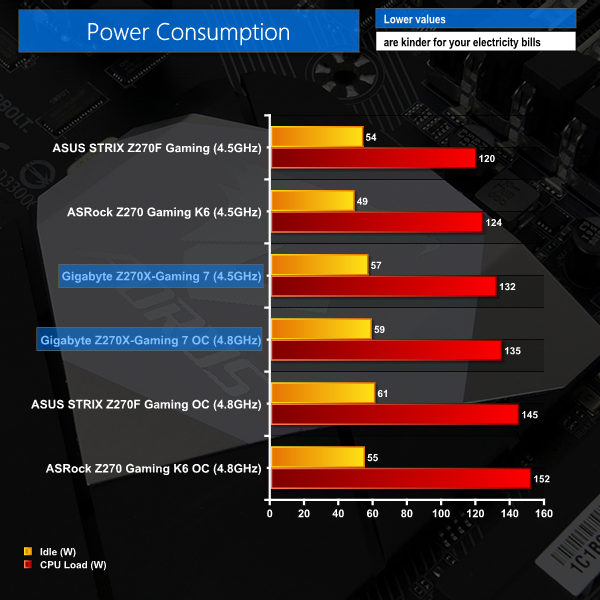
We leave the system to idle on the Windows 10 desktop for 5 minutes before taking a reading. For CPU load results we run AIDA64 CPU, FPU, and Cache stress tests and take a reading. The power consumption of our entire test system (at the wall) is shown in the chart.
Stock (MCT) power consumption was not a strength for Gigabyte due to the over-aggressive CPU voltages being applied. Overclocking only resulted in effectively the same power consumption, emphasising just how needlessly high the stock voltage levels are.
With that said, Gigabyte's board does have lower overclocked load power draw numbers than ASUS and ASRock competitors. This is a direct result of the poor voltage accuracy attributed to the LLC settings. The board actually gets a stable overclock at a lower voltage by virtue of poor LLC design, which is an interesting thought that some may deem not such a bad point.
 KitGuru KitGuru.net – Tech News | Hardware News | Hardware Reviews | IOS | Mobile | Gaming | Graphics Cards



“The individual audio results should be interpreted with care due to the difference in RightMark Audio Analyzer’s reaction to the Creative-based solution used on Gigabyte’s board versus the Realtek codec of its competitors.”
I don’t understand what that means.
I have this board and while it’s a tremendously beautiful work of art, RGB Fusion doesn’t hold its brightness settings after reboot. Which, can be annoying when the PC is on your desk just to your right and you don’t want those beautiful bright greens to be /too/ bright, so you tone them down to the lowest setting (25%) only to find that you have to do it every single time you boot into Windows 10 Pro x64. I looked to see if there were any obvious files in the RGB Fusion folder that would hold settings for such and if they perhaps were read-only, but the only settings files I found were xml’s for various demo effects, I would assume. I’ve tried setting the main exe’s in the folder to run as administrator and see if that works. No dice. Seems as if Gigabyte might have a little more work left to do with this, and funny enough, their GvLedServices.exe file descriptions weren’t filled out. They were left as “TODO: ” .. “TODO: ” .. “TODO: ” under Properties > Details. I guess that slipped their “to do” list. It shows up as “TODO: ” in Task Manager > Processes, which could potentially confuse someone that isn’t privy to the program not quite being as polished as it should be.
Also, I had an issue where, suddenly, when trying to run the RGB Fusion program, it would load the dialog box, but that’s it, and sit there with blank panels and “Please Wait…” flashing through the RGB spectrum in the middle of the main panel for around 5 minutes before finally loading, then making any changes would take another few minutes or so, but they wouldn’t actually do anything. The power switch at the top no longer turned the LED’s off, either. I had to uninstall the program, reboot, reinstall the program and then run each process from its folder manually to get it to work again. It’s been working since then, even after reboots, but still doesn’t hold the brightness setting.
https://uploads.disquscdn.com/images/7bd0e4c346835a42abdf525b89866c38c628c6205a00e90bada27f21db0bbf2f.jpg
Might as well be written in another language and then translated back to English with Google translator.