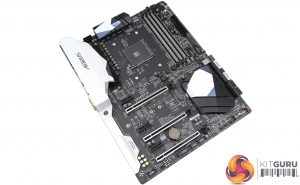
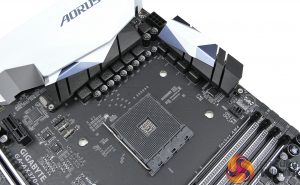
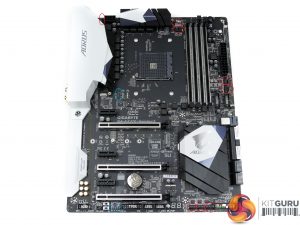
The Gigabyte Aorus AX370-Gaming 5 motherboard uses a black and white colour scheme that has seen increasing popularity over the past few years. The motherboard is primarily black, with subtle touches of silver on slots, while the large rear IO cover and sections of heatsinks are coloured in white.
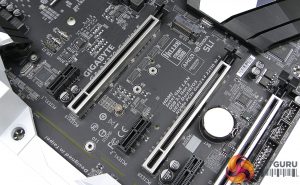
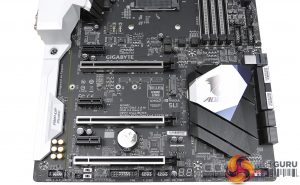
Strengthened PCIe and DIMM slots are noticeable from the offset. Marketed as Ultra Durable and Armor by Gigabyte, the steel-reinforced PCIe slots should help to minimise GPU sag with large graphics cards. The strengthened DIMM slots will reduce PCB flex when installing memory modules.
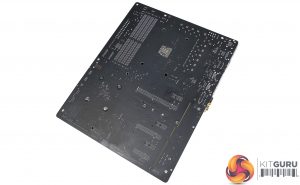
A look at the motherboard's rear PCB side shows that the lowest full-length expansion slot is hard-wired for PCIe x4 bandwidth.
With its Gaming 5, Gigabyte offers six discrete LED lighting zones across the motherboard, in addition to two RGB LED strip headers (one 5-pin RGBW and one 4-pin RGB). The individual lighting zones are:
- DIMM slots
- Upper VRM section
- Middle PCIe x16 slot
- Near the chipset heatsink
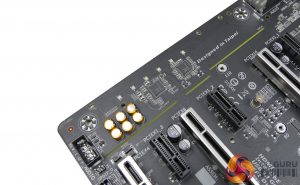
- The audio section
- The plastic overlay near the 24-pin connector
Multiple RGB LEDs are used for lighting in some of the zones, allowing Gigabyte's board to emit a visibly bright glow should you deem it necessary. Different operating modes, such as flashing and intelligent activation, are supported but the individual zones can only be controlled as a group, not separately.
If you want the PCIe slot LEDs using a separate colour to the DIMM slots, Gigabyte will force you up to a higher-end Aorus SKU, as is the case with the Z270 offerings.
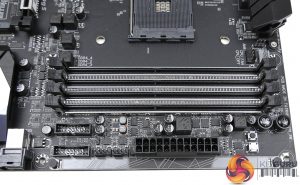
Up to 64GB of DDR4 memory can be installed in the four DIMM slots. Gigabyte quotes out-of-the-box support for 3200MHz kits and this is backed up by the UEFI support for a 32x memory divider, as well as XMP. It is, however, worth checking Gigabyte's QVL to see if your kit is supported. Our G.SKILL Trident Z modules worked without hassle.
Two internal 5Gbps USB 3.0 headers are situated next to a pair of 4-pin fan connectors. Both headers use ports delivered through the X370 chipset. Next to the 24-pin connector are onboard buttons that prove handy for troubleshooting.
Gigabyte mounts a plastic overlay in this section of the board, beneath which reside RGB LEDs that light through the piece. This overlay is swappable, meaning that users could cut or 3D print their own design and mount it to the motherboard for a uniquely-lit section. This feature is not as flexible as ASUS' 3D printing mounts but it is a novel way of allowing users to customise their motherboard.
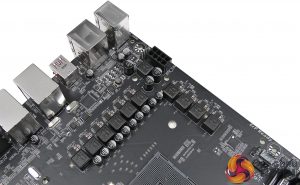
The power delivery system is a 6+4-phase design, with the six phases being delivered to an AM4 CPU and four allocated for the SOC voltage rail. Gigabyte uses an International Rectifiers IR35201 PWM to control ten 40A-rated IR3553M PowIRstage MOSFET solutions, aided by two IR3599 PWM doublers mounted above the upper four phases (and presumably allocated to SOC duties).
This makes sense given the IR35201 PWM's possible deployment as a 6+2-phase design and implies that the CPU voltage rail gets a dedicated six control phases.
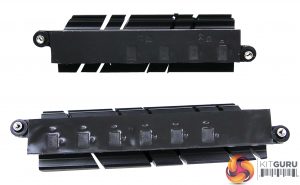
I am not particularly impressed by Gigabyte's MOSFET cooling solution. The two heatsinks are roughly standard size for an ATX motherboard of this calibre but they are individual heatsinks, rather than a single unit connect via a heatpipe.
Linking the pair together by a heatpipe would have helped to balance thermal energy across both heatsinks to enhance and better balance cooling potential. As it stands, each unit acts on its own meaning that saturation of one of the heatsinks may occur even if the other has spare cooling capacity.
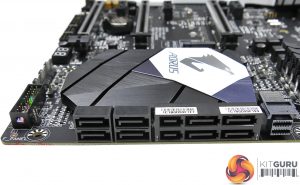
All eight SATA 6Gbps ports are delivered by the X370 chipset. Gigabyte takes four of these ports and uses them to double-up as a pair of SATA-Express connections. This is now stupid because SATA-Express is practically dead and the internal USB 3.1 10Gbps connector (an area where SATA-E was previously useful) has been standardised. Gigabyte's logic here is that SATA-E is basically free to provide, other than the cost of plastic and a slight adjustment to PCIe lane routing.
On the topic of that internal 10Gbps USB 3.1 Gen 2 connector, it is disappointing to see that Gigabyte has not included it on the AX370-Gaming 5. Instead, the pair of chipset-based 10Gbps USB 3.1 Gen 2 ports are mounted on the rear IO. Some form of internal USB 3.1 solution would have been preferable.
That U.2 connector is good to see on a £205 motherboard, especially with Ryzen 7's capability as a prosumer CPU for video editors and other heavy users. The port is fed with 32Gbps of PCIe 3.0 x4 bandwidth directly from the AM4 CPU and is compatible with NVMe SSDs such as the Intel 750.
Bandwidth limitations for AMD's AM4 platform mean that the U.2 connector shares its connection with the M.2 PCIe 3.0 x4 lanes. This means that only one of those connectors can be used at a given time.
The onboard M.2 slot is capable of housing PCIe 3.0 x4 NVMe and SATA 6Gbps SSDs up to 110mm in length. As previously mentioned, its bandwidth is shared by the onboard U.2 connector, making only one usable at a given time.
Gigabyte's positioning of the M.2 slot is both good and bad. The positive aspect of mounting it below a graphics card is that an ugly green M.2 SSD's PCB is hidden and incidental airflow will be received from an open-air graphics card cooler.
However, if you are exporting a video file or rendering a project and the GPU is pumping out warm air, that will be blown directly onto an M.2 SSD and is likely to contribute to thermal throttling. Gigabyte should have implemented some form of cooling method for an SSD installed in its M.2 slot. Branching a heatpipe out from the large chipset heatsink would have been easy and would have allowed for heat to be removed from an M.2 SSD's controller.
The first and second full-length PCIe slots are fed Gen 3 lanes directly from an AM4 CPU. Two-card CrossFire and SLI is supported as the bandwidth can be delivered as x16/x0 or x8/x8.
Spacing is positive – Gigabyte leaves a 3-slot gap between the connectors, which is acceptable for retaining cooling space between a pair of 2- or 2.5-slot graphics cards.
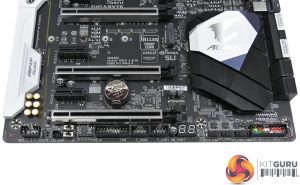
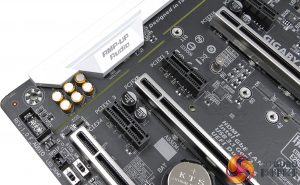
The lowest full-length PCIe slot runs at a maximum of Gen 2 x4 bandwidth delivered by the X370 chipset. Those four lanes are shared with the trio of PCIe x1 slots. The full-length connector drops to x2 bandwidth if you utilise the PCIE_X2 and PCIE_X3 slots and it is decreased to an x1 link if the PCIE_X1 slot is populated.
Headers situated along the motherboard's bottom edge are the usual affair, in addition to a trio of 4-pin fan connections, a 2-digit debug LED, and the 5-pin RGBW LED output.
Gigabyte also mounts a pair of BIOS switches that allows users to alternate between the primary and secondary BIOS in case of troubleshooting. A secondary BIOS for system recovery would have been useful on our ASUS ROG Crosshair VI Hero sample when it crashed and rendered the motherboard completely unusable.
Gigabyte's AMP-UP audio solution is based around a pair of Realtek's popular ALC1220 audio codecs. The built-in amplifiers are used for headphone-driving duties and Gigabyte aims to clean up signals using Nichicon audio capacitors, dedicated PCB tracks, and a plastic cover.
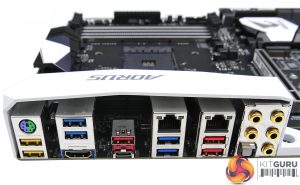
The rear IO is heavy on USB connections, thanks to the sizeable count included with AMD's X370 chipset. Two yellow 5Gbps USB 3.0 Type-A ports, mounted below the PS/2 connector, are given USB DAC-UP 2 duties. Gigabyte suggests that USB DACs should be connected to these ports as they are designed with re-drivers to deliver a continuous level of clean voltage.
There are four more 5Gbps USB 3.0 ports, all of which are coloured blue. 10Gbps USB 3.1 Gen 2 Type-A connections (red-coloured) from the X370 chipset are mounted below an Ethernet port. Gigabyte's decision to make these ports available on the rear is the reason for the exclusion of an internal 10Gbps USB 3.1 header.
ASMedia's ASM1143 chipset is used to provide 10Gbps USB 3.1 Gen 2 Type-A and Type-C ports. Gigabit Ethernet is provided by Intel's I211AT chipset and the Killer E2500 alternative. Dual GbE connections gives users an ability to choose their preferred networking vendor but it is also wasteful, aside from offering redundancy, as they cannot be teamed together in Windows.
An HDMI 1.4 port, lending itself to compatibility with future AM4 APUs, and gold-plated audio jacks finish off the set of rear IO connections.
Backing up the marketing claims for its Smart Fan 5 system, Gigabyte deploys a total of eight 4-pin ‘Hybrid‘ fan headers on the AX370-Gaming 5. Distribution of the PWM- and DC-controllable headers is good, with three connections being close to the CPU socket and five mounted on the board's edges to serve chassis fans.
The combination of ITE's IT8686E and IT8792E controllers are to thank for Gigabyte's fan control and monitoring abilities. The 4-pin headers' ability to manage PWM and DC fans is thanks to the ITE chipset detecting if a PWM pin is present and adjusting its operating parameters (the adjustable voltage pin) accordingly. An ITE IT7236AFN controller is also present and seems to manage the RGB LEDs.
Gigabyte also provides headers to connect the two included thermistor cables. This is good if you want to manage fan speed based on a component or area that is not given onboard temperature sensor readings, such as memory modules or a GPU backplate.
The 5-pin RGBW and 4-pin RGB LED headers are circled with blue. The 5-pin connection is mounted on the motherboard's bottom edge and can be used with the included extension cable. Gigabyte positions the secondary 4-pin header close to the CPU socket. This location is good for controlling the AMD Wraith Spire RGB cooler but it is otherwise inconvenient for connecting an RGB LED strip as a cable will have to sprawl across the motherboard.
 KitGuru KitGuru.net – Tech News | Hardware News | Hardware Reviews | IOS | Mobile | Gaming | Graphics Cards


Good review, i like when reviewers uses lastest BIOS, great motherboard
Great in-depth review. Great features, robust vrm and probably one of the best motherboards you could buy for an AM4 build.