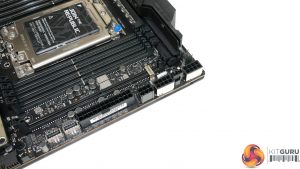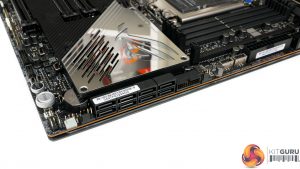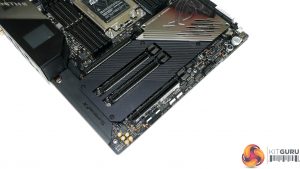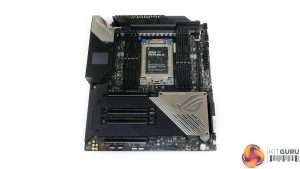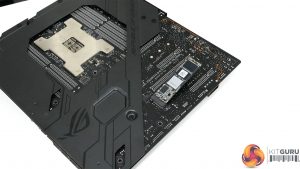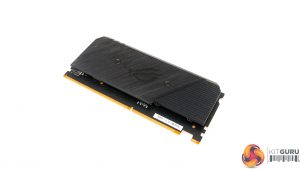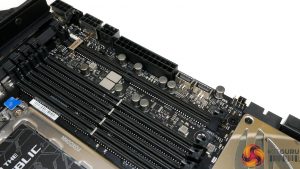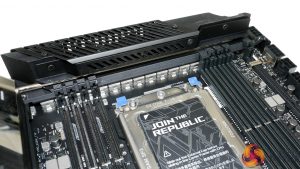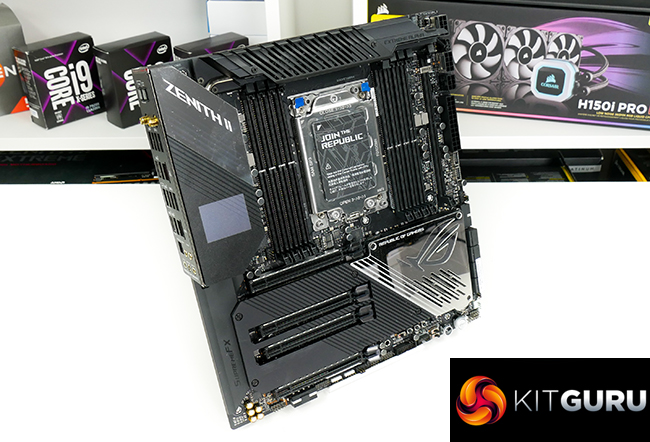
The rewards for offering a high-performance flagship motherboard on the TRX40 platform are clear. Vendors are all competing at price points well above £600 which culminates in motherboard options filled to the brim with the features that almost anybody could wish for. ASUS' ROG Zenith II Extreme was no exception to that point. However, ASUS has taken the fight up a notch by releasing an updated ‘Alpha' model which is buffed-up with a set of sixteen 90 Amp power stages.
Could this be the ultimate TRX40 motherboard?
A sixteen-stage power delivery solution driven by 90 Amp power stages, five M.2 connections, 10 Gigabit Ethernet, 20Gbps USB 3.2 Gen 2×2, and an onboard OLED display, the ASUS ROG Zenith II Extreme Alpha offers an envious array of features. Targeting hardcore enthusiasts, those who need workstation-type performance, and overclockers who want to push boundaries, ASUS' flagship TRX40 motherboard is designed to appeal to a cross-market audience.
The wants of overclockers are different to the wants of workstation prosumers. It will be interesting to see how ASUS strikes the balance between the target audiences for its Zenith II Extreme Alpha. We can only assume that the total market for a motherboard that is currently priced close to £900 is relatively small. And with tough competition from Gigabyte and MSI, how will ASUS' crown jewel perform? Let's find out.
Features (information taken from the ASUS webpage):
- Ready for AMD 3rd Gen Ryzen™ Threadripper™ Processors: Maximize connectivity and speed with up to five M.2 drives, USB3.2 Gen2x2 and AMD StoreMI
- Robust power delivery: Optimized power solution with 16 Infineon TDA21490 power stages, ProCool II power connectors, microfine alloy chokes and 10K capacitors
- Comprehensive thermal design: Active-cooling VRM heatsink, PCIe-zone M.2 aluminum heatsink, backplate, Fan Extension Card II and water-cooling zone
- High-performance networking: Onboard Aquantia® 10 Gbps Ethernet, Wi-Fi 6 (802.11ax) with MU-MIMO support, and GameFirst V technology
- Unmatched personalization: Color OLED display and ASUS-exclusive Aura Sync RGB lighting, including two additional RGB headers and two addressable headers
- Industry-leading ROG audio: SupremeFX S1220 and ESS® SABRE9018Q2C for enthusiast-grade audio performance, featuring Japanese capacitors
- DIY-friendly design: Pre-mounted I/O shield, ASUS SafeSlot, BIOS FlashBack™ and FlexKey
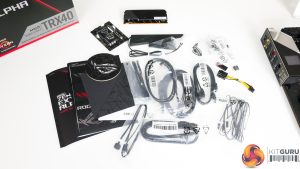
The bundle that ASUS supplies with its flagship TRX40 motherboard is extremely healthy. You get cables, screws, a USB drive, stickers, a coaster, and added-value cards.
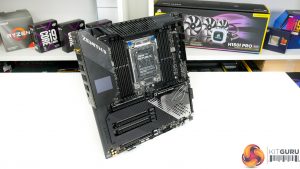
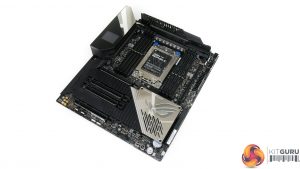
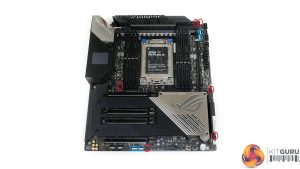
Style wise, we see the typical ROG colour scheme. That is, black and grey for the bulk of the motherboard, with zones of contrast provided by onboard and controllable RGB LED lighting.
In terms of physical size, the Zenith II Extreme Alpha is an Extended ATX motherboard. E-ATX is a challenge for many mid-tower cases but should fit fine in larger chassis. Either way, E-ATX is a far easier solution to manage from a chassis perspective than the XL-ATX form factor we see Gigabyte opt for.
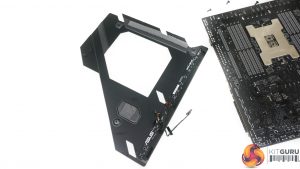
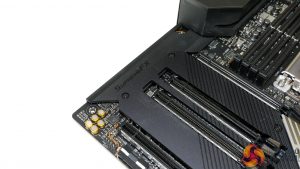
A large shroud covers the bottom half of the motherboard, but it is relatively easy to remove with the board out on a table. The shroud is made from aluminium and features M.2 SSD cooling pads. Adding together all of the heatsink weight provides a motherboard that weighs more than 2kg and feels extremely sturdy.
You also get dual BIOS chips which is a somewhat unusual inclusion for ASUS. I like the redundancy and resiliency perspective of having the backup BIOS, especially for a motherboard of this expense.
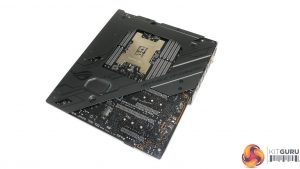
The cold-rolled steel backplate is primarily used for stiffness and rigidity enhancement. It manages both of those tasks very well, and that's important for such a heavy motherboard that could have further weight added via a large CPU cooler.
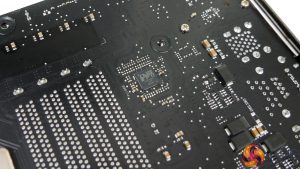
Direct contact via thermal pads is made with specific locations on the motherboard's PCB rear side. Of note is the large thermal pad mounted directly beneath where the VRM MOSFETs reside. Being steel, thermal conductivity is not going to be ideal from a cooling perspective and you certainly won't match the performance of Gigabyte's aluminium backplate. However, a decent sized lump of metal should do a reasonable job at whipping some heat away from the PCB.
The right-side RGB lighting strip is housed on the backplate and operates via a pair of connector cables.
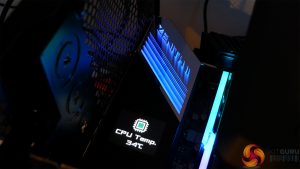
Functionally useful, rather than a simple gimmick, I like ASUS' inclusion of the 1.77″ LiveDash OLED display. You can display things like monitoring information, words, and different colours on the screen. This is important if you want to see how hot your CPU is running during system operation or whether your BIOS update is actually taking place.
The two-digit debug LED has been a long-term favourite of mine. But ASUS' OLED display is a far superior option and is found in a smart location. No doubt it adds noticeable costs to the motherboard, though.
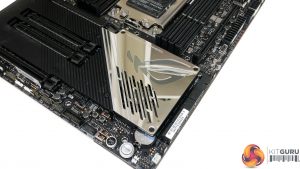
RGB lighting is primarily provided in three main zones: rear IO cover, chipset, and right edge strip. I like the subtly of ASUS' implementation and you get good control capabilities thanks to AURA software. The ‘infinity-style' RGB cover found above the LiveDash OLED display is my particular favourite as I think it looks very appealing when the system is running.
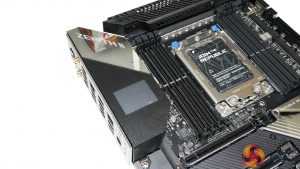
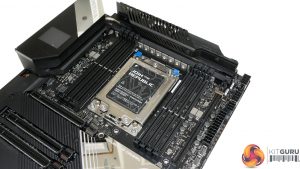
Sat either side of the massive sTRX4 CPU socket is a set of 4-DIMM banks. You get eight DIMM slots in total which allows installation of up to 256GB of DDR4 using standard non-ECC modules. The fastest kits highlighted on ASUS' QVL are DDR4-4600MHz offerings from Corsair and G.SKILL. ECC memory module support is also noted in the QVL.
Positioning of the large VRM heatsink, combined with ASUS' single-latch DIMM slots, makes accessing the removal notch very difficult. ASUS includes a specific screwdriver for the task of popping the module release latch, though this was not included with our sample.
Vertical positioning of the CPU socket and DIMM slots is also likely to cause interference with CPU cooler and graphics card backplates. This is something that you have to watch out for. Thankfully, our Gigabyte Aorus RTX 2080 Ti Xtreme graphics card and Cooler Master Wraith Ripper CPU cooler worked fine together, even if it was a tight squeeze.
CPU-specific power comes from dual steel-reinforced 8-pin EPS connectors and a single 6-pin PCIe connection. Even enthusiast overclockers pushing a Threadripper CPU hard should not have to worry about power delivery concerns from this motherboard. Positioning of these connectors in the motherboard's top-right corner is a move driven by the VRM cooler hogging most of the PCB's top edge real estate.
ASUS' inclusion of onboard voltage monitoring points is a feature that I love to see and something that I consider a necessity for an elite level overclocking motherboard. You also get a thermal sensor header in the top-right location which allows you to plug in the thermistor cable and monitor nearby components such as memory modules or VRM heatsink surface temperature, for example.
Dual USB 3.2 Gen 2 10Gbps Type-C headers is good to see. Both of these headers run individually without sharing bandwidth, so you should be able to use both simultaneously with minimal transfer rate slowdowns.
While there are clearly eight SATA 6Gbps ports in total, only four of these run from the TRX40 chipset. The other four are provided by a pair of ASMedia controllers and are therefore bandwidth limited to two PCIe Gen 4.0 lanes by comparison to the TRX40 options. Another caveat is that the four ASMedia-powered ports share bandwidth with the rear M.2 connector and therefore cannot be used whilst an SSD is installed in that location.
One of the board's two USB 3.0 5Gbps headers is located next to the SATA ports. The right-angled orientation is ideal for cable management though you certainly need a wide case to be able to make such a cable run with this E-ATX motherboard. Bandwidth for the ports is shared with the other header's two ports via a single 5Gbps USB 3.0 link to the TRX40 chipset.
As such, you need to be careful of significant slowdowns when transferring files from more than one storage device that is connected to these front panel ports. If in doubt, split drive connections between your front panel ports and the rear IO ports as they run with different bandwidth links.
You get the usual set of connectors along the motherboard bottom edge. ASUS also adds a 4-pin downwards facing Molex for supplementary power, in addition to the ASUS NODE connector for the fan extension board.
Switches controlling the system operating mode when pushing hard overclocks are positive additions. This is good as you don’t have to crash and rely on the dual BIOS chips for resiliency. The onboard buttons are in a good location, especially as the alternative area near the DIMM slots is highly likely to be covered by extreme cooling for enthusiast overclockers.
Two USB 2.0 headers are provided, but one of them only supports a single port, which is a bit bizarre but is fine for AIO coolers and the likes. The other header uses a single USB 2.0 chipset link and a hub to split into two connections.
Liquid cooling connectors for things like water flow sensing are found in the bottom right section. One notable omission that may disappoint some potential buyers is the lack of a Thunderbolt 3 AIC internal header.
Four full-length PCIe slots are provided with varied bandwidth allocations. From top to bottom, the slots run at x16, x8, x16, x8 with Gen 4 lanes coming from the sTRX4 CPU. I would argue that this slot layout is about as good as one can expect for a motherboard of this calibre without going for the unfavourable XL-ATX form factor.
You can do 3 cards with dual-slot coolers, although at least one will have to run at x8 bandwidth and you need an 8-slot case. With two dual-slot graphics cards, you can do x16/x16 and still have x8/x8 slots available for expansion devices such as the ASUS Hyper M.2 Gen 4 card. You can also do dual triple-slot cards, but this uses or blocks all the expansion slots.
M.2 slot 2 (the one directly above the bottom PCIe slot) shares bandwidth with the bottom PCIe slot. With an M.2 SSD installed, the PCIe slot will be limited to x4 bandwidth. As such, that would limit users to only dual graphics cards capability at reasonable bandwidth (given the slot layout), so watch out for that.
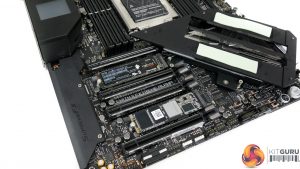
A total of five M.2 connections are available, which is highly impressive and somewhat negates the requirement of an M.2 add-in-card adapter like we see from competing solutions (that steals a valuable expansion slot). Not all of these M.2 slots can be used with SATA SSDs and some also steal bandwidth from other devices, so it is important to pick your installation wisely.
M.2 slot 1 and slot 2 sit beneath the motherboard’s expansion slot area heatsink. They are cooled by thermal pads attached to the sizeable metal plate. Installation with expansion devices already installed will be time consuming as you have to remove the cooling plate.
M.2 slot 1 (upper) and 2 (lower) run at up to PCIe Gen 4 x4 bandwidth from the Threadripper CPU lanes and DO NOT support SATA. Slot 2 shares bandwidth with the lowest PCIe expansion slot, which needs bearing in mind when deciding the best installation approach. Both slots support up to 80mm SSDs.
M.2 slot 3 (rear) sits on the back of the board and runs at up to PCIe Gen 4 x4 from the TRX40 chipset. It steals bandwidth from the 4 ASMedia-powered SATA ports and will render them unusable with a PCIe x4 SSD installed. The rear slot also has limited cooling capability as it does not have a heatsink attachment or good access to airflow, given its rear mounting. An SSD up to 80mm in length can be installed.
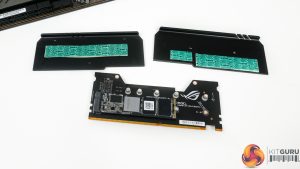
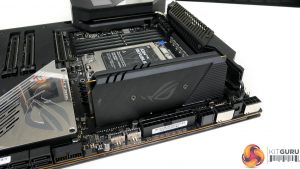
Slots 1 and 2 on the very useful DIMM.2 card support PCIe Gen 4 x4 and SATA 6Gbps connections and are fed by the TRX40 chipset. These connections do not share bandwidth with anything else on the motherboard and can therefore be used without affecting anything else.
I am particularly fond of ASUS' DIMM.2 card as it features a good cooling system thanks to its metal housing and thermal pads. This cooling potential is aided by the install position to the right of the DIMM slots which gives the add-in-card a good amount of airflow in a typical chassis configuration.
The card itself, as well as the SSDs it houses, are easy to install even after a full system build as the slot area is easily accessible and the card is easily removable. SSDs up to 110mm in length can be installed.
With a total of five M.2 connections provided, it takes some decisions as to which slots you should use in your system (unless you fill them all, of course). My personal usage would be as follows.
- Slot 1:
- Install a PCIe SSD in slot 1 first as it is easy to install when first building the system as it does not require expansion card removal as would be the case if the system was already built.
- It has good cooling and does not steal any bandwidth and it is direct CPU-fed lanes.
- Slot 2:
- Use slot 2 next for a PCIe SSD, ONLY if you are happy to run with reduced bandwidth on the bottom PCIe slot.
- It is easiest to be installed during initial system build as you need to remove expansion cards and the M.2 heatsink if your system is already built.
- It has good cooling and does not steal any bandwidth and it is direct CPU-fed lanes.
- Slot 3 (rear):
- Use slot 3 as a backup-type slot or if you have a slower M.2 SSD and will NEVER use the four ASMedia-powered SATA ports.
- It does not have active cooling so is not good for a fast SSD with sustained write operations.
- It is difficult to access the back of the board, so is not good for upgrading with a new SSD in the future when the system has been fully built.
- The slot is fed through the TRX40 chipset, so there is potential for bandwidth limitations when reaching to the CPU for data.
- I personally think that an OS SSD would be OK in this slot as it will not be pummelled with heavy, sustained write operations and you won’t physically access it regularly.
That leaves the DIMM.2 card spare. If you can deal with the bandwidth, cooling, and installation limitations of the board-mounted slots, I would be inclined to leave the DIMM.2 slots free as the install process is very simple for upgrades when a system is fully built. It is incredibly easy to install SSDs in this card and simply pop it into your system without dismantling or removing other components.
I would also use these slots if you need to install more than three SSDs (obviously) or if you do not want to deal with bandwidth sharing limitations that you get from some of the board-mounted connections. There are, however, potential bandwidth limitations if both of the chipset fed SSDs were reaching out to the CPU for data simultaneously, along with other system devices.
Given the beneficial cooling potential of the DIMM.2 card, it is also worth using these connections if you have a hot-running SSD that is regularly hit with heavy, sustained write operations.
Credit to ASUS for giving ample M.2 flexibility without forcing users to sacrifice a physical expansion slot by using an adapter card for multiple SSDs.
ASUS' SupremeFX audio system is based around the SupremeFX S1220 audio codec and uses the Realtek ALC4050H chipset to convert from the USB 2.0 connection on the chipset. You also get an ESS Sabre 9018Q2C DAC, Nichicon audio capacitors, and dedicated audio tracks.
A cool little feature is the LED illuminated audio jacks on the rear IO.
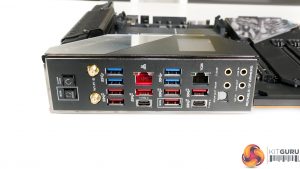
I would go as far as saying that the rear IO is pretty much perfect for a flagship, enthusiast motherboard. Obviously, you get the integrated IO shield and also the IO cover on the front of the board which houses the LiveDash OLED display.
You get ten USB Type-A ports, six of which are 10Gbps, with one of those being allocated BIOS Flashback duties. The 10Gbps run at full speed with four from the CPU and two from the chipset. No hubs or controllers are used. The 5Gbps ports, however, all run from a single 5Gbps link to the TRX40 chipset that is then split out to 4 ports via a hub chipset. This will introduce bandwidth penalties if hitting the ports simultaneously.
You get two Type-C ports, one of which runs at 10Gbps bandwidth from the TRX40 chipset, with the other operating at 20Gbps speeds via a dedicated USB 3.2 Gen 2×2 host controller.
10Gb Ethernet is provided by an Aquantia AQC107 NIC and you get the robust Intel I211AT as an addition. One could argue that the secondary NIC should be faster. I think 10G plus 1G is generally OK, though Gigabyte does opt for dual 10G via an Intel chipset. WiFi is provided by the Intel AX200 chipset and supports BT5.0 as well as WiFi6 with up to 2.4Gbps bandwidth.
Rear IO buttons for BIOS Flashback and Clear CMOS are good to see. They’re positioned far enough away from USB ports to not be pushed accidentally. You get the usual set of audio connections.
Directly on the motherboard, ASUS provides four conventional 4-pin fan headers, two of which are dedicated to CPU fan duties. You also get an additional two 4-pin headers on the right and these are referred to as W_PUMP headers thanks to their higher current output capability. They can be used as conventional fan headers, if you desire.
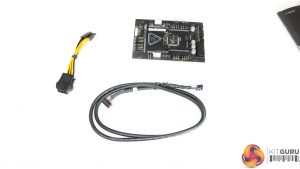
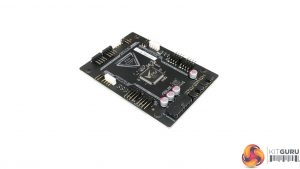
The fan extension card has an additional six 4-pin fan headers, and this makes a total of twelve headers, which is plenty even for a motherboard of this calibre. Also offered on the fan extension card are three more 2-pin thermal sensor headers in addition to the one header onboard (and the further three temperature sensor sources built into the board).
In terms of RGB, you get another three 12V RGB headers on the break-out card to add to the two 12V RGB and two 5V addressable RGB headers onboard.
Board plus add-in-card distribution of the headers is excellent as you can place the fan extension card out of the way and run all cables to it, hidden and out of sight. The card has screws that line up with a 2.5” SSD mount which is very smart from ASUS and makes installation straightforward.
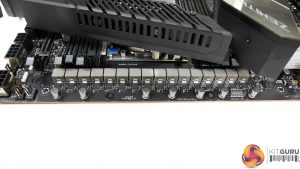
The sixteen-stage power delivery solution is built around the Digi+ ASP1405I PWM controller, which is essentially a rebadged Internal Rectifiers IR35201 which is a well-respected 8-phase solution.
You ‘only’ get eight control phases and ASUS does not use PWM phase doublers, so instead ASUS’ power stage teaming approach is used. Two of the power stages are controlled in parallel by one control signal. This eliminates the latency penalty of adding phase doublers while still giving the full current capacity of a 16-stage solution. The drawback is that you can get limited granularity compared to what more physical control phases would give you.
Gigabyte’s competing solutions, by comparison, use the Infineon 16-phase PWM controller even on the lower-end offerings. This true 16-phase controller used by Gigabyte is, on the face of it, a preferential solution compared to ASUS’ 8 control phases teamed power stage design.
The power delivery solution upgrade is the key difference between the Zenith II Extreme and the newer Alpha model. The former uses 70A power stages and the latter gets 90A treatment.
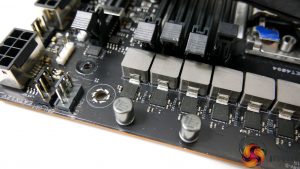
The sixteen power stages that feed a Threadripper processor are Infineon TDA21490 90A units. These are basically the best options on the market or are at least tied with the alternative 90A solutions that we have seen ASRock deploy. ASUS also deploys 10K-rated Japanese capacitors and 45A-rated chokes.
Put simply, the ASUS ROG Zenith II Extreme Alpha and its 16x90A power delivery solution is just about the best on the market for extreme overclockers pushing the current hard.
Gigabyte’s alternative approach with a true 16-phase controller is also extremely strong, but the TRX40 Aorus Xtreme’s 70A power stages cannot match ASUS’ board in terms of raw current capability. ASRock has a sixteen-stage option with 90A units, but these are based around the Intersil design spec and components as opposed to the generally preferred Infineon/International Rectifiers option for ASUS’ board.
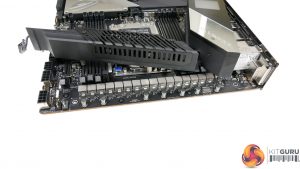
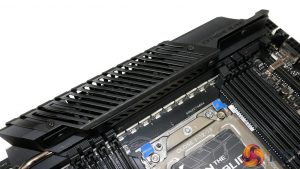
VRM cooling is handled by a sizable block of aluminium that connects via heatpipe to a secondary large slab of aluminium. I would not call the heatsink design particularly efficient as there is minimal attempt to fin the structure to improve surface area. Instead, ASUS is relying upon the thermal conductivity of aluminium and the airflow of the two 30mm fans, if necessary.
Another factor in the heatsink design may be the sheer overkill capacity of the 1440 Amps of theoretical current capability from the CPU VRM. Running at reasonable power delivery levels, these MOSFETs should not need particularly strong cooling. Pushing 500W+ through to the CPU, however, is a different story.
Pushing even high levels of current and power to the CPU will necessitate strong cooling for the power stages. But at that level it is likely that sub-zero cooling is being used, so proximity to chilled LN2 vapor will help with shifting heat away from the MOSFETs (if the heatsink is even retained in place, that is). Speaking of removing the heatsink, EKWB actually offers a Zenith II Extreme (and Alpha) monoblock that covers cooling of an sTRX4 CPU and the motherboard MOSFETs.
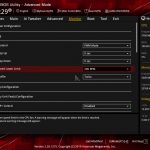
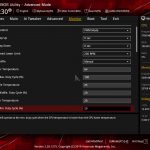
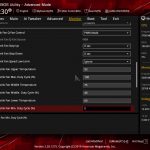
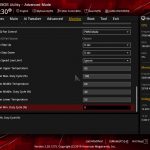
According to ASUS, the fans are custom-built Delta Superflo units with high-durability bearings that record a 60,000-hour lifespan (based on statistics for what 90% of the bearings can achieve). These dual 30mm units spin at a maximum fan RPM of around 9400 RPM within the UEFI. At this level, they are extremely loud even over an air CPU cooler. Thankfully, ASUS has good fan speed control in the UEFI. By default, the fans stay idle when VRM temperature is below 60°C.
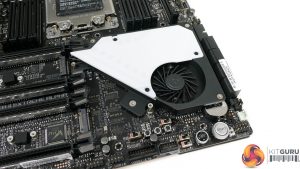
ASUS’ 40mm controllable chipset fan sits atop a metal cooling plate that features ample fins to dissipate heat from the TRX40 silicon. The fan is an open-rotor radial design that needs to force air across the well-sized fin stack in order to dissipate thermal energy effectively. Maximum RPM for the fan is around 4700 RPM within the BIOS. This level is loud but thankfully ASUS has good control options. By default, the fan does not spin at all when chipset temperature is below 55°C.
Incidental airflow for the radial fan is also routed towards the upper M.2 SSD nearby, which is a smart move by ASUS. Equally clever is ASUS’ application of a SoC power delivery component heatsink directly in the airflow path of the chipset fan.
Furthermore, positioning of the chipset fan is preferential as ASUS has made effort to position the blower as far away from a top-slot graphics card as is reasonably possible. This means that the small fan will be able to ingest air from the cool stream driven in by front chassis fans, with a lower amount of interference from the exhaust air exiting a hot graphics card cooler. Of course, that design logic is completely void if a user installs an open venting graphics card in any of the lower slots.
ASUS' ROG-themed UEFI software is the same implementation as what we saw on the ROG STRIX TRX40-E Gaming. As such, our analysis follows a similar tone and we have reused many of the UEFI screenshots from the previous review.
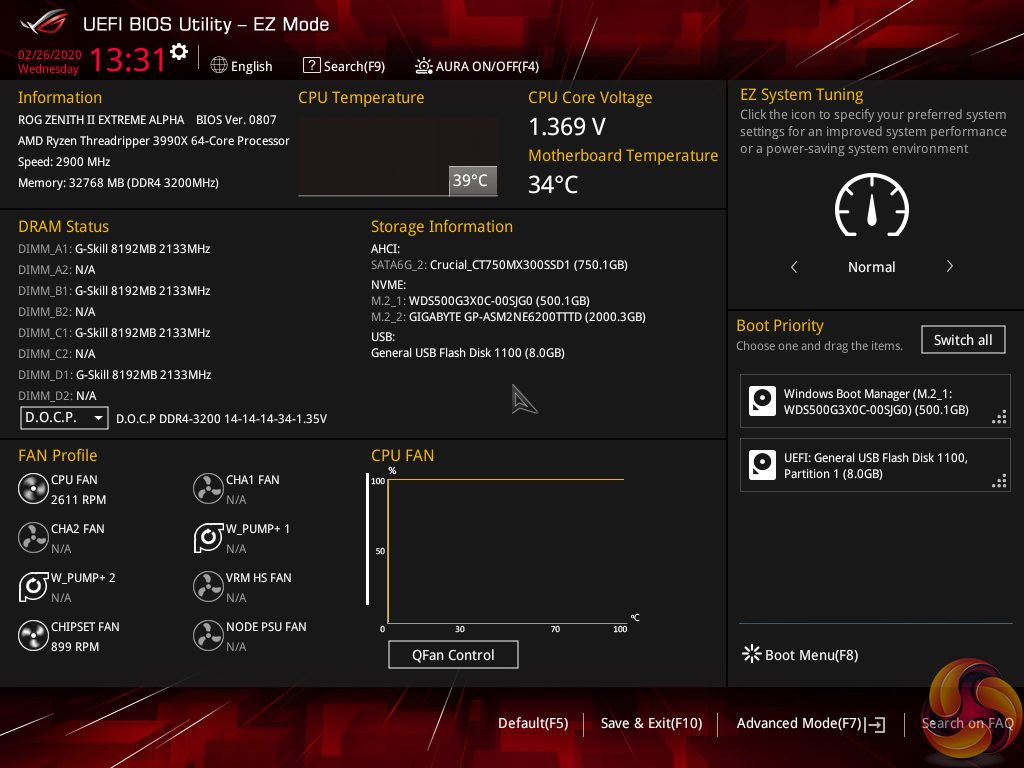
The default entry page for ASUS’ UEFI is EZ Mode. On this page, basic settings relating to fan speeds and boot devices can be adjusted and other important information can be viewed. EZ Mode is simple enough for novice users to not be dissuaded from entering the UEFI.
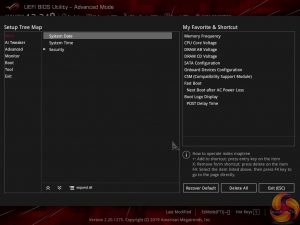
Hitting F7 allows the Advanced mode to be accessed. The Main page outlines information relating to the system and motherboard. The My Favorites tab can be convenient if you are frequently searching for a setting buried deep within the UEFI.
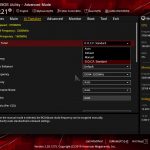
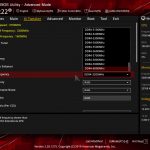
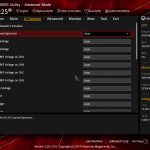
AI Tweaker follows the standard layout that we have come to expect from recent ASUS motherboards, and that’s a good thing. Easy access is provided to ratio, frequency, and voltage settings, allowing users to adjust their system parameters with minimal effort.
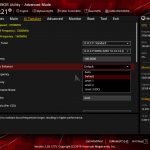
Different voltage operating modes are available for the CPU, allowing the user to adjust an overclock to their own preference. The modes of interest are: Offset, Manual, and Auto.
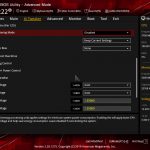
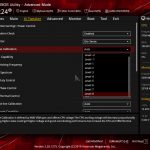
Load-line calibration (LLC) settings can be accessed through the Digi+ VRM page. ASUS provides options over multiple levels but gives no explanation of how the LLC levels work. This is frustrating as we had to resort to trial and error in order to find the desirable LLC level, which was a waste of time compared to competing vendors’ solutions of including a clear graph.
The Advanced tab is where options relating to storage and onboard devices can be adjusted.
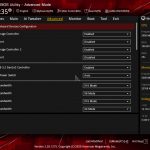
Under the Onboard Devices page, operation mode of the PCIe 4.0 slots can be adjusted and the bifurcation can be set. This subsection also provides an option for the onboard RGB lighting to be enabled or disabled during sleep and power-off modes.
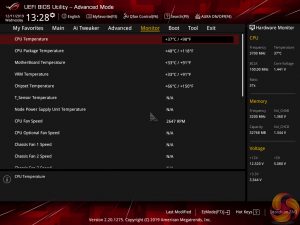
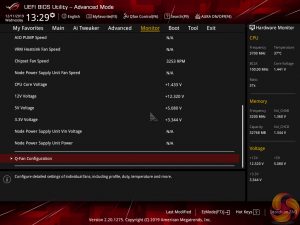
ASUS gives a wealth of information relating to voltages, temperatures, and fan speeds, as displayed in the Monitor UEFI page. Warnings relating to low fan speed can also be set to warn a user of a failed fan, for example.
Fan speed control in ASUS’ UEFI is very good. There are multiple methods of controlling the fan speed curve and several pre-determined modes are also available. Fans can also take temperature readings from different sources in order to better tune their operation to a user’s cooling preference.
Hitting F6 loads up ASUS’ Q-Fan Control GUI which is a graphical method of adjusting the fan speed curve. All fan headers are given control in Q-Fan by using a 3-point curve. The CPU fan header is given the greatest flexibility as the minimum fan speed it supports is 20%. The non-CPU headers can only go to 60% as their minimum fan speed setting in PWM control mode.
There is, however, a Fan Off setting for the non-CPU fans that allows them to power down when the relevant temperature conditions are met. While this is a useful feature in theory, I have previously seen fans succumbing to motor twitch in this mode, and the jump from 0% speed to 60% is generally audible.
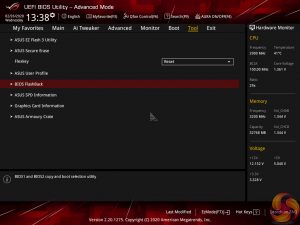
The Tool section is home to ASUS’ useful features, such as Secure Erase and EZ Flash 3 Utility.
EZ Flash 3 has the ability to update the BIOS using a storage device or over the web. Up to eight settings profiles can be saved and named in the UEFI. Further profiles can be transferred through storage mediums such as a USB flash drive.
SSD Secure Erase is a useful tool for securely wiping the contents of an SSD if you are selling it on, for example. There is also the possibility that wiping the data will restore performance, though this was more prevalent with older SandForce drives.
GPU Post and ASUS SPD Information can be useful in troubleshooting scenarios such as identifying dead or disconnected hardware without tearing one’s system apart.
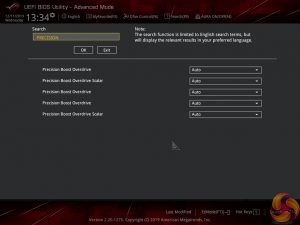
The search function is useful for quickly jumping to specific sections. ASUS gives quick access to a toggle that allows the AURA LED mode to be adjusted.
AI Suite 3 is the go-to point for any settings or information relating to system operations. Want to check temperatures and voltages or adjust multipliers for the CPU and speeds of fans? AI Suite 3. Want to speed up certain programs or reduce the amount of RAM-hogging operations on your system? AI Suite 3. Want to check for a BIOS update? AI Suite 3.
The fan control abilities within AI Suite 3 are similar to those found within the UEFI. One of the key differences here is the ability to tie fan speed curves to positions within one's system build, which is especially useful if you have a large number of fans.
You also get the flexibility of being able to manually tune the fan speeds and their curve whilst the system is in operation. It is good that you do not have to jump back into the UEFI if your current system usage switches from simple Word document typing to more demanding video editing or gaming, for example.
GameFirst V can be used to prioritise network traffic in a similar fashion to Killer’s Network Manager software, but whilst using a non-Killer NIC. For example, higher priority can be set to Steam or a game than a web browser in order to prioritise traffic and minimise lag during gameplay.
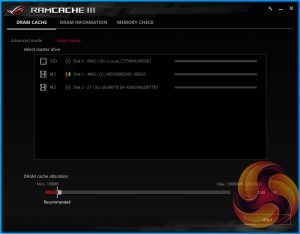
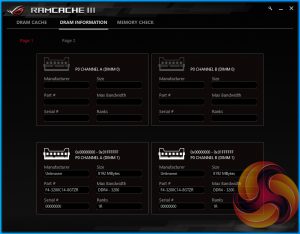
RAMCache III uses free system memory to act as a read/write cache on top of a storage drive (including NVMe SSD) that allows for faster access to frequently used data. This can have a benefit of speeding up frequently accessed programs. This is a smart tool which makes use of a user-determined amount of system memory that would otherwise be sat idle.
ASUS’ AURA RGB tool is a very comprehensive piece of software used for managing the colours and operating parameters of onboard and connected LEDs. LED operating modes can be synchronised with other compatible hardware or managed for the motherboard alone.
I particularly like the CPU temperature mode that changes the light colour based on processor thermals. The thresholds can be adjusted so that green stays present for longer or red is activated quicker. It was, however, noticeable how slow the LED colour would change when a load was applied. This is due to the lag in temperature readings through AI Suite 3 (the software tool that is used to drive AURA‘s temperature readings).
Integration with Philips Hue lighting is a particularly useful feature within AURA.
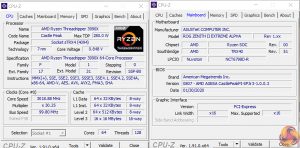
We will be outlining the ASUS ROG Zenith II Extreme Alpha motherboard’s performance with the AMD Ryzen Threadripper 3990X CPU, 32GB of 3200MHz DDR4 memory, and an Aorus RTX 2080 Ti XTREME graphics card.
TRX40 Motherboard Test System:
- Processor: AMD Ryzen Threadripper 3990X.
- Memory: 32GB (4x8GB) G.SKILL 3200MHz CL14 DDR4 @ 1.35V.
- Graphics Card: Gigabyte Aorus RTX 2080 Ti XTREME 11G (custom fan curve to eliminate thermal throttling).
- System Drive: WD Black SN750 500GB.
- Test SSD: Gigabyte Aorus PCIe Gen 4 2TB.
- Games SSD: Crucial MX300 750GB.
- CPU Cooler: Cooler Master Wraith Ripper (full speed fans to minimise thermal throttling).
- Power Supply: Seasonic Prime TX-1000 80Plus Titanium 1000W.
- Operating System: Windows 10 Pro 64-bit 1909 Update.
Drivers and UEFI:
- ASUS ROG Zenith II Extreme Alpha BIOS 0807 [AGESA 1.0.0.3] (latest at the time of testing).
Comparison Motherboards:
- MSI TRX40 Creator (BIOS 1.32N1).
Tests:
- Cinebench R20 – All-core & single-core CPU benchmark (CPU), Stress test (Temperatures & Power Consumption)
- Blender 2.81a – All-core rendering of the BMW and Classroom benchmark (CPU), Stress test (Temperatures & Power Consumption)
- 7-Zip v19 – Built-in 7-Zip benchmark test (CPU & Memory)
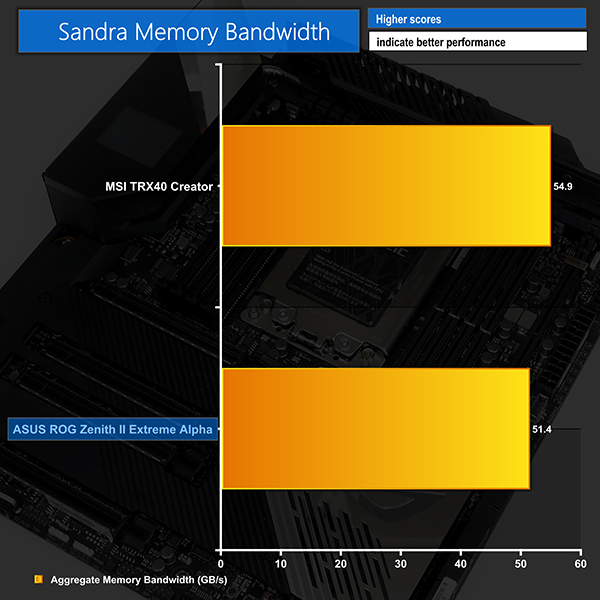
- SiSoft Sandra – Memory bandwidth (Memory)
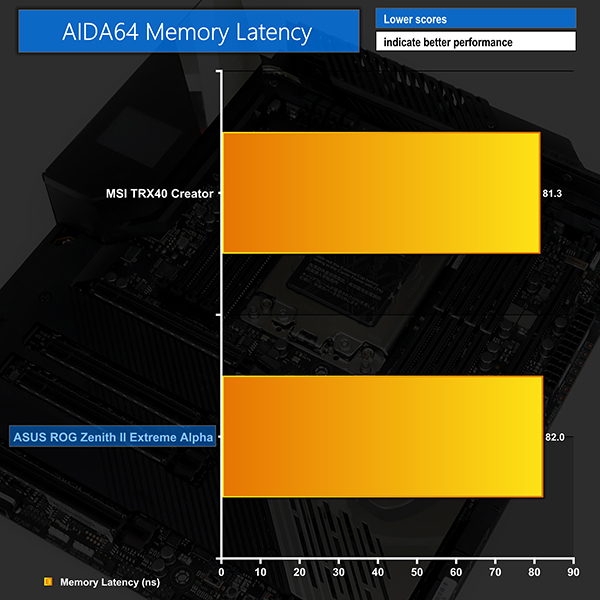
- AIDA64 – Memory bandwidth, memory latency (Memory)
- 3DMark TimeSpy – Time Spy (1440p) test (Gaming)
- The Division 2 – Built-in benchmark tool, 1920 x 1080, Ultra quality preset, DX12 version (Gaming)
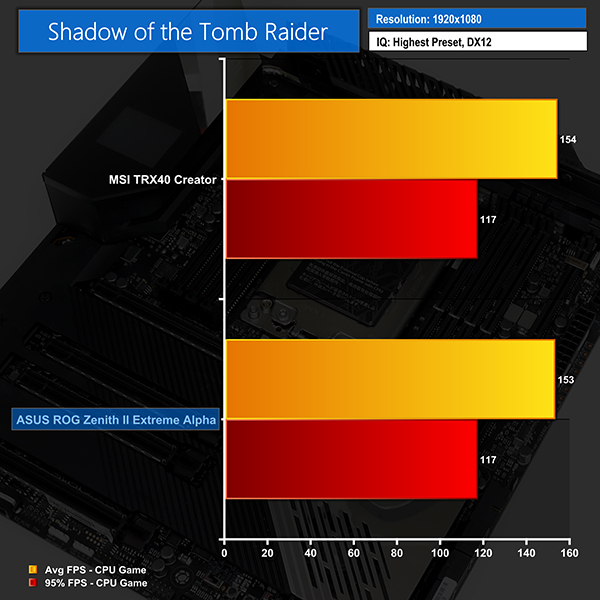
- Shadow of the Tomb Raider – Built-in benchmark tool, 1920 x 1080, Highest quality preset, no AA, DX12 version (Gaming)
- CrystalDiskMark– Storage transfer rates (Motherboard)
- Rightmark Audio Analyzer – Record and playback test using a line-in to line-out loopback with a 3.5mm audio cable (Motherboard)
- HWiNFO – System sensor monitoring during stress test (Temperatures & Power Consumption)
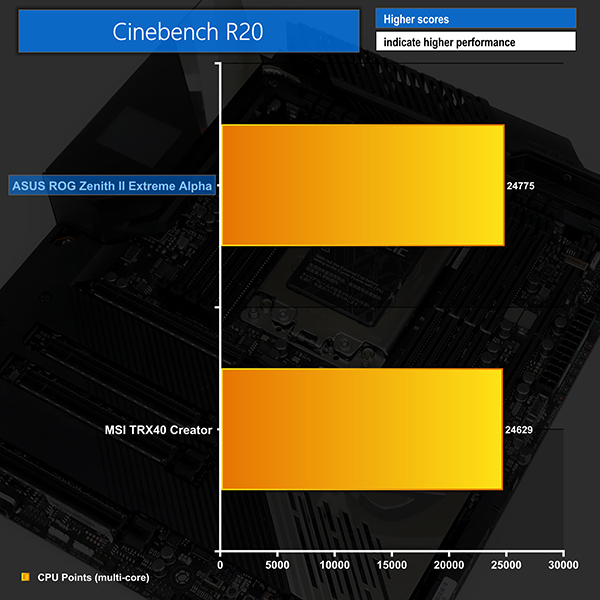
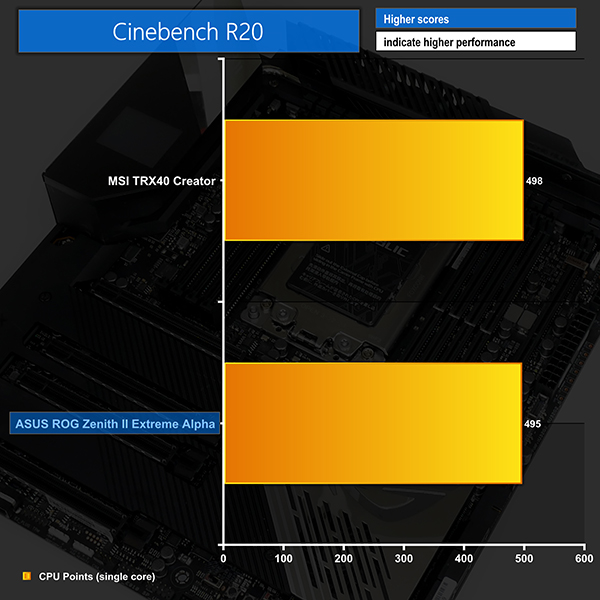
Cinebench R20
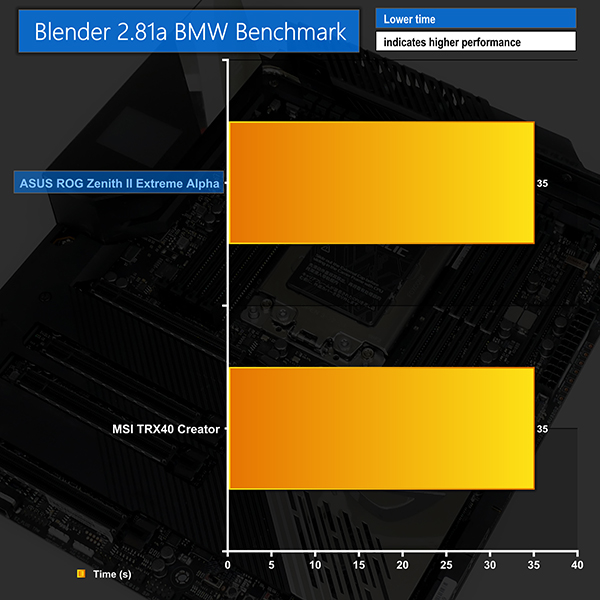
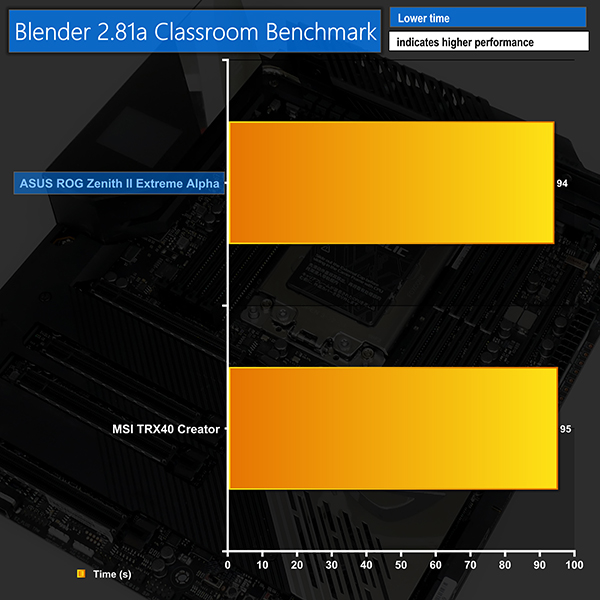
Blender BMW & Classroom Benchmarks
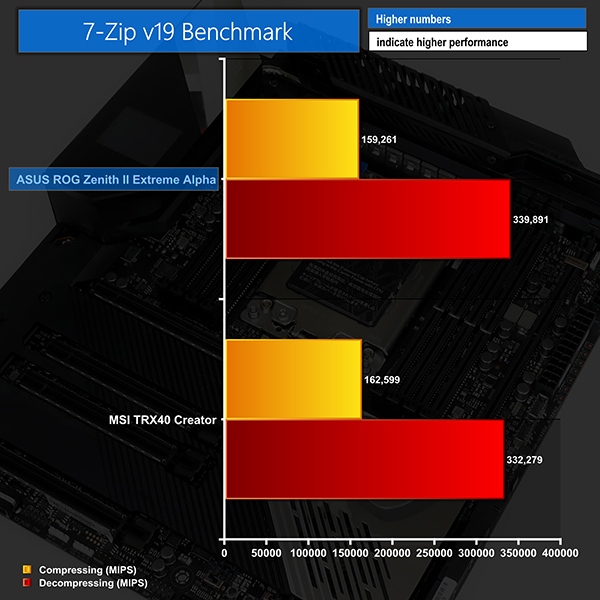
7-Zip
CPU-related performance from the ROG Zenith II Extreme Alpha is very competitive against MSI’s flagship TRX40 Creator. Cinebench is a little faster on the ASUS board for nT but is very slightly slower in 1T mode. Realistically, these numbers are close enough to call performance roughly a draw.
The same can be said for Blender in both the BMW and Classroom tests. The latter sees ASUS winning by 1 second, but that victory is largely due to numerical rounding of the recorded results. Add in 7-Zip results, which do differ slightly based on memory performance differences and the affinity towards bandwidth and latency for each test, and we still see more-or-less a performance draw.
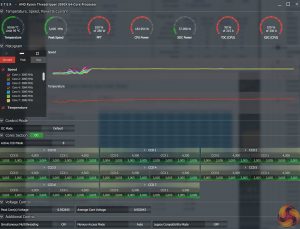
All-core CPU frequency from the ASUS motherboard powering our 64-core Threadripper 3990X averages around 3.0-3.1GHz in Cinebench R20 nT and around 100MHz lower in Blender’s longer Classroom run. Maximum boost clocks of 4.3GHz were shown using Cinebench 1T, implying that ASUS’ current BIOS and AGESA revision are working fine.
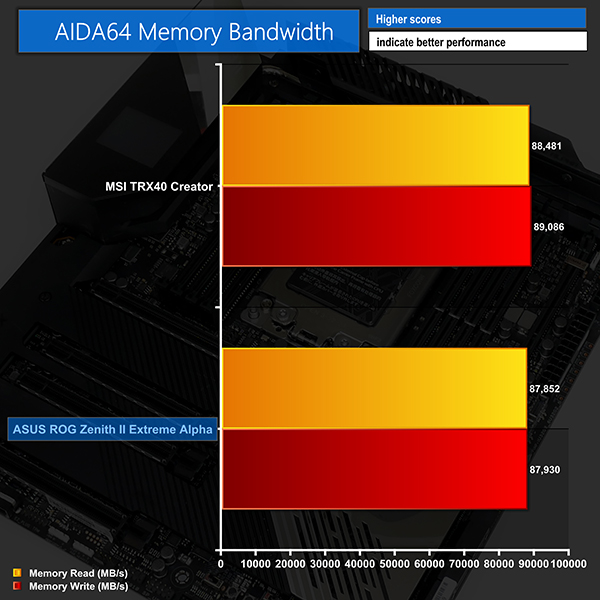
AIDA64 Engineer
Sandra Memory Bandwidth
Memory bandwidth numbers shown by the ASUS ROG Zenith II Extreme Alpha are not as high as the figures from MSI’s competitor. That result holds true in both SiSoft Sandra and AIDA64 testing.
ASUS also loses out in our AIDA64 memory latency test, so we will have to see if any of the further results are affected.
3DMark
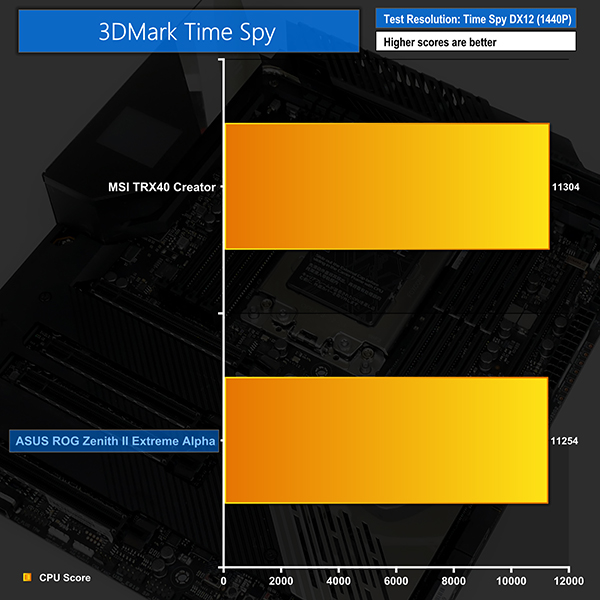
3DMark is a multi-platform hardware benchmark designed to test varying resolutions and detail levels of 3D gaming performance. We run the Windows platform test and in particular the Time Spy benchmark, which is indicative of high-end 1440p PC Gaming.
The Division 2
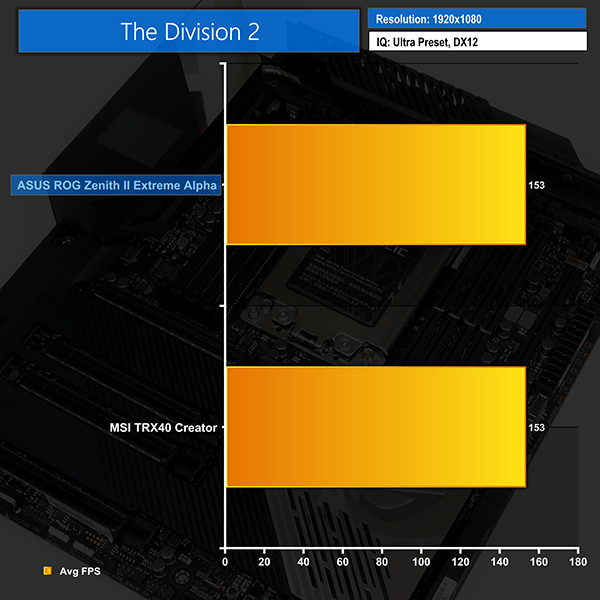
We use the game’s built-in benchmark with quality set to Ultra, VSync disabled, and DX12 mode.
Shadow of the Tomb Raider
We run the built-in benchmark using the DirectX 12 mode, anti-aliasing disabled, and the Highest quality preset.
Gaming performance is competitive on the ASUS motherboard and is practically level with the figures shown by MSI’s TRX40 Creator. A slight lead is shown for the MSI offering in both Shadow of the Tomb Raider and 3DMark Time Spy, but I don’t see this difference as large enough to create cause for concern.
Nevertheless, it’s worth factoring in if you are a benchmarker who is keen on pushing for records in the likes of 3DMark.
M.2 PCIe Performance
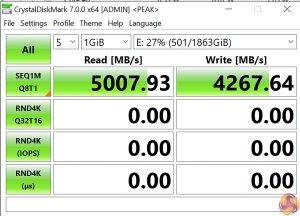
We test M.2 PCIe performance using an Aorus PCIe Gen 4 2TB SSD. This SSD uses a Phison-based PCIe Gen 4 controller.
Using the board-mounted M.2 slot, performance from our PCIe Gen 4 SSD is right where we would expect it to be at 5GBps peak.
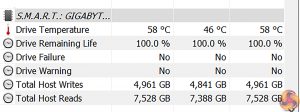
ASUS’ cooling solution, which is effectively an oversized slab of metal with a thermal pad, has no problem keeping our speedy M.2 SSD cooled. We stayed below 60°C throughout the CrystalDiskMark run.
SATA 6Gbps Performance
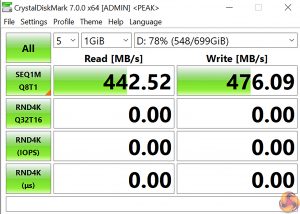
For SATA 6Gbps testing we use a Crucial MX300 750GB SSD.
SATA performance looks perfectly fine for the onboard connections.
Audio
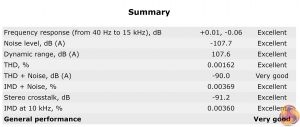
Rightmark Audio Analyser is a freeware benchmarking utility designed to objectively test the performance characteristics of audio solutions. We setup a line-in line-out loop and execute the record/playback test before generating the results report you see below. A sampling mode of 24-bit, 192 kHz was tested.
Rightmark Audio Analyser rates the ASUS audio system as ‘Very Good’, with most of the categories scoring as ‘Excellent’.
CPU Overclocking:
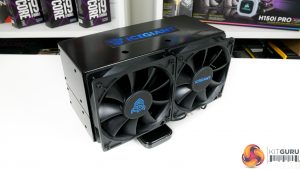
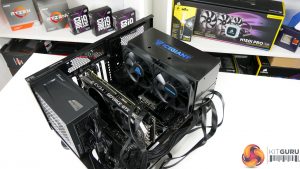
Overclocking with the Ryzen Threadripper 3990X 64-core CPU truly is a battle of how much heat your cooling solution can deal with. As such, we switched to the ludicrously capable IceGiant Prosiphon Elite prototype cooler that comfortably outperforms our Cooler Master alternative.
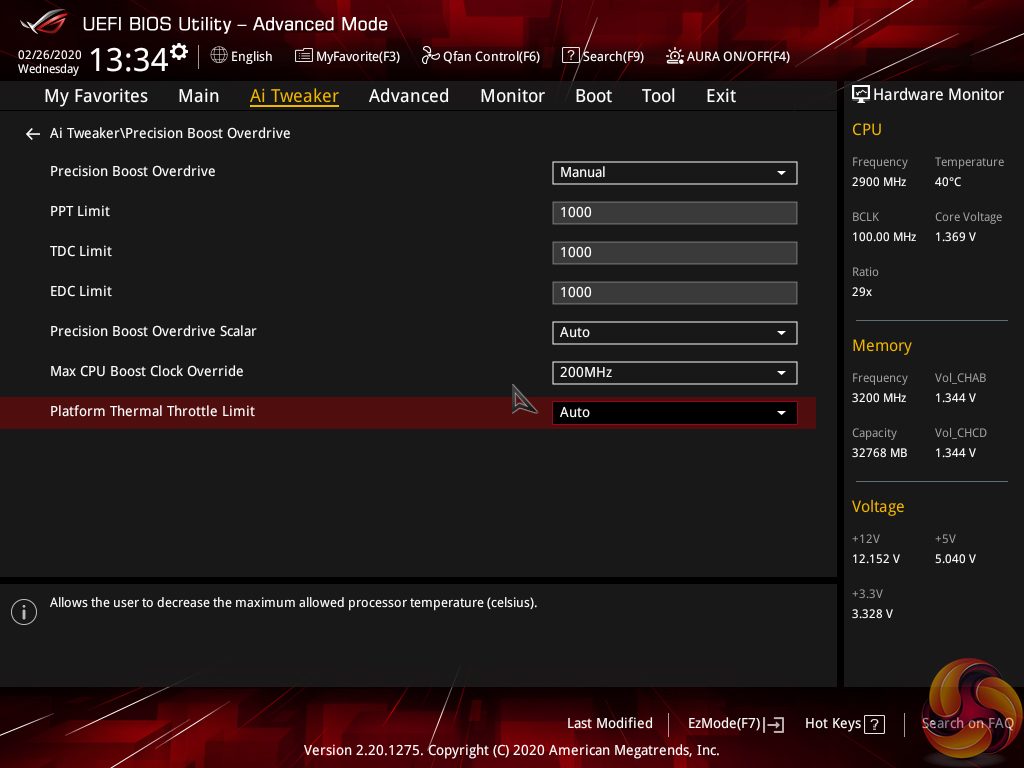
Using Precision Boost Overdrive with the budgets set to 1000A, 1000A, and 1000W, we checked how far the chip could push while the cooling solution maintained stable operating temperatures.
Fundamentally, this is very similar to a manual overclocking technique, which we know most of this motherboard’s buyers will be interested in. The key difference is that the proficient Precision Boost Overdrive algorithm is simply doing the overclocking work for us until the CPU cooler and/or motherboard and CPU can take no more.
Pushing the system with back-to-back Cinebench R20 nT runs as the stress test, the ASUS ROG Zenith II Extreme Alpha and IceGiant Prosiphon Elite CPU cooler prototype managed to hold the CPU at a stable frequency of just over 3.8GHz after 30 minutes of loading.
The CPU package power draw peaked at around 650-700W, according to software, and wall readings were around the mid-800W mark in general with peaks as high as just under 900W. Clearly, ASUS’ choice of power delivery components is smart and well-implemented. That’s proven when shifting over 600W through the VRM system seems to be of little hassle.
I would say that just over 3.8GHz for extended, CPU-heavy operation from the 3990X CPU is a very healthy result for the ASUS ROG Zenith II Extreme Alpha motherboard. Yes, users with more exotic cooling will be able to manually push further. But the benefits of PBO from a stability and boost clock perspective, combined with the lofty all-core frequency thanks to excellent power delivery, make this a good result.
Motherboard Sensors
ASUS provides a solid set of onboard monitoring readings. Values such as VRM and PCH temperatures and fan speeds are clear, though you don’t get readings from the likes of PCIe slot areas, as you do with Gigabyte competitors.
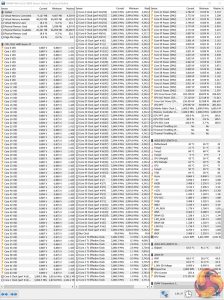
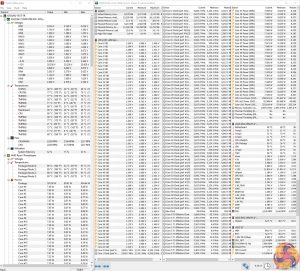
The VRM heatsink fans reading drops in and out as the fans either shut off or spin up. The fans seldom need to ramp up during stock 280W CPU package usage. However, the pair of small blowers are worked hard when the VRM is shifting immense amounts of power through to the CPU in its frequency boosted PBO state.
Overclocked Performance
Feeding the 3990X CPU with enough power for it to run consistently and stably at around 3.8GHz allows Cinebench R20 nT scoring to be increased to around 30,000 points. That’s an immense score, even if it is helped by a $4000 CPU.
After 30 minutes of constant back-to-back multi-threaded runs, the Cinebench R20 score dropped to around 29,700 points. A reduction of only around 1% from 10 minutes of run time to 30 minutes of run time highlights the ASUS motherboard’s ability to cool the VRM effectively, allowing them to continuously deliver high levels of current.
System Power Consumption
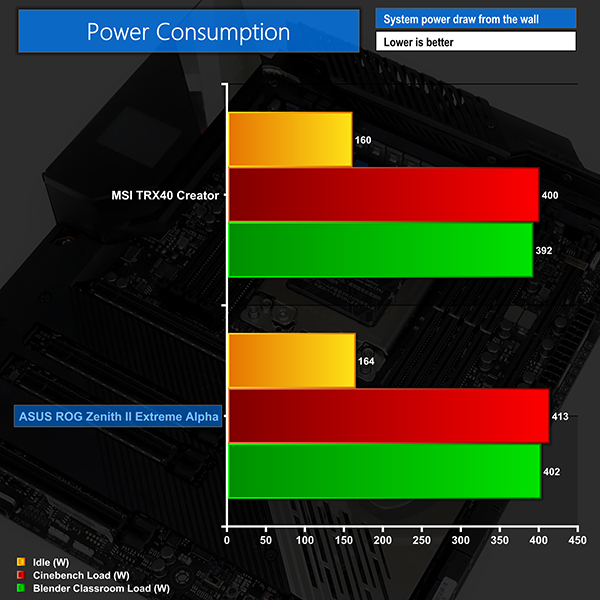
We leave the system to idle on the Windows 10 desktop for 10 minutes before taking a reading. For CPU load results we run Cinebench R20 nT and Blender Classroom stress tests and take a reading. The power consumption of our entire test system (at the wall) is shown in the chart.
ASUS uses reasonable stock voltage levels and therefore maintains the Threadripper CPU’s 280W package power. The overall system power when the CPU is pushed hard is around 10W higher than MSI’s competitor. It would not be unreasonable to assign those 10 Watts to ancillary components, such as the RGB lighting, additional fans (if active), and onboard controllers.
As we have already noted, even pushing around 600-700W of package power to the 3990X CPU when overclocked, the overall power delivery system in ASUS’ ROG Zenith II Extreme Alpha motherboard held strong.
We saw peak wall power readings hit around 900W; almost 1kW of power for the ASUS motherboard to manage is a huge figure but the job was done well.
System Temperatures
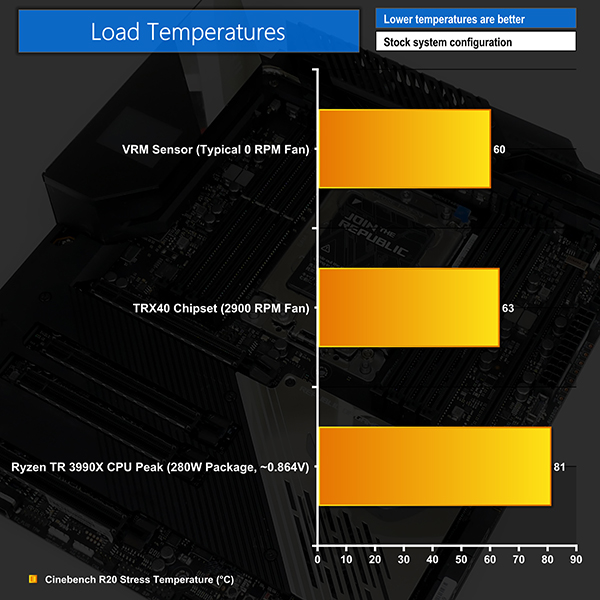
We run the Cinebench R20 nT test on loop for 1 hour while recording the system data using HWInfo. This data is then analysed to show the CPU temperatures and also the VRM MOSFET temperatures, when the sensor data is available.
ASUS’ overall VRM design is superb. Sixteen high-current power stages combined with an overbuilt and actively cooled heatsink make for an excellent combination. The cooling does a good job at keeping power stage operating temperatures in check and this in turn helps their efficiency. Looping back around, that better efficiency helps to keep thermals in check, and the cycle repeats.
At stock, the VRM sensor hit a maximum of around 60°C and therefore never forced the fan to ramp up by any meaningful amount. Clearly, a 280W CPU package load is easy pickings for this motherboard’s calibre of power delivery system.
Overclocking pushed the VRM temperature way past 60°C within a few minutes of load being applied. With the IceGiant CPU cooler applied and around 600-650W CPU package power being delivered, the VRM sensor reading was just below 90°C with the fans running at around 7000 RPM. While an undeniably high fan speed and operating temperature were recorded, pushing that much power through an air-cooled system is a tough task but ASUS’ motherboard holds up very well.
Chipset cooling was perfectly fine with the temperature running in the mid-60s using a perfectly tolerable fan speed of around 3000 RPM. The Ryzen Threadripper 3990X peaked at 81°C in Cinebench R20 nT back-to-back runs using the Cooler Master Wraith Ripper CPU cooler. This number is a peak level as the frequency quickly clocks down when all cores are loaded, and the settling temperature is closer to 65°C at that point.
There really is very little to say about the ASUS ROG Zenith II Extreme Alpha motherboard because there really are so few areas where the board disappoints. You get arguably the best power delivery solution on the market, five M.2 connectors, a 1.77” OLED display, there’s 10 Gigabit Ethernet and high-speed WiFi, and ASUS’ UEFI implementation is as strong as ever.
Perhaps the only slight negatives I can point my finger towards are the large E-ATX sizing, but this is a necessary evil to fit so much hardware onboard and it’s certainly easier to deal with than XL-ATX. You don’t get a multi M.2 SSD add-in-card adapter like with competing solutions, but ASUS’ board supports five drives natively, which is a better outcome in my opinion. And the current retail price of £900 is ludicrous, but that’s expected for a flagship product on the TRX40 platform.
On the positive side, ASUS’ power delivery solution was superb and pushed our 64-core 3990X as far as the CPU cooling solution could take it. The VRM cooling of the motherboard also proved competent by managing well over 600W of power delivery to the CPU for extended time periods.
The fans did ramp up heavily and we recorded MOSFET temperatures that were closer to 100°C than we’d have liked. But, in context, this is a strong result that lesser calibre motherboards would struggle to achieve.
I must also highlight my particular fondness for ASUS’ VRM and chipset fan control capabilities. The VRM fans stays passive below 60°C, which is actually quite difficult to reach without overclocking a Threadripper chip. That keeps the relatively loud 30mm blowers quiet for a majority of one’s usage and also extends their lifespan. The chipset fan stops below 55°C, though the TRX40 chipset is more susceptible to heating up quickly, as we have seen from X570. Thankfully, the chipset fan was not intrusive and did a solid cooling job.
While ASUS’ control for the onboard fans on the motherboard is strong, the overall fan control abilities in the UEFI for system fan headers is not as strong as Gigabyte’s competing solution. ASUS does, however, include the functionally useful fan extension board that adds further temperature sensor and RGB lighting capability.
£900 is a hard-to-swallow asking price, even for a flagship TRX40 motherboard that could be paired with a market-leading 64-core CPU that is just shy of £4000. With that said, it is really difficult to see how anybody purchasing this motherboard could wish for any more. Yes, another high-speed NIC would have been welcomed, like we see from Gigabyte, or some degree of Thunderbolt 3 support would also be good.
But overall, we think that the ASUS ROG Zenith II Extreme Alpha ticks a vast majority of the boxes that deep-pocketed enthusiasts, prosumers with demanding workstation tasks, or hardened overclockers with lofty goals could wish for. Expensive, but perhaps good value if you can indeed make use of the vast array of features and capabilities offered.
The ASUS ROG Zenith II Extreme Alpha is priced at £900 (at the time of writing) at Overclockers UK HERE.
Discuss on our Facebook page, over HERE.
Pros:
- Excellent choice of features and well-built, high-quality design.
- Market-leading power delivery solution.
- LiveDash OLED screen is novel and useful.
- Strong VRM cooling capability.
- Five M.2 connections without stealing expansion card slots.
- Smart inclusions for overclocking enthusiasts – onboard buttons, voltage check points, dual BIOS chips.
- Strong BIOS stability and plenty of useful UEFI options.
Cons:
- An additional high-speed NIC would have been welcomed by prosumer enthusiasts.
- E-ATX design is more straightforward than XL-ATX but limits multiple graphics card capability.
- £900 in the UK currently!
KitGuru says: A flagship product in every sense of term. There really is very little to complain about with the ultra-enthusiast ASUS ROG Zenith II Extreme Alpha, other than its £900 current price, of course.
 KitGuru KitGuru.net – Tech News | Hardware News | Hardware Reviews | IOS | Mobile | Gaming | Graphics Cards
