ASUS X299 UEFI
The UEFI used for ASUS' X299 motherboard is almost identical to that found on the Z270 counterparts. As such, we have re-used the bulk of our analysis from the Z270 reviews and updated the text where there are subtle differences.
Firstly, we are pleased to report that our generic wireless mouse worked in the ASUS X299 UEFI. Some mice can be troubling with UEFI support, so when a generic wireless unit functions correctly in the interface, that is usually a good sign for overall mouse support.
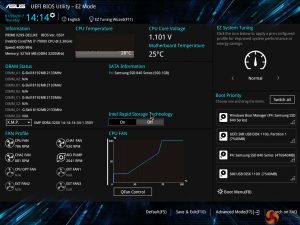
The default entry page for ASUS’ UEFI is EZ Mode. On this page, basic settings relating to fan speeds and boot devices can be adjusted and other important information can be viewed. EZ Mode is simple enough for novice users to not be dissuaded from entering the UEFI.
Hitting F7 allows the Advanced mode to be accessed.
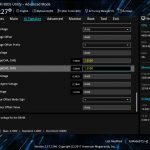
AI Tweaker follows the standard layout that we have come to expect from recent ASUS motherboards, and that’s a good thing. Easy access is provided to ratio, frequency, and voltage settings, allowing users to adjust their system parameters with minimal effort.
Different voltage operating modes are available for the CPU, allowing the user to adjust an overclock to their own preference. Subsections provide users with additional overclocking abilities – External Digi+ Power Control is the focal point.
Load-line calibration (LLC) settings can be accessed through the External Digi+ Power Control page. ASUS provides options from level 1 to level 8 and gives a basic explanation of how LLC works. However, ASUS’ explanation of how voltage changes with load is not as good as MSI’s and ASRock’s visual interpretation using a graph. We had to resort to trial and error in order to find the desirable LLC level, which was a waste of time compared to competing vendors’ solutions.
Memory dividers allowing up to 4400MHz can be selected in the drop-down tab. All of the general timings settings are accessible via their own section.
A colour system to warn users when voltages are safe, borderline, or too high is one of the biggest strengths for ASUS' UEFI.
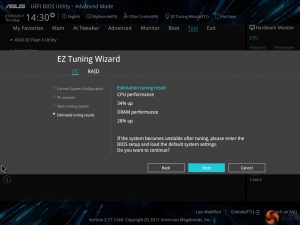
The EZ Tuning Wizard has an ability to increase system speed for novice users. We would recommend manual overclocking with Skylake-X in order to meet your chip’s specific requirements. We expect that users purchasing this calibre of motherboard will indeed be doing their own overclocking.
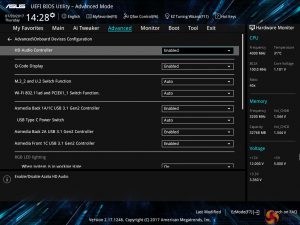
The Advanced tab is where options relating to storage and onboard devices can be adjusted.
Under the Onboard Devices page, operation mode of the M.2 slot can be adjusted in order to get the correct operation. This subsection also provides an option for the onboard RGB lighting to be enabled or disabled during sleep and power-off modes.
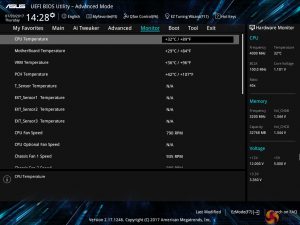
ASUS gives a wealth of information relating to voltages, temperatures, and fan speeds, as displayed in the Monitor UEFI page.
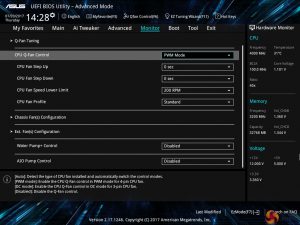
Fan speed control in ASUS’ UEFI is very good, though it is clear that ASUS would prefer you to use the Q-Fan Control option for setting up custom speed curves.
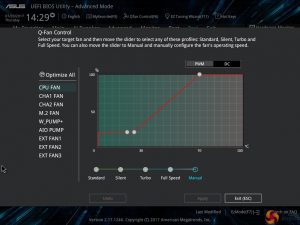
Hitting F6 loads up ASUS’ Q-Fan Control GUI which is a graphical method of adjusting the fan speed curve. Speed curves can be selected and configured for PWM and DC fans.
While the interface is good, it certainly isn’t as strong as Gigabyte’s Smart Fan 5 system which has more granular tuning and better control over temperature relations from motherboard sensors.
EZ Flash 3 has the ability to update the BIOS using a storage device or over the web.
SSD Secure Erase is a useful tool for securely wiping the contents of an SSD if you are selling it on, for example. There is also the possibility that wiping the data will restore performance, though this was more prevalent with older SandForce drives.
Up to eight settings profiles can be saved and named in the UEFI. Further profiles can be transferred through storage mediums such as a USB flash drive.
UEFI Summary:
ASUS’ overall UEFI is good. The interface is very well laid out, easy to use, and provides plenty of options for system tweaks relating to speeds and voltages. With that said, ASUS seems to be missing out on some updates that competing vendors are providing to bring their UEFI implementations more in-line with the requirements of today.
For example, there is no solution similar to System Browser or Board Explorer, as ASRock and MSI term them, respectively. Such a tool is convenient for basic troubleshooting, such as checking which USB port an external drive is connected to when your system is built and operational (which is relevant given the speed difference between ASMedia and alternative ports).
Another important omission from ASUS’ UEFI is any form of RGB lighting colour or operating mode control. Gigabyte has a tool that allows basic control of the board’s RGB lighting colour without relying solely on OS-based software. While the OS software is far more comprehensive than a UEFI solution, the UEFI option has the benefit of maintaining its operating settings in the event of an OS crash or clean install. And that’s not even accounting for users who simply refuse to install any vendor-specific software that will take up system resources (that UEFI-based control would not do). ASUS should implement some level of RGB LED control in its UEFI.
With that said, stability of the error-free UEFI is superb and fan control is also good thanks to each header’s ability to control PWM or DC fans.
 KitGuru KitGuru.net – Tech News | Hardware News | Hardware Reviews | IOS | Mobile | Gaming | Graphics Cards







Awesome review…..but my heart leapt when I saw the Air 540, I still mourn the day I sold it, I can still see it leaving my street in the back of the guys car. Goodbye little ‘Sugercube’ I still miss you.
PCIE slot placement has always been a thing for ASUS or at least on every board I’ve ever owned, I remember not being able to SLI because a gpu fouled all of the headers on the bottom of the mobo a few years back. Did you try the 5 way optimisation ; ) I’m just curious knowing how generous it can be with voltages, you will get some customers who click it and just trust it knows what its doing.
“Positioned close to the 24-pin is one of the board’s two M.2 connectors. This PCIe 3.0 x4-only slot is mounted to allow for vertical orientation of an installed M.2 device. A support bracket and screws are included. Vertical mounting is good for putting the device in a direct airflow path, while also minimising the footprint taken up on the board PCB”. – Yup and is all the worst way to put one and will get snapped by any wandering hands of if some one mounts a DVD rom’s that are to log for the slot (yes ppl still use DVD roms).