Automatic CPU Overclocking:
Asus has a number of methods for overclocking the system with little user input. These methods range from dedicated clock speed presets to tuning based on your usage patterns or hardware's ability. We will take brief look at the automated overclocking options that Maximus VIII Impact buyers are most likely to opt for.
EZ Tuning Automated Overclocking Wizard
The UEFI-based EZ Tuning wizard asks a number of questions relating to your system usage and its cooling performance. Based on these responses, an appropriate boost to the CPU and memory clock speeds is applied.
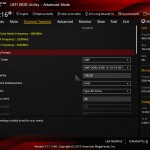
We selected the usage option as gaming and the cooling option as watercooling (as this releases Asus' highest performance tuning, and our Noctua NH-D14 is a capable unit). The system applied a 435MHz boost in CPU frequency by way of a multiplier bump to 45x and a 103MHz BCLK.
The increased BCLK also meant that the CPU Cache frequency was raised, as was the memory speed. That last point was important because the 96MHz boost on our Corsair Vengeance LPX 3200MHz sticks resulted in system instability. Disabling XMP and then re-tuning the system was a necessitated solution.
Asus' applied settings seemed fine until a load was put through the system. Rather than apply a manual voltage for the CPU, Asus left the board to automatically apply a voltage. This resulted in 1.472V being delivered under load, which is about 70mV higher than I would be happy putting through a 6700K on a daily basis.
1.472V under load is really pushing the upper limit of what even enthusiast overclockers with high-end, custom-loop watercooling configurations will put through their Skylake chips. A lower clock speed and more sensible voltage level should be applied, especially when considering that the audience for automated overclocking tools may not know the risks of running a Skylake chip at 1.472V for extended periods of time.
Gamers' Overclocking Preset
The Gamers‘ overclocking preset applied a dynamic overclock on the CPU that ranged from 4.8GHz for a single-core workload to 4.5GHz when all four cores were loaded. The CPU Cache was also overclocked to 4.5GHz, however the memory's XMP profile was disabled and set to operate at the default 2133MHz frequency – a significant downgrade.
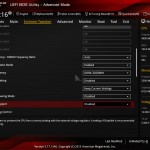
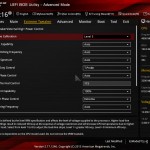
Additional power settings were tweaked, including setting the LLC to Level 7 and increasing the CPU's current capability by 40%.
While the overclock was perfectly stable and the per-core frequencies worked well, the CPU voltage for a four-core load was once again on the high side. 1.456V being delivered for a 4.5GHz CPU frequency is over-the-top for a 6700K CPU.
Many chips will reach 4.5GHz with a significantly lower core voltage. Equally so, many users will not be happy to see over 1.45V being pushed through their 14nm processor that may be tasked with many years of duty.
Back to the drawing board on this one, Asus.
OS-based 5-Way Optimization Overclocking
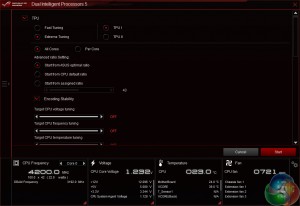
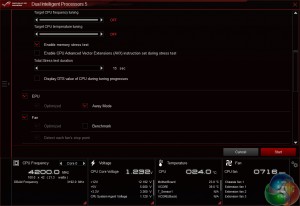
The OS-based 5-Way Optimisation tool found in Asus' AI Suite software allows a number of parameters to be set before overclocking tuning begins. Asus gives users plenty of flexibility for the system to be tuned to a clock speed that is deemed stable for their usage scenarios.
The Encoding Stability check-box is particularly useful as encoding tools such as Handbrake can highlight CPU instability where conventional stress tests do not pick it up.
Although it is not highlighted on the software page, a quick look in the UEFI indicates that TPU I is designed for air cooling users, while TPU II is for those with liquid cooling.
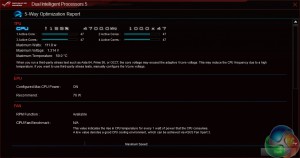
5-Way Optimisation works by rebooting the system and then automatically stress testing a frequency level. If the chosen CPU speed passes the brief stress test, an increase in the core ratio is applied and the process is repeated. At the point of instability (as shown by a BSOD), the system will crash and then re-launch with the last known stable speed before moving on to fan speed tuning.
The watercooling tuning option using TPU II seems to put a little more emphasis on exact fine-tuning of the system. This time, a stable CPU multiplier is discovered and the automated system proceeds to increase the BCLK small increments at a time. With our test chip, this proved a somewhat worthless procedure and did not deliver evidently greater results.
The automated tuning process works superbly and truly is a click-and-forget processor overclock. A number of the key recordings, such as the maximum CPU temperature and voltage, are displayed however their readings differ greatly from those seen in manual stress tests or even encoding workloads.
Asus' software also displays the highest CPU multiplier that was tested and the highest one to be found stable. This could prove useful as a reference point for those trying to push their PC to the limit.
With the automated tuning complete, one can enter the UEFI and manually save the entire profile. With our test system, Asus applied a 4.7GHz CPU speed and maintained the CPU Cache frequency at its 4.1GHz stock level. Disappointingly, however, the memory speed was dropped to 2933MHz from our sticks' 3200MHz XMP setting. Memory timings were not adjusted, nor were the LLC and CPU current settings.
An offset CPU voltage was chosen, with the motherboard's automatic setting being selected as the base point.
Under full Prime95 load, the chip was supplied with 1.376V for its 4.7GHz frequency. This is a surprisingly well-tuned overclock that required zero user input and resulted in stability and decent CPU temperatures.
We also noticed that the fan speed of our CPU cooler had been reduced by the tuning procedure and idle CPU voltage was lower, resulting in around 10W less power being drawn from the wall.
Overall, Asus' 5-Way Optimization tuning was a successful procedure that delivered pleasing results.
Manual CPU Overclocking:
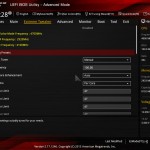
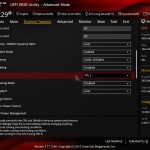
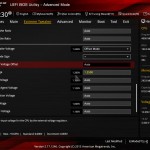
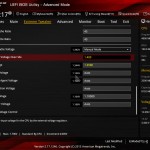
To test the Asus Maximus VIII Impact motherboard’s CPU overclocking potential, we first increased the CPU VCore to 1.40V and the PCH voltage to 1.10V. We selected Level 5 load-line calibration after trial and error showed that it delivered an acceptable load voltage level that remained below our target VCore. Power saving settings were disabled and the CPU Cache ratio was set to 45x.
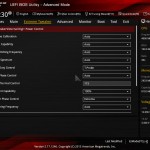
Manually overclocking the system is generally easy thanks to Asus' superb UEFI layout. The reason I use the word ‘generally‘ is because the Load-Line Calibration settings do not make much sense, especially when compared to their actual operation.
I prefer the approach deployed by ASRock, and now MSI, whereby a visual graph positioned adjacent to the LLC setting displays how the CPU voltage will react for each configuration. That visual approach is generally easier to interpret.
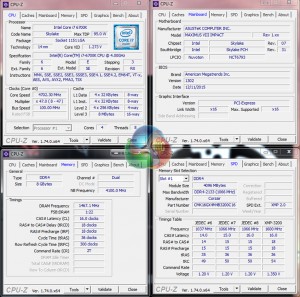
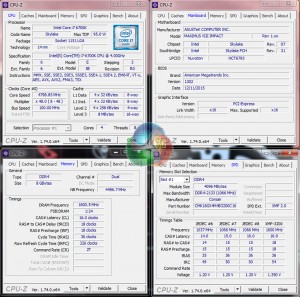
Asus' Maximus VIII Impact had absolutely no problems taking our Core i7-6700K to its frequency limit of 4.8GHz. Load voltage sat at around 1.37V (as validated by a multimeter), which was around 20-30mV less than the 1.40V we selected in the UEFI, due in large to the chosen LLC settings.
The Level 5 LLC setting was selected based on our previous experiences with Asus' Z170 motherboards and because Level 6 delivered a voltage overshoot (albeit only 8mV). I do wish that Asus would provide a LLC setting that delivers closer to the requested voltage level without overshooting, however the challenges in overcoming accuracy levels of the PWM controller also come into play.
 KitGuru KitGuru.net – Tech News | Hardware News | Hardware Reviews | IOS | Mobile | Gaming | Graphics Cards






Looks like a great ITX board but no m.2 = no purchase from me 🙁
No M.2 = no purchase.
I have the z170i Pro Gaming, which has a lot of these features (but has M.2 NVMe), minus the additional soundcard and VRM cooling (but still has decent of both) and can go as high as 4GHz on the RAM (though my BIOs shows 4.133Mhz). Same Software, same Wifi… about £50 cheaper.
That said, I’m in the process of returning it to Scan as the WiFi died on me. Let me just say that Scan have a horrendous returns policy. No advanced return. Offered to just buy a new board and they refund me when they received mine… they said ok, but were only willing to refund £125 (the price I paid). It’s now £133 + £12 postage on their website, so I’d be out of pocket. So, I have to wait 5-7 days to return. Moral of the story – buy from Amazon (sold and fufilled by) Free next day delivery for Prime and they ship a replace before you return.
EDIT:
Those VRMs would interfere with most cooling in ITX cases too. At least in my Corsair Obsidian 250D, which is a squeeze with my H100i GTX as it is.
there are u2 to m2 converters… and as someone who has the Intel 750 SSD, this board was exactly what i needed.
A few days ago new McLaren F1 subsequent after earning 18,512$,,,this was my previous month’s paycheck ,and-a little over, 17k$ Last month ..3-5 h/r of work a day ..with extra open doors & weekly paychecks.. it’s realy the easiest work I have ever Do. I Joined This 7 months ago and now making over 87$, p/h.Learn More right Here
as…..
➤➤
➤➤➤ http://GlobalSuperEmploymentVacanciesReportsNet/GetPaid/98$hourly…❦.❦.❦.❦.❦.❦.❦.❦.❦.❦.❦.❦.❦.❦.❦.❦.❦.❦.❦.❦.❦.❦.❦.❦.❦.❦.❦.❦.❦.❦.❦.❦.❦.❦.❦.❦.❦.❦
Do you have a link for U.2 to M.2 adapters? I have seen M.2 to U.2 but have yet to come across the other way around.
Indeed USB 2.0 devices will work fine in USB 3.0 ports, however the lack of an internal header could be a problem to somebody who has a mini-ITX chassis with front panel USB ports, in addition to something like a card reader. There’s not enough internal USB (including 2.0, which is small and easy to fit on the PCB) connectivity in that case.
Yes, there are quite a few enthusiast mini-ITX cases (Corsair 250D, Phanteks Enthoo ITX, etc.) that will take four SATA devices or more. And that’s without just placing 2.5″ SSDs in some free space, without an actual drive mount (which is quite common and perfectly fine). Some people will want more than 4 SATA devices, especially with the lack of M.2, so it would have been better to include another two SATA ports (especially because the Z170 chipset has plenty of spare lanes). If 4 SATA ports is fine for somebody’s needs, then great – that point is not an issue at all.
Which CPU cooler are you using? The NH-D14 fit fine in our testing. Make sure to send some pics to our Facebook page when you’ve completed the build :)!
i dont understand why so many insist on a PS/2 keyboard/mouse connector. This is a High end board. Thus majority will have New-ish USB keyboard mouses? why waste the space. Get real Kitguru. Your spending a solid Few hundred on a Motherboard, your going to have a decent mouse/keyboard combo too.
If the U.2 port is positioned under the board like my Z170i Pro Gaming then an adapter might be an issue…
Showing my ignorance, though, as I’m unfamiliar with U.2. The bus link is the same PCI-E x4, though, so I don’t see the advantage on this board. Surely a topside M.2 with a U.2 adapter would be the best case scenario?
I wouldn’t say the Z170 has spare lanes. SLI/XFire is more limited than the 2011-3 X99 boards due to less lanes on the CPU
When I say Z170, it refers specifically to the chipset, not the LGA 1151 CPU or the platform as a whole. The CPU’s lanes are generally reserved for the wider PCIe links (x4, x8, x16) for graphics and other expansion cards, however that’s not really important with this board as all 16 lanes get delivered straight to the one full-length PCIe slot.
The Z170 chipset has spare lanes available for use, compared to what has been deployed on this motherboard. The Z170 chipset itself actually supports up to 26 IO lanes, however there are some limitations as to how many of these can be deployed as PCIe, USB, and SATA 6Gbps.
I think youre right, I cant find a link, must have been thinking of M.2 to U.2, once there is a market for it im sure adapters will exist though.
Like a said, for my use case all of the above are non issues.
I am going to be putting a build together in the RVZ02 and trying either the Scythe BIG Shuriken 2 Rev. B or the Zalman low profile. Not sure yet, Im overseas and the mobo is stuck in customs.
yeah max lanes for m.2 is the same as u.2, but if im not mistaken some of the boards that have m.2 and more additional connectivity options share some of the lanes? Like depending on your configuration and what you are using, your m.2 is limited?
if the u.2 was am m.2 instead, would one of the converter cards fit in there?
Yeah, sure, but X99 boards can support x16, x16 and x8 configurations on PCI-E with some spare for I/O… Just saying the z170 is lacking in the PCIE lanes department
Using this board in a HTPC build with a ML07 case and a gtx 1060sc gpu Ive run into an issue with the sound card connector for the front panel jacks,,it appears most low profile coolers end up right up against the sound card, leaving no room to connect the HD audio cable for the front jacks, if there was a cable that would allow the sound card to be mounted off the board somewhere it would help but I havent found a cable yet that would allow one to mount it elsewhere much like the included fan header card. As it stands now I will just cover the male connectors with insulating tape to keep them from contacting the cooler fins on my Geminii M4 cooler and forego using the front jacks until i get a different cooler or find a jumper cable that allows moving the sound card to a better mounting position in the silverstone case.