Manual CPU Overclocking:
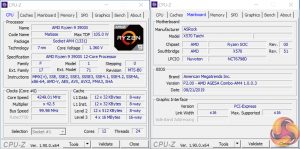
To test the ASRock X570 Taichi motherboard’s CPU overclocking potential, we set the CPU Core Voltage to 1.35V and applied the Level 2 LLC setting.
Overclocking was particularly easy with the X570 Taichi, thanks in large to ASRock's well laid out UEFI, clear loadline calibration settings, and seemingly accurate software-based voltage readings.
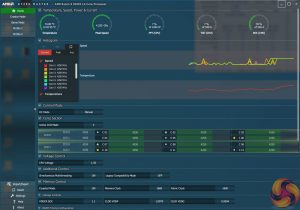
We were able to hit a stable frequency of 4250MHz using 1.35V as set in the UEFI. We applied the Level 2 load-line calibration setting as this resulted in a load voltage of 1.36V according to CPU-Z and 1.35V according to Ryzen Master. Level 1 LLC pushed voltage a little higher than we we’d have liked with its 26mV overshoot.
Motherboard Sensors
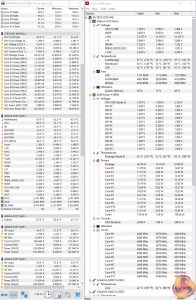
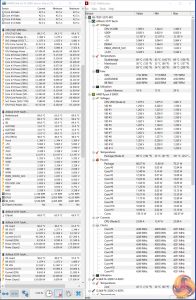
Much of ASRock’s power-related sensor data, as fed through to monitoring tools including Ryzen Master, is simply incorrect. As such, we used our power reading from the wall to interpret that the Ryzen 9 3900X was indeed being fed with the voltage of around 1.35V that we had requested.
Overclocked Performance
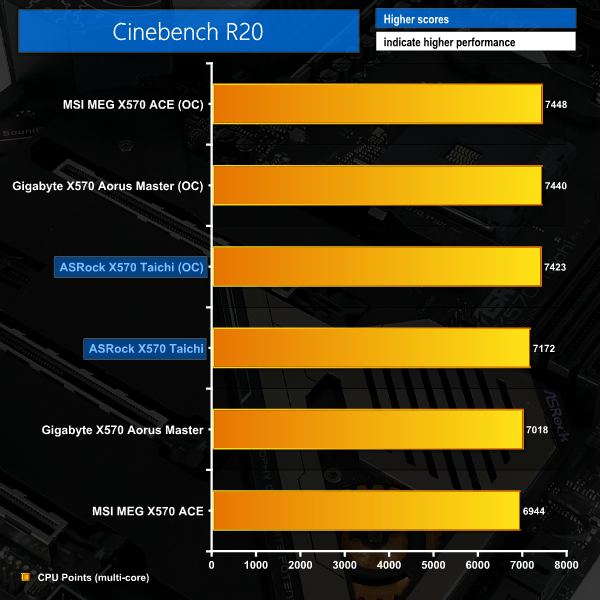
With the Ryzen 9 3900X CPU’s speed boosted to 4.25GHz by ASRock’s X570 Taichi motherboard, Cinebench R20 multi-core performance increased by 251 points. This 3.5% gain is quite slim for an overclocked result but that is due to the aggressive voltage and clock speeds that ASRock’s board permits at stock.
System Power Consumption
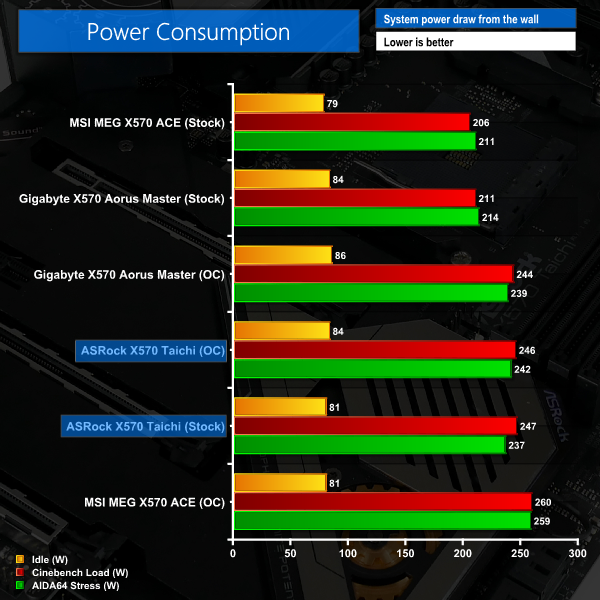
We leave the system to idle on the Windows 10 desktop for 10 minutes before taking a reading. For CPU load results we run AIDA64 CPU, FPU, and Cache stress tests and take a reading. The power consumption of our entire test system (at the wall) is shown in the chart.
Unsurprisingly, given the aggressive voltages that ASRock applies to our Ryzen 9 3900X under stock conditions, power draw is around 30-40W higher than what we’d expect for the 12-core Ryzen. That’s not ideal as it translates into extra load on the VRM components and extra stress on the thermal solutions, though it does come with a performance boost in multi-threaded workloads.
This was not related to ASRock sneakily applying Precision Boost Overdrive as we disabled it manually within the UEFI. Incorrect power and TDC data were being fed through to Ryzen Master, and one would assume that this data is also being input to the Precision Boost 2 algorithm. In turn, there was no power or thermal current throttling, according to Ryzen Master, and the CPU was glued to 100% electrical current input of 140A. This looks to be the reason for ASRock’s more aggressive CPU voltage and higher clock speeds – questionable sensor data, as suggested by Ryzen Master and HWInfo readings.
Our 1.35V overclocked voltage actually managed to maintain roughly the same power consumption, despite running 125MHz higher under all-core conditions. Clearly, the stock settings are not ideal for users who care about how much power their system draws, especially if that heat is then dumped inside a non-air-conditioned room.
System Temperatures
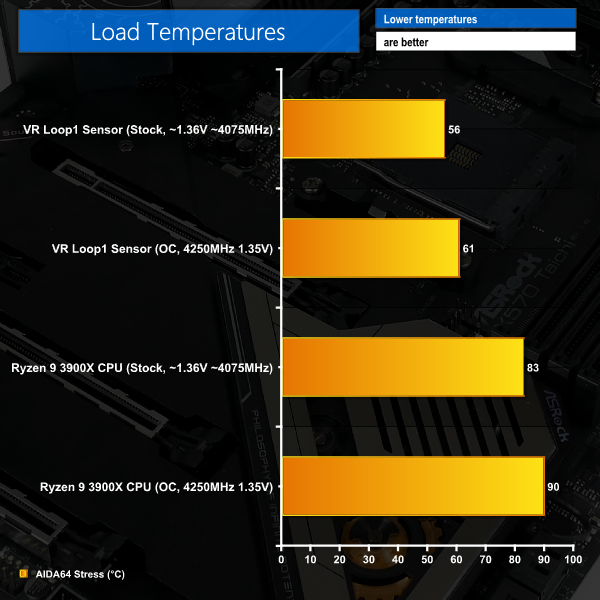
We run the AIDA64 CPU stress test for 1 hour while recording the system data using HWInfo. This data is then analysed to show the CPU temperatures and also the VRM MOSFET temperatures, when the sensor data is available.
The Ryzen 9 3900X registered more than 80°C under our H100X at stock settings. Again, ASRock’s aggressive stock voltage and frequency is to thank for that. Despite ASRock’s MOSFET heatsink being more focused on looks than efficient cooling performance, the VRM temperatures were perfectly reasonable according to data from the VR Loop1 sensor.
Overclocking pushed temperatures higher as the frequency was increased but ASRock’s voltage accuracy helped to keep our Ryzen 9 part away from the 95°C limit. VRM temperatures were still perfectly good when the CPU was overclocked.
One temperature that isn’t plotted in the chart but is worthy of reference is that of the X570 chipset. ASRock’s cooling system for this piece of silicon is not particularly high performance. That showed throughout testing, with temperatures regularly drifting past 70°C despite the 40mm fan spinning at more than 4000 RPM on our open-air test bench. This is worth bearing in mind when you are plotting fan speed curves through ASRock’s excellent UEFI- and software-based tools.
 KitGuru KitGuru.net – Tech News | Hardware News | Hardware Reviews | IOS | Mobile | Gaming | Graphics Cards


