Usually when overclocking, we like to use MSI Afterburner as it is generally quite reliable and responsive. Sadly it needs an update before being able to tweak the Radeon VII, so we resorted to Wattman.
For the Radeon VII, manual tweaking is done via a frequency-to-voltage curve, with the stock peak figures being 1802MHz at 1084mV. Unfortunately, I had very poor results from any manual tweaking of this curve – and I tried all sorts, including setting a low voltage with a high frequency, or setting a high voltage with a lower frequency, and then pretty much everything in between.
In a nutshell, either my card's operating frequency would level out at essentially stock speeds, or I would actually see the frequency drop below stock speeds and achieve even worse results. I am not yet sure how much of this is sample-dependent – I could just have a very poor overclocking chip, or it could be the case for most Radeon VII cards. In any case, I will try again with Afterburner when that is updated and see if I can achieve any better results.
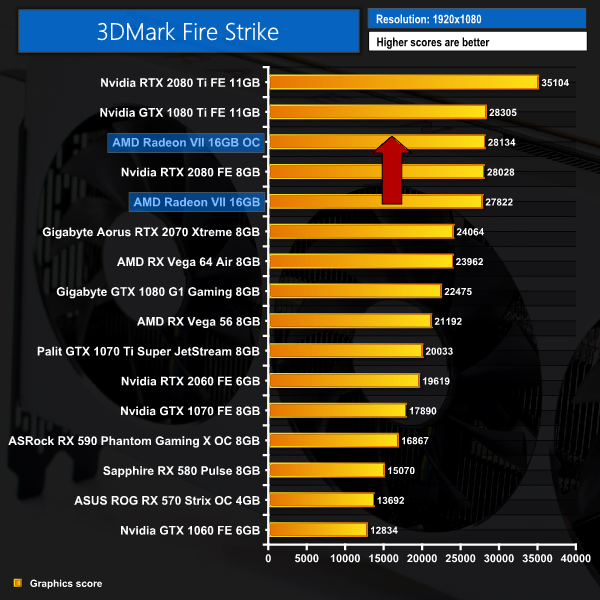
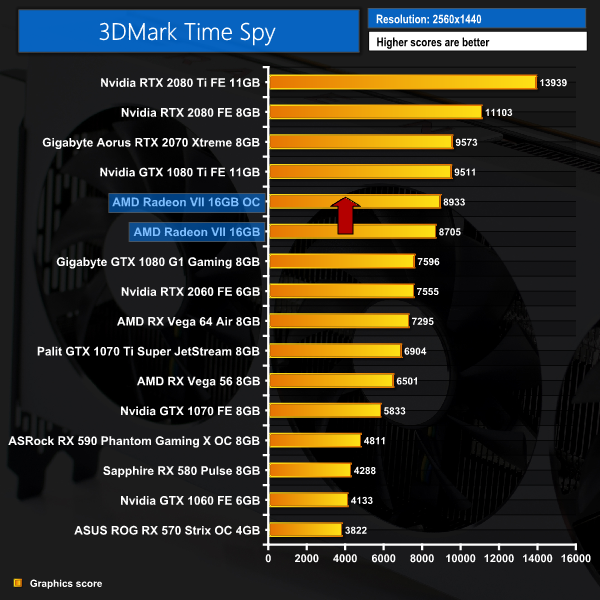
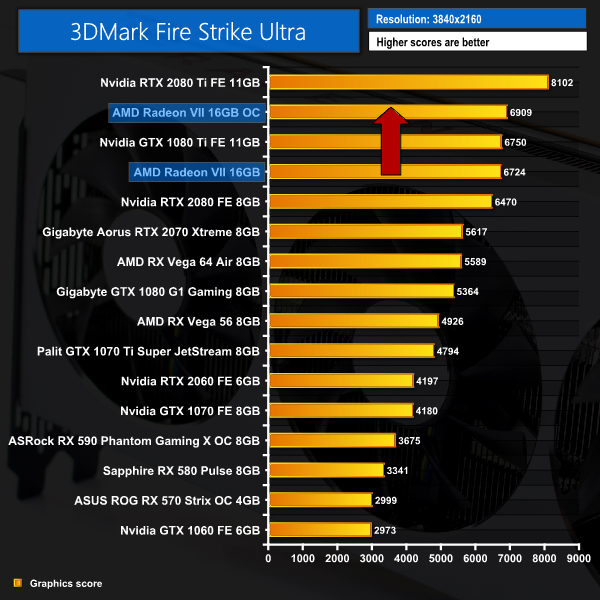
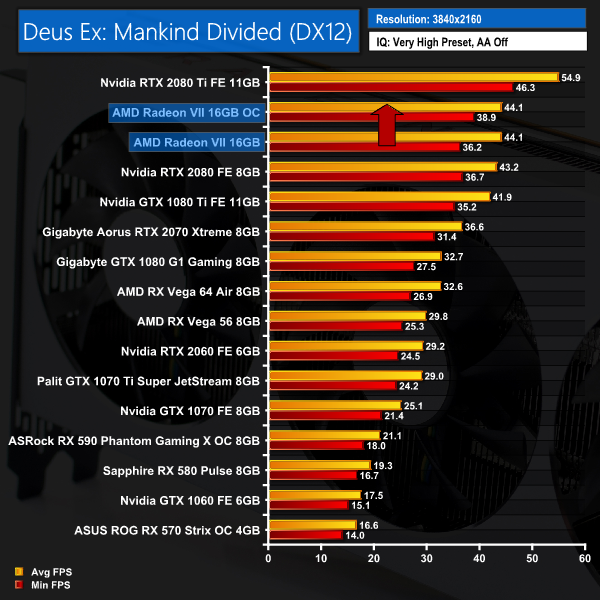
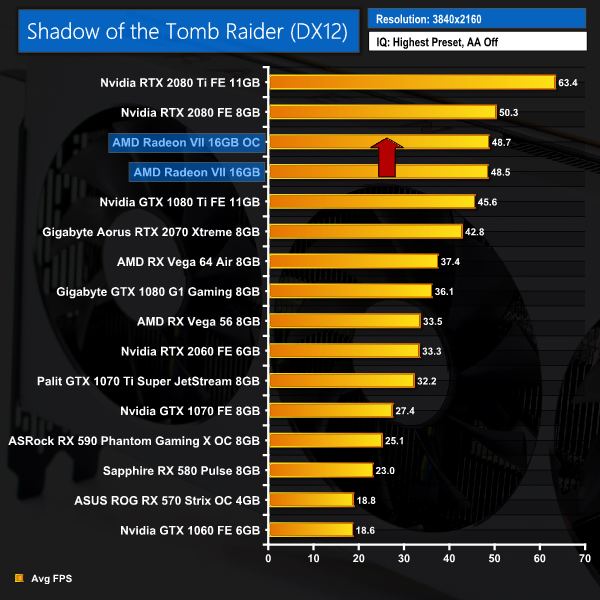
So in the end, I settled with using the ‘auto overclock' option found within Wattman – this was actually the only way I managed to see improved results over stock, so here are some performance examples taken when running this overclock:
3DMark and games testing
As you can see, despite this being the best overclock I managed with my Radeon VII, the performance increase is pitiful – barely a couple hundred points for the 3DMark benchmarks, and just an extra 0.2FPS when playing Shadow of the Tomb Raider.
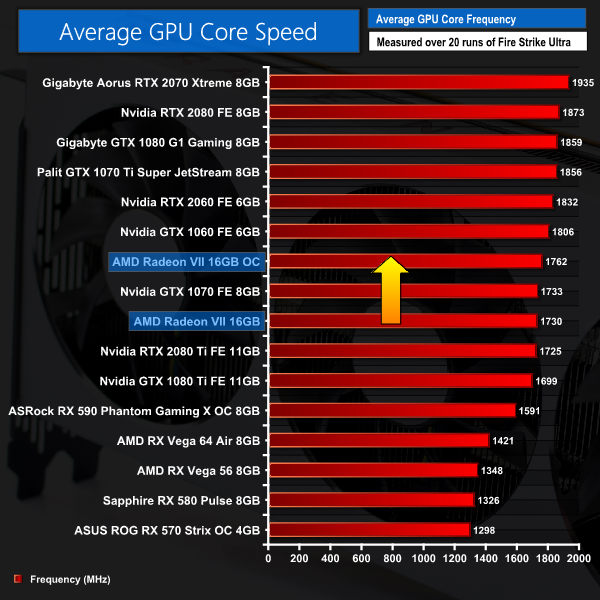
Average clock speed under load
This poor performance increase is due to the fact that we added barely any frequency – just 32MHz on average. And yes, like I said – this was actually the best overclocking result I managed from spending half a day trying to get the most from the chip.
 KitGuru KitGuru.net – Tech News | Hardware News | Hardware Reviews | IOS | Mobile | Gaming | Graphics Cards


