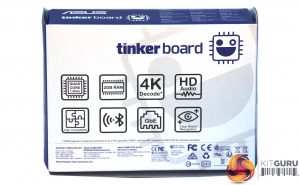
All the key features are mentioned on the box exterior. This is also a bit sturdier than Arduinos and Raspberry Pis tend to come in.
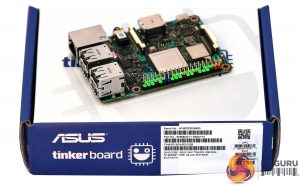
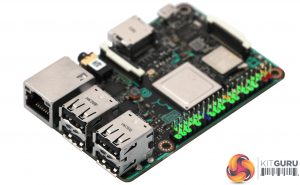
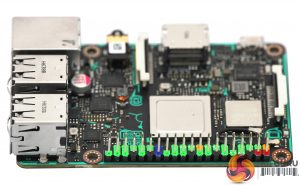
At first glance, the ASUS Tinker Board is a spitting image of the Raspberry Pi 3, with all the ports and headers in exactly the same places on the PCB. This is presumably so that the same casings, shields and peripherals can be used.
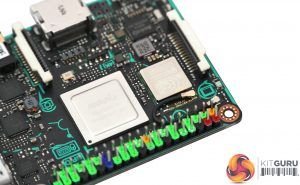
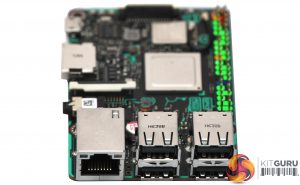
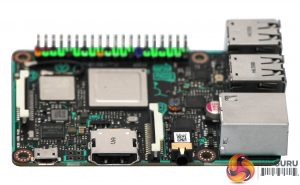
The Rockchip RK3288 SoC comes bare, and the system will actually boot and run like this. However, ASUS also includes a passive heat sink in the box, which sticks over the Rockchip to ensure that it doesn't overheat.
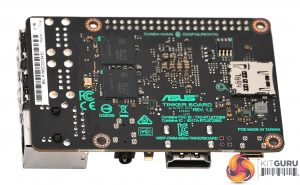
The main feature on the bottom of the PCB is the slot for the MicroSD card. ASUS recommends at least 8GB capacity for installing an operating system, applications, and your own custom code.
Just like a Raspberry Pi 3, one end sports the four USB 2.0 ports and LAN, although the latter in this case is Gigabit Ethernet. Nestling between the USB and LAN are bare connectors for S/PDIF digital audio, although you will have to solder your own wires to these. The other end is where the 15-pin DSI header for serial-connected displays resides.
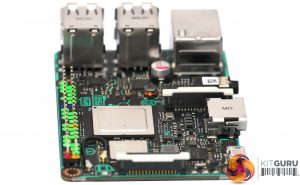
On the longer edges, one is host to the 40-pin GPIO header for connecting sensors and outputs such as LEDs. The configuration appears to be identical to the Raspberry Pi 3, which isn't likely to be a coincidence.
On the other longer edge there's the Micro USB connection for providing power, which should be 5V 2A. You need this much, too. We tried a USB port that didn't supply this much power and the Tinker Board wouldn't boot. Next along is full-sized HDMI connection with support for 4K screens at 60Hz, although this depends on operating system capabilities.
Alongside the HDMI port is the 15-pin CSI connector for serially-attached cameras. Then there's a stereo minijack that, in tandem with the Realtek ALC4040 codec, allows audio output up to 192KHz and 24-bit resolution. The minijack also happens to be a combo, so supports a microphone input as well.
 KitGuru KitGuru.net – Tech News | Hardware News | Hardware Reviews | IOS | Mobile | Gaming | Graphics Cards



Arrr… Raspberry Pi 3 top result compared https://browser.geekbench.com/v4/cpu/compare/3061317?baseline=5408809 Not best result for RK3288. Google’s OP1 actually RK3288 also https://browser.geekbench.com/v4/cpu/compare/5060917?baseline=5408809 better performance… Ho… Ho…
See https://www.ossblog.org/installing-google-play-store-asus-tinker-board/ , where Steve Emms published an article on performing the Googleplay installation back in May 2017 (well over 7 months ago now, back about 2 months after I first received my Tinkerboard).
The only real problem I’ve found with the Tinkerboard, from the perspective of a system developer, is that the Android image is not certified properly to allow it to use HDCP, which negates it’s ability to run apps that use HDMI copy-protection on hardware that doesn’t support it –such as Comcast’s Xfinity app, used to watch cable channels over IP.
Everything else I’ve ran on this board, under Android, has been blazing fast –including Kodi 17.6.
I took a good long look over Asus’s release of Debian (called TinkerOS), and realized very quickly that their in-house Linux dev team were clueless about making a solid Linux. I replaced that install with Armbian and it worked beautifully. There were no real issues worth mentioning –at least not anything that the average Linux user would be surprised by or have any trouble working around.
I’ve kept my Tinkerboard running on Android, with Googleplay, Youtube, and several other GAPPS automatically updating correctly since May 20th when I did the final build for my board. Since I launched that system, it’s been paired with a 23″ Dell touch screen (w/ 10-pt multitouch), and works for us like a giant tablet. Its roughly twice the speed of the RPi3 on just CPU/ram-speed alone, and combined with Gbit eth0, this is one of the fastest ARM based boards I’ve ever used.
Personally, I’d recommend this board to anyone with the experience to know what to do with it. For those that aren’t quite there yet, spend more time with RPI3 boards and Linux on x86/x64; this will help you gain the troubleshooting skills you’ll need for working with these sorts of environments.
Right now, the Tinkerboard is my personal board of choice for high speed embedded projects, but I’m not depending on Asus to supply me with OS code, so that may make quite a bit of difference in my case –but really, that’s how RPi boards are too… the best OS image releases tend to be 3rd party images, or the ones built by experts for their own projects. In terms of real world performance (rather than artificial results generated from simulated workloads), I’ve had no issues with mine at all.
Oh, and Eleduino makes some great all-aluminum cases that fit both Tinkerboard and RPi2/3; I nailed down 3 of them, and used 1 of the 2 I ordered in Piano-black for my Tinkerboard. Surprisingly, the black cases were cheaper ($13) compared to the anodized (silver) aluminum models by $5 ($18 for the silver cases), but they worked interchangeably and shed heat like a big heatsink so I’ve needed no fans at all.
That was an awesome review. Thank you.
Thanks for your detailed comment! I did try the Emms Google Play install, but it didn’t work. Not sure what I was doing wrong. It actually completely borked my Android install so I had to revert to the original image again.
Seems the Android version makes a big difference.
It *wasn’t* an easy process, at all. But I think in that original discussion I’d posted, there were notes further down that allude to the debugging work we did to get it working right on a single installation run. I’m at work now, but I’ll be home soon… and will try to remember to look over that info, gather it together into a concise document and publish it somewhere as a howto.