We have covered Noctua's excellent ‘SecurFirm2' multi socket mounting system many times before, so today we thought we would show you the installation procedure on an AMD motherboard. The Asus Crosshair IV Formula to be exact. The first thing you have to do is to remove the AMD retention bracket at the front. Keep this stored however in case you decide to change coolers later. The AMD backplate is used.
The retention bracket removed, the backplate should be held in place to mount the cooler.
Four plastic spacers are placed over the backplate holes.
The AMD system uses two small bars which must be mounted with the curve pointing inwards. These diagrams show it much clearer than a picture. It is elegant and simple to fit.
The top fan can then be removed, exposing two small holes through the aluminum fin array and through to the two screws below. Noctua supply a handy tool specifically designed for this, but if you have a long, thin screwdriver then you can use that instead. The heatsink can be mounted in any direction, to suit specific motherboards. Remember the air is forced downwards over the motherboard PCB, so direction isn't critical with this design as case fans will remove the hot air from the area.
The mounting process only takes a couple of minutes and then the outmost fan can be reattached. The top fan doesn't actually need to be removed as the driver will fit between both sets of fan blades, but we found it easier to work with. We are admirers of the Noctua fan mount system, they use two simple clips which connect to the curved heatsink fin section, seen above. Both fans can then be connected to the motherboard.
It is worth pointing out that the heatsink has two sets of clear elastomeric anti vibration strips mounted to all edges, these help reduce vibrations and subsequent noise emitted from both fans.
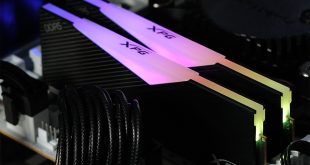
The C14 doesn't prove a problem for oversized ram modules, especially as you can rotate the heatsink in any direction to suit. Above, our GSkill modules fit perfectly fine, even in the nearest ram slot.
A stunning design, but now its time to see how it holds up with our stress testing.
 KitGuru KitGuru.net – Tech News | Hardware News | Hardware Reviews | IOS | Mobile | Gaming | Graphics Cards


Stunning is right, their engineering standards are unmatched. I got the D14 in november, and it really is a beautiful piece of work. my temps dropped 10c too which is a bonus 🙂
Great. This is going to suit a lot more people than the D14, and the cooling isn’t that far behind either.
Love their products, but they are very expensive for those who dont really need the ultimate performance levels.
I saw another site reviewed this, and it outperformed the D14 in one system build? surely not?
Impressive cooler however, if expensive. fans are worth it though. so many cooler companies bundle shit coolers.
I bought this and its excellent. its not quite as good as the D14 going on my testing. as I have both, but its great for smaller spaces.
Is this the first time a company has used a support beam for strength? thats quite ingenious.
I still think the frio is the best value cooler on the market for high end, its under £40 now.
Very nice cooler indeed…
I’m curious if it fits on a mini-ITX bords? This could be “the cooler” for a powerful SFF build