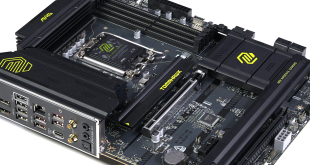
Today we will be using an AMD platform for our testing. The installation procedure for an AMD system involves several steps. Due to the sheer size of the HAVIK 140 we strongly recommend removing the motherboard from the chassis prior to beginning the installation process.
We start with the universal backplate, which is used for both AMD and Intel systems. For the AMD install the first thing is to make sure the upside of the backplate is marked for AMD systems. This information is engraved in the backplate so making the correct choice is straightforward.
Once the correct orientation is selected, the black plastic spacer should be placed on top of the backplate, then snapped into position. The next thing to do is attach the 4 insulating pads and insert the 4 long screws through the holes in the backplate.
Next we insert the screws through the mounting holes on the motherboard and secure them with the 4 black plastic pillars. Using the 8 small silver screws provided we attach the two metal AMD brackets to the two Intel brackets. The image above-right shows the assembled brackets.
On the Intel bracket there are arrows that should point inward towards the CPU socket. The retention brackets are then placed over the 4 backplate screws and secured by tightening the 4 cylindrical silver nuts. With everything tightened in place we need to apply a thin layer of thermal paste on the CPU.
The heatsink should be placed on top of the CPU and secured in place using the crossbar that is provided. The trick here is to use both hands and apply equal pressure on each side of the Crossbar before tightening the 2 retention nuts at the same time. After getting a grip on the threaded posts of the AMD clips a Phillips screwdriver finishes the task of tightening the crossbar in place. The 3rd image above gives us a look at the assembled support brackets that the HAVIK 140 requires for an AMD system.
To complete our installation we need to attach the dual 140mm fans. We start by attaching two of the rubber fasteners to one of the fans.
The next step is attaching the fasteners to the tower portion of the cooler. We just repeat this step to install the second fan and we are good to go.
The final image above shows just how good the HAVIK 140 looks fully assembled and ready for action.
 KitGuru KitGuru.net – Tech News | Hardware News | Hardware Reviews | IOS | Mobile | Gaming | Graphics Cards


Impressive indeed. looks huge, but is it as good as D14? probably not.
And what about noisiness?
they are quiet for sure if I remember they are rated at 25dBA
Very good, looks great too. Better deal in US. UK is a rip off lately.
Looks as big as the D14? is it the same size or a bit smaller steve?
Looks like it will block memory slots though which I dont like. good review, thanks.
I don’t have a D14 to compare it to but I would estimate it is just about as large. it will block slots with high profile heatspreaders
The Havik looks good but it depends how it is priced in your country. In my country the Silver Arrow and the D-14 are cheaper. Idk why but that’s how it is.
Bt, when can we expect a review for Prolimatech Panther?
i like
SteelSeries + FnaticMSI = Worlds Best