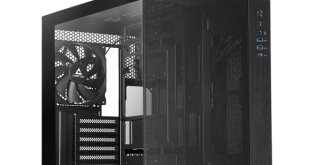
System specs:
Sentey Arvina GS-6400 Full Tower
AMD Phenom II X6 1055T
Gigabyte GA-890GPA-UD3H v2
Asus Radeon 5850 1GB PCI-e
4 GB G-Skill DDR3 1600
Kingston 64GB V Series SSD
WD 500 GB SATA II
Samsung 22x SATA DVDRW
SilverStone Strider Plus 850w modular PSU
Here we have the Arvina GS-6400 with our motherboard and PSU secured in position awaiting the rest of our build components. Our second image is our test system nearing completion, there is very little visible cable clutter which is a welcome sight for sure. After a close look the Radeon 5850 looks like a perfect match for the colour scheme used in this chassis.
This brings us to our first area of concern with this chassis. The graphics card is a tooless installation, however the plastic device used to secure the graphics card in the GS-6400 feels rather flimsy. Getting the mechanism to lock in place takes a little effort and didn't feel that secure either.
The images above are of the removable side panel that hold the 2 x 80mm fans. Sentey have incorporated an interesting method of providing power to the fans. If you look at the 2nd image there is an area outlined in green. The 2 visible terminals make contact with 2 other terminals that are wired into the chassis to complete a circuit and power the fans. This is extremely convenient when removing the fans since there are no wires to contend with.
The removable drive bays have an aluminum frame and tray so they should help keep our hard drives at a reasonable temperature. They are designed to hold 2.5″ or 3.5″ drives and it only takes a few seconds to install a drive. Our images show both types of hard drives mounted in the drive trays. Again, no tools were required, the drives just click into place and are ready to slide it back into place in the caddy.
After sliding the drive caddy back into place the chassis is turned around to connect all the cables. This is a nice touch when hiding cables and a feature we are starting to see used more often.
Installing optical drives in the Arvina GS-6400 is once again a tool free procedure. The cover is removed for the drive bay, then the red tab is pressed on the locking mechanism to release it from the locked position. Once unlocked the DVD drive is pushed into the open bay with the black section pressed to lock.
This brings about our second area of concern. The red plastic tab feels very fragile and may fatigue easily with multiple system installs. That said, in most situations a system is placed in a particular chassis where it will stay until a new system is purchased.
The optical drive is hidden behind a cover which helps to ensure a fully matching front fascia when the system is built.
 KitGuru KitGuru.net – Tech News | Hardware News | Hardware Reviews | IOS | Mobile | Gaming | Graphics Cards


nice looking case, but if the plastic feels cheap then its not a good deal.
Very colorful, but its going to be hard for them to make a dent in this industry.
I like the ideas they have, and I think they will do well if they can manage to make enough to hang around. must be hard for a new guy in this industry.
Always interesting to see new players and this is actually a very attractive case, especially internally.
Shame about the weak plastic, its something I think bitfenix suffer from in their new cases also, according to reviews anyway. Hard market to crack, but id like to send them my support.
I actually really like the look of this case, its a lovely design concept.
What about noise results? 80mm fans? ekkkk. any real world testing steve?
To be honest I don’t have any type of dB meter to test fan noise levels. The 2 80mm fans were quiet actually but I couldn’t find any specs for them