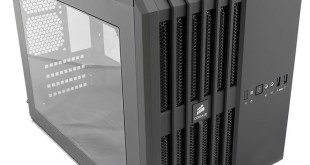
The new Corsair Carbide Air 240 uses the same split-chamber design that Corsair introduced with the Carbide Air 540 but this time it is used in a smaller, more compact chassis with a low price under £70. A smaller chassis means you have to choose a Micro-ATX or Mini-ITX motherboard however there is still plenty of scope for building a gaming powerhouse.
Judging by the photo you might think this case is cuboid in shape although it actually measures 397mm x 260mm x 320mm.
Specifications:
- Motherboard support: Micro-ATX, Mini-ITX.
- Expansion slots: 4.
- Included fans: 2x 120mm front intake, 1x 120mm roof.
- Fan mounts: Additional 120mm roof, 2x 120mm floor, 2x 80mm rear, 1x 120mm side.
- Radiator support: Up to 240mm front, up to 240mm floor (Mini-ITX only).
- 5.25″ drive bays: None.
- Internal drive bays: 3x 3.5/2.5″, 3x 2.5″.
- Dimensions: 397mm depth x 260mm width x 320mm height.
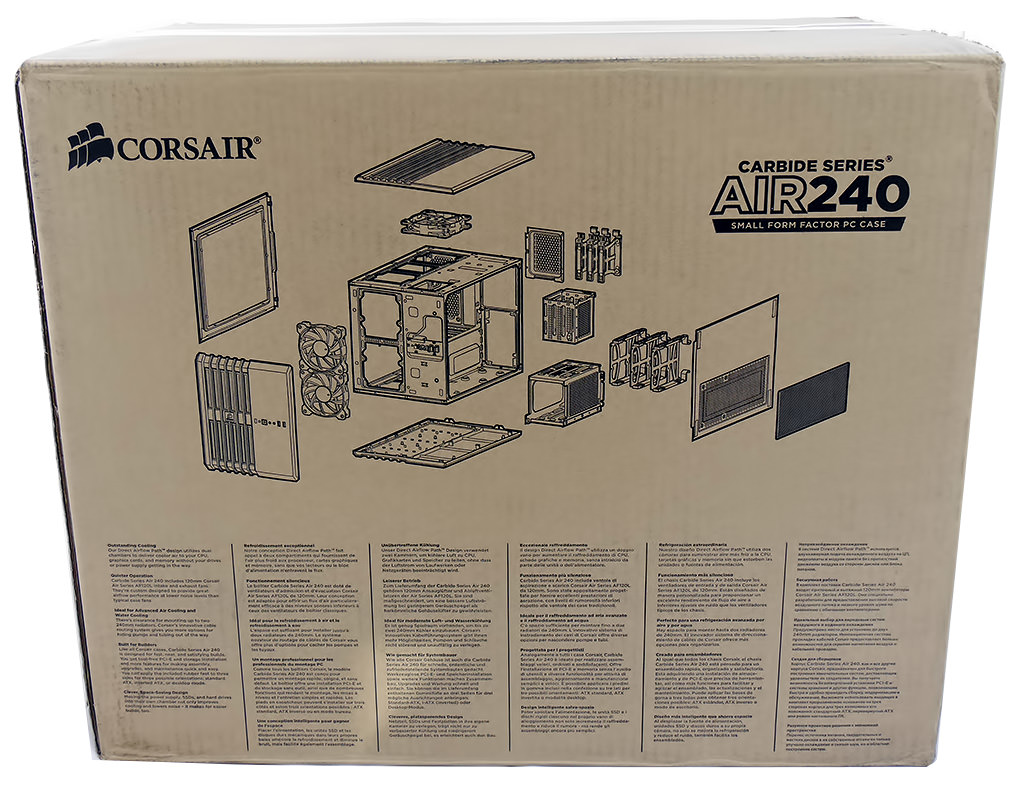
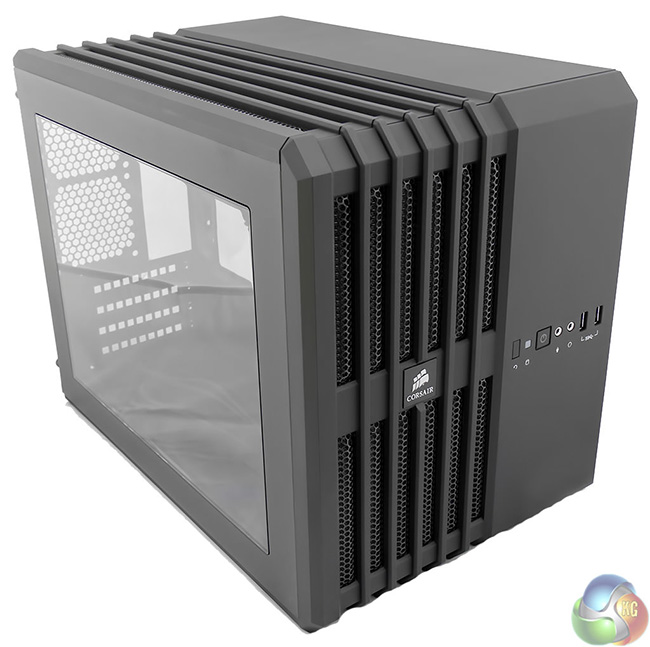
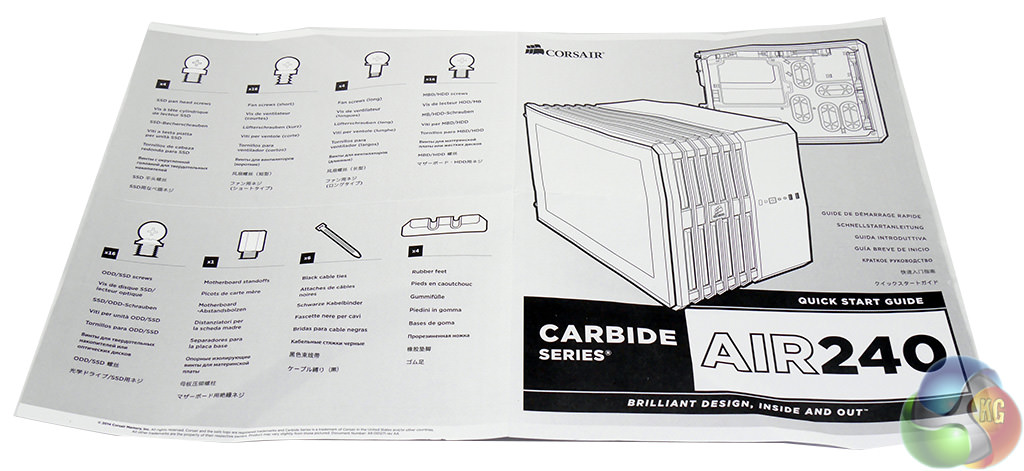
The packaging shows a series of line drawings of the Carbide Air 240.
Take a close look and you'll see that the Air 240 is a curious beast and nothing goes quite where you might expect.
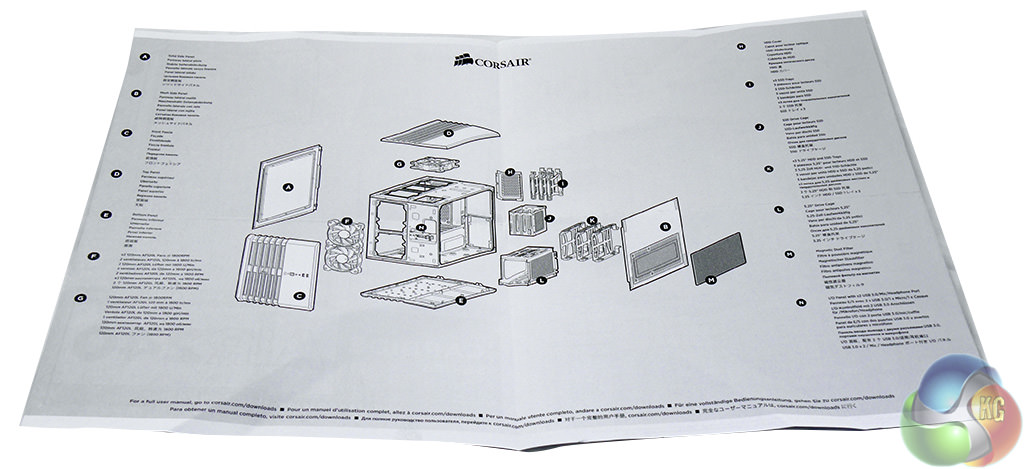
This impression is reinforced by the set-up sheet which shows you where all the components go without giving you any hints how you go about the build. It doesn't take a great deal of work to find out how the case comes apart however it would be nice to have a little more help from Corsair as the design is so unusual that you cannot take anything for granted.
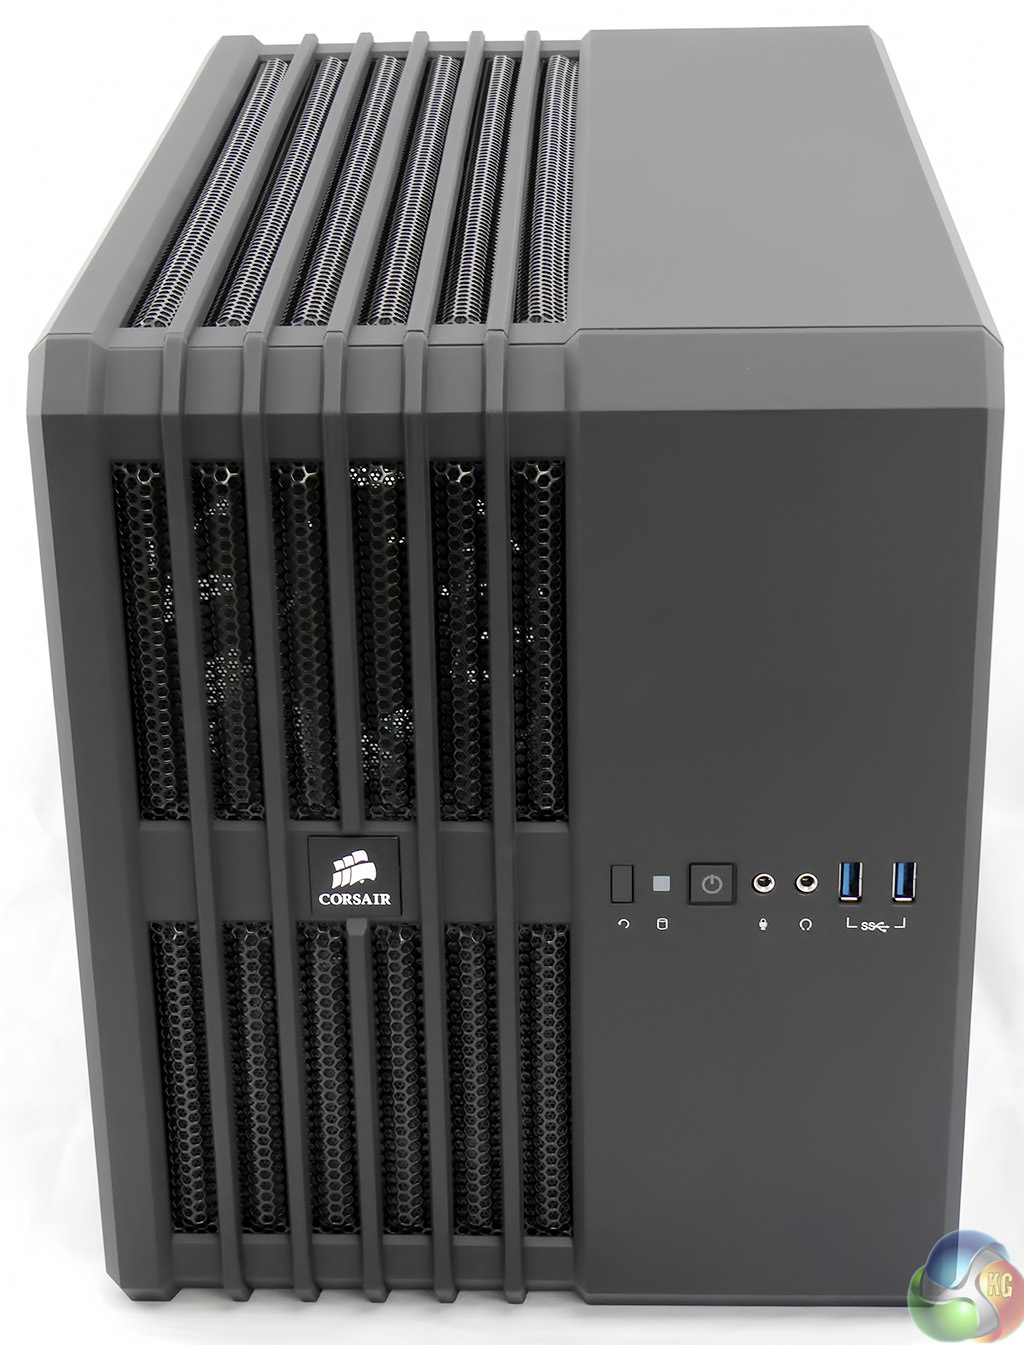
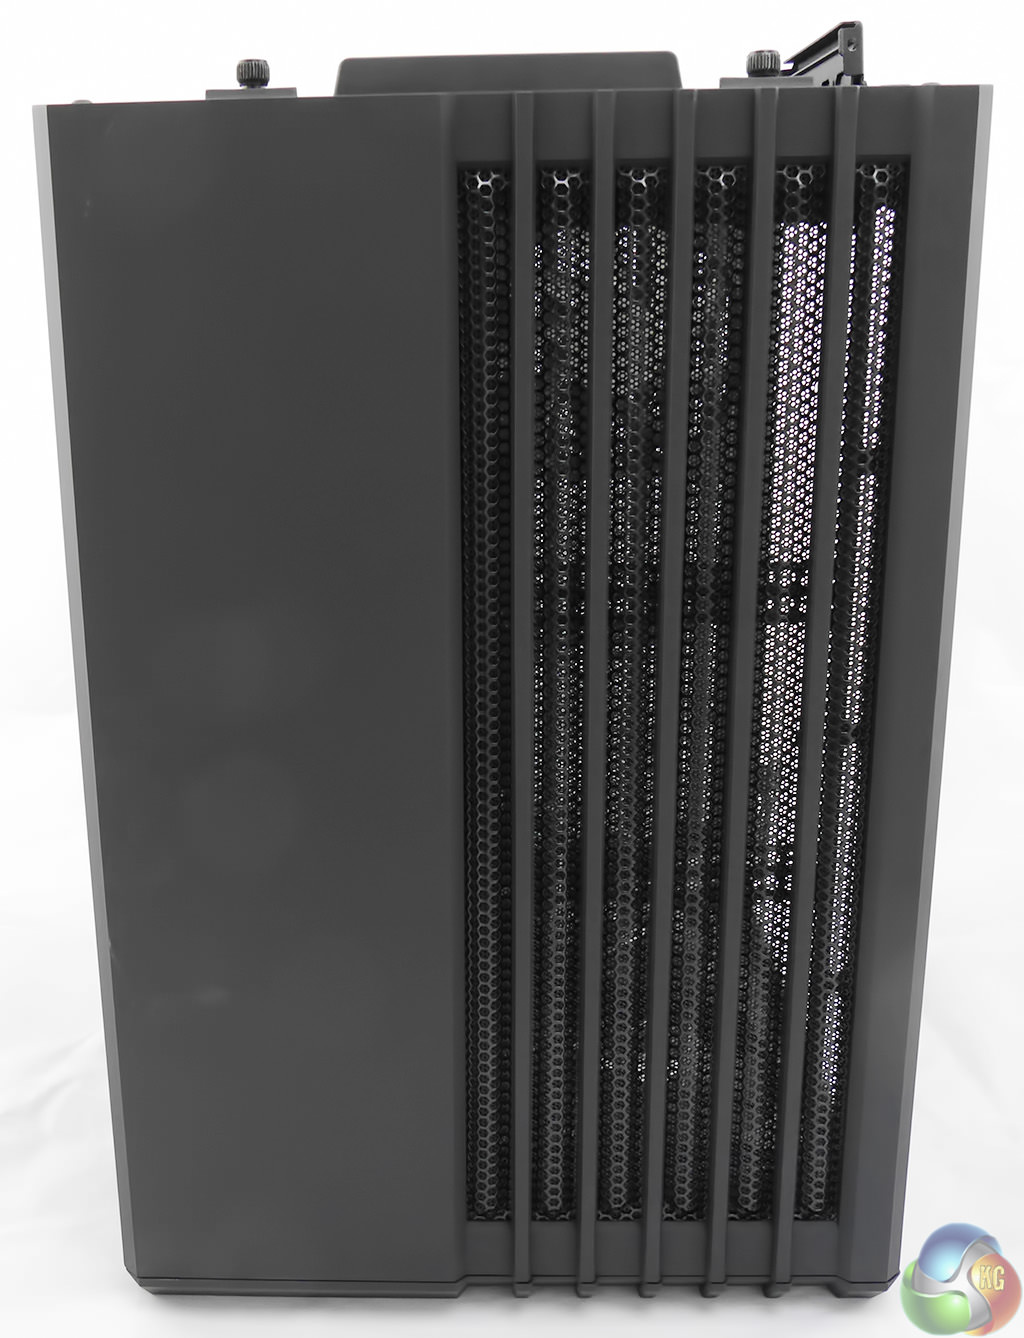
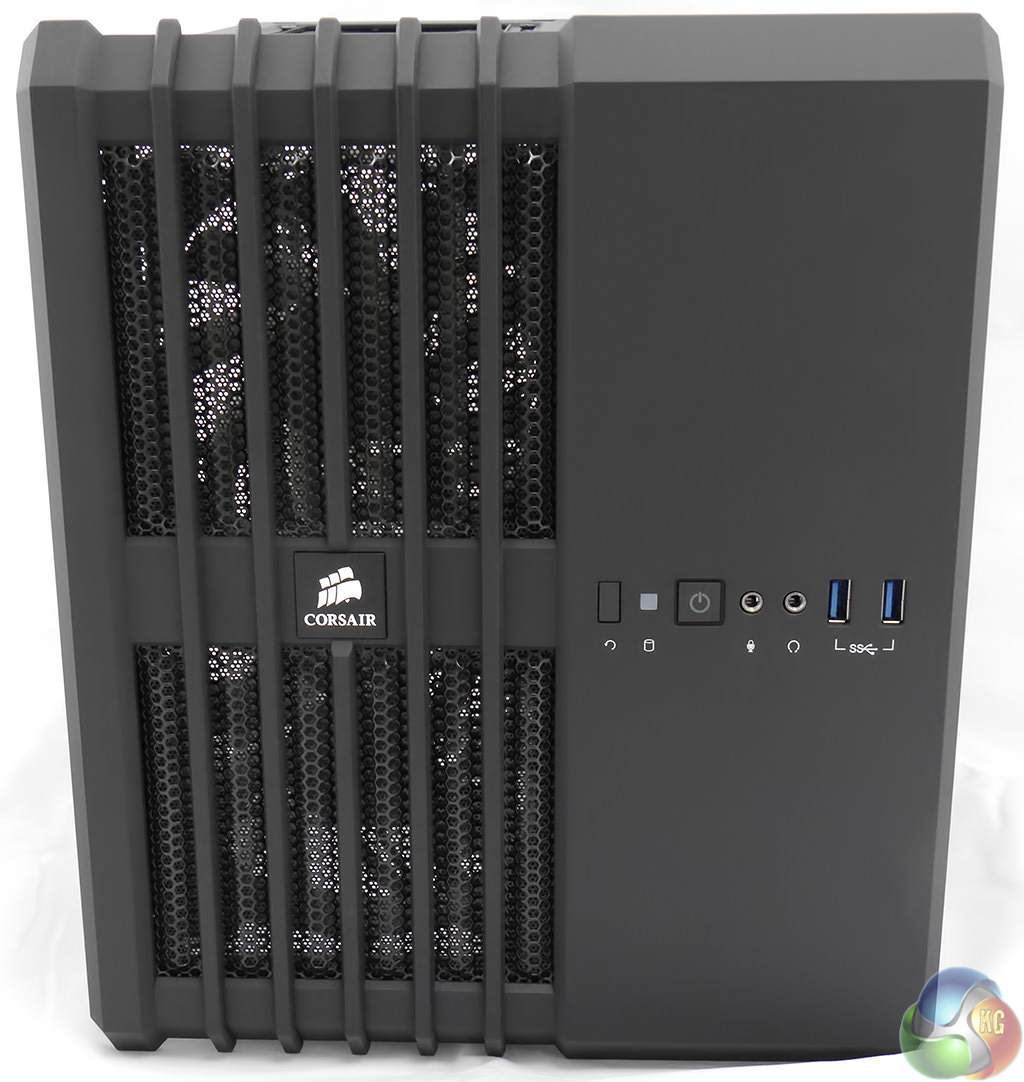
The front of the Corsair Air 240 looks very smart. The left side is ventilated so air can flow to the two 120mm Corsair AFL120L fans and onward to the motherboard, CPU and graphics card. The right side of the case is solid at the front and there is nothing to indicate from this angle that you'll find the power supply, solid state and hard drive bays on this side of the case.
Take a look at the position of the Power, Reset, headset jacks and USB 3.0 ports and you'll see their location is significant. The buttons and connectors are arranged in a row only 15cm from the bottom of the case so if you stand the Air 240 on the floor they are pretty much out of reach. If Corsair meant you to use the case in that way my guess is that the ports would be located on the top edge of the front panel.
The only way the Air 240 makes sense to me is if you stand it on your desk or table where is it within easy reach. That could be a problem as the Air 240 has a large footprint (397mm deep and 260mm wide) so while it isn't very tall it is actually quite large.
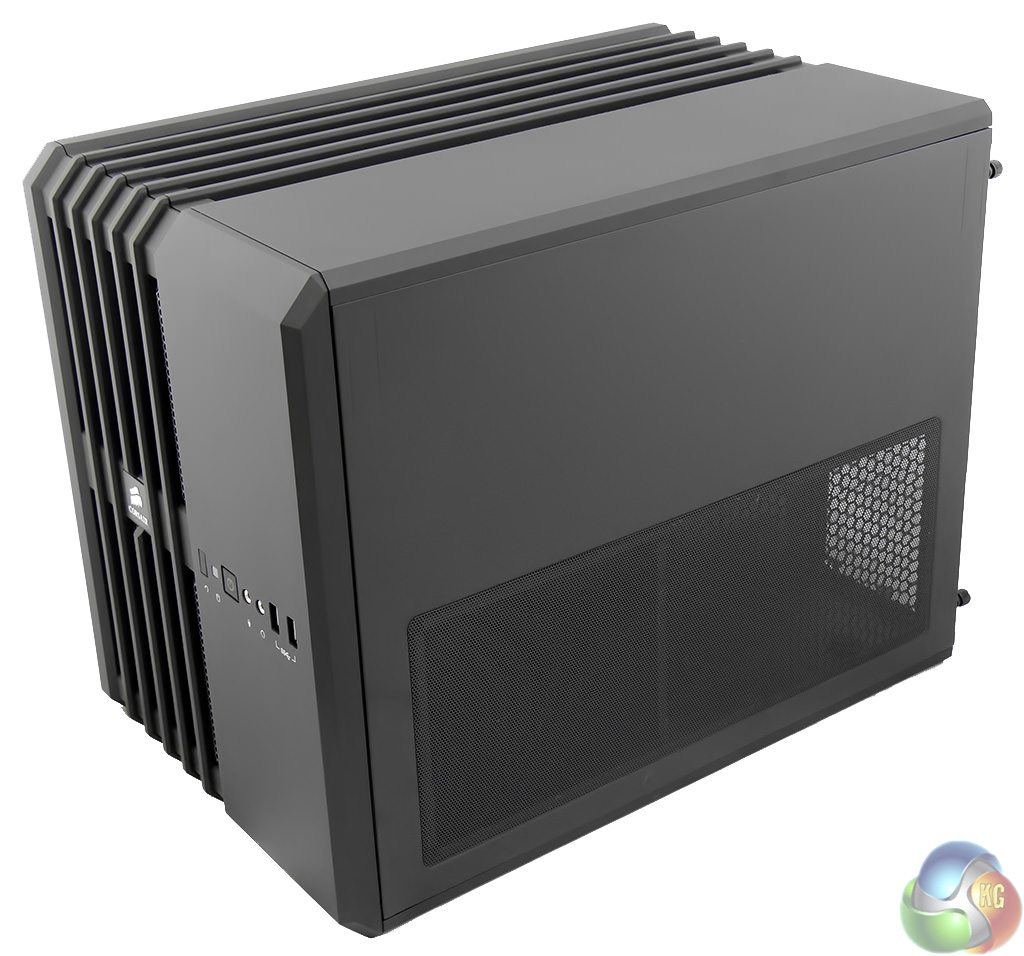
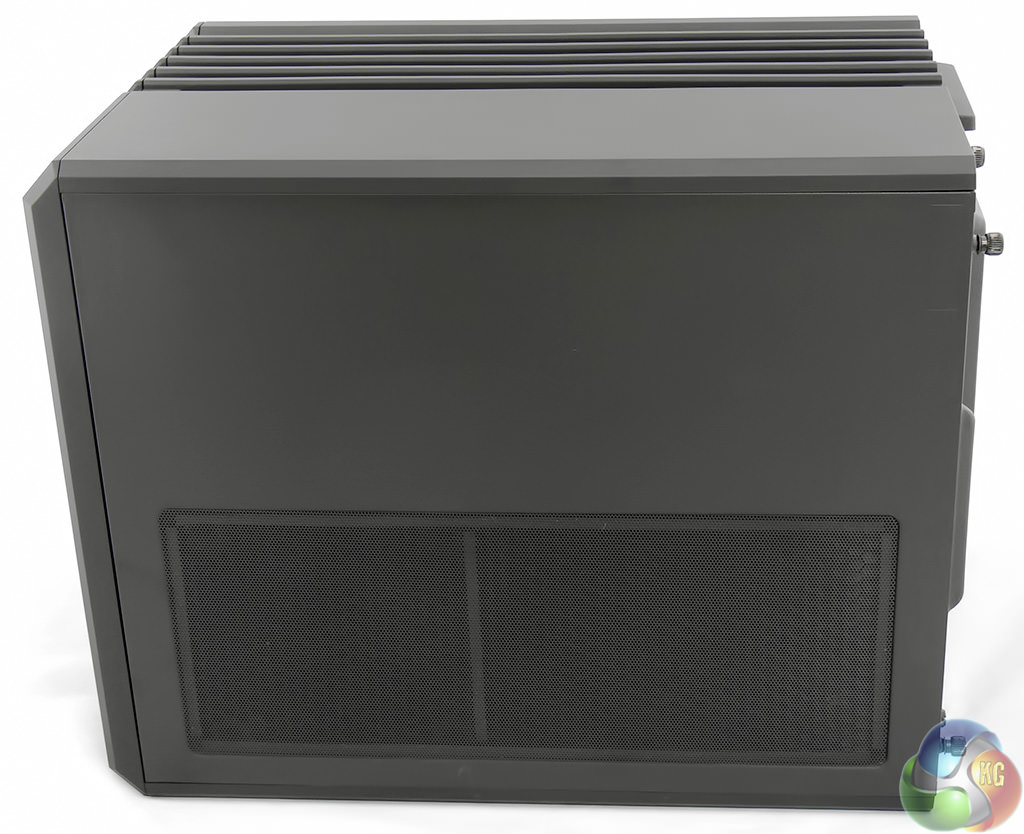
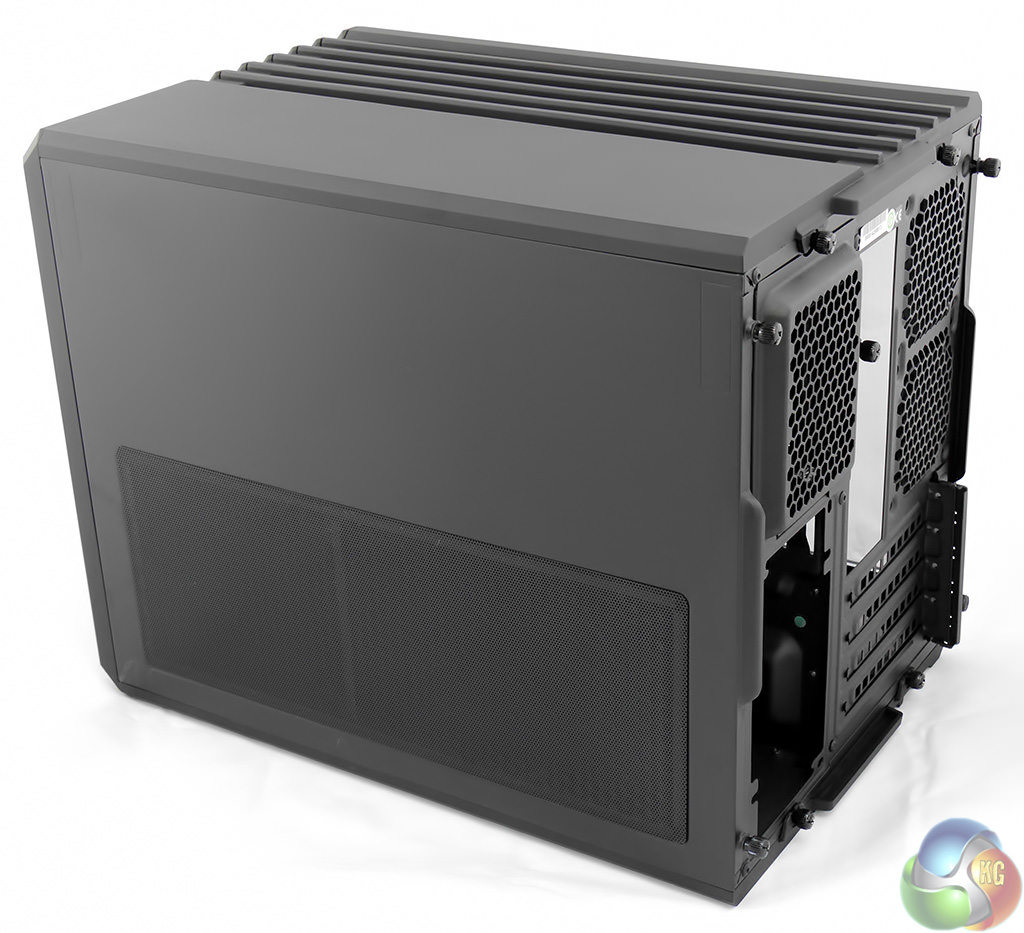
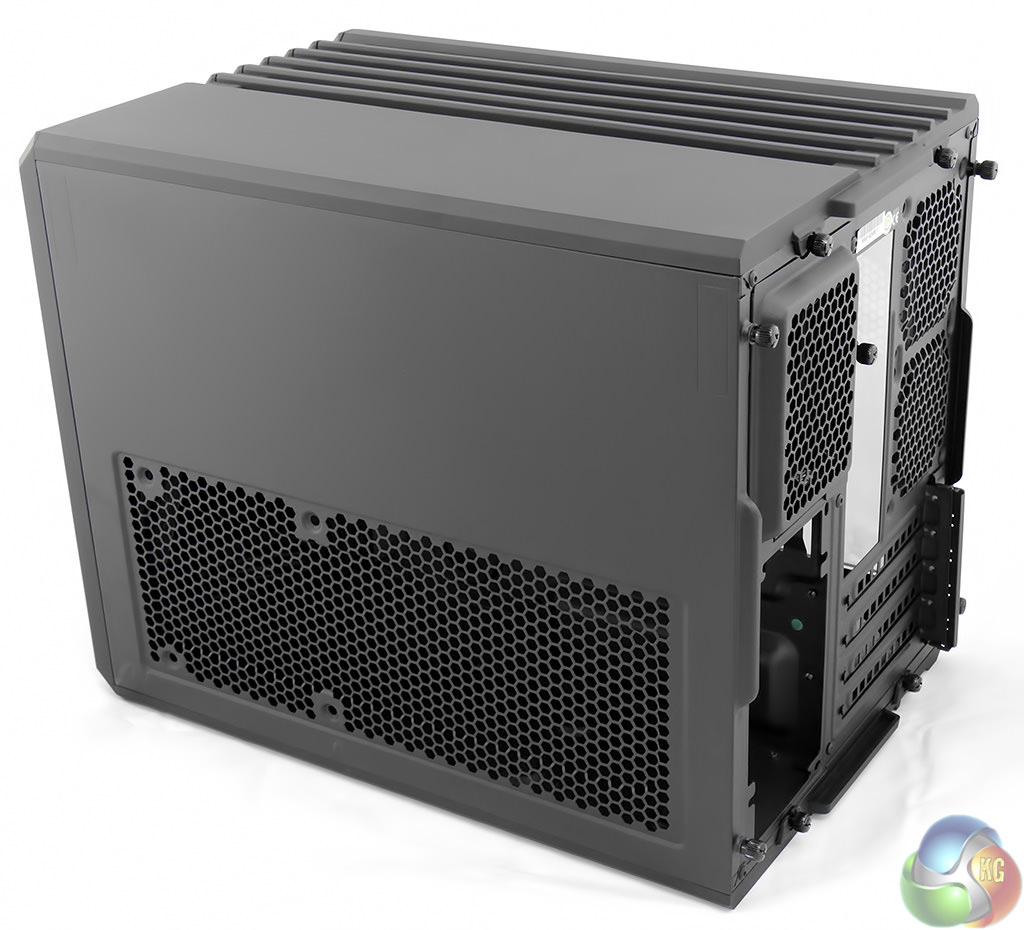
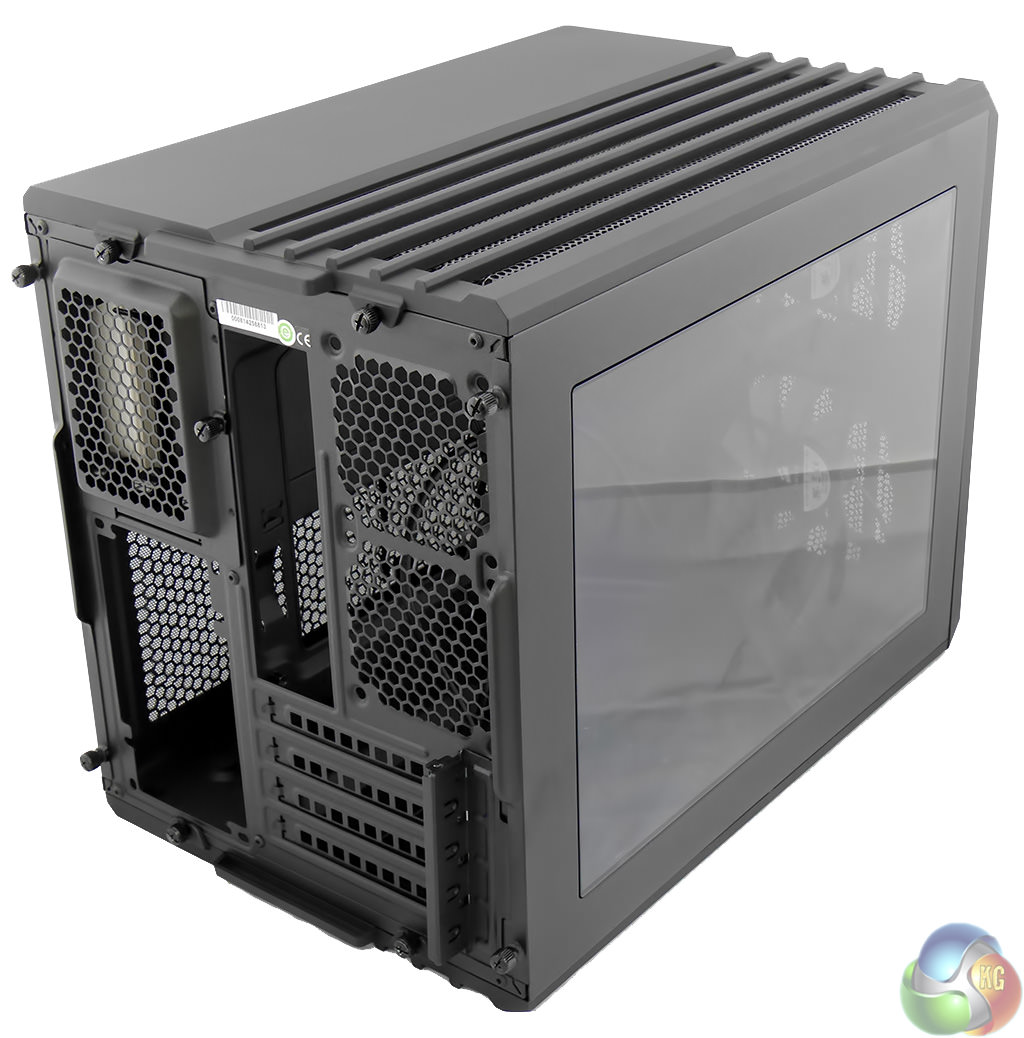
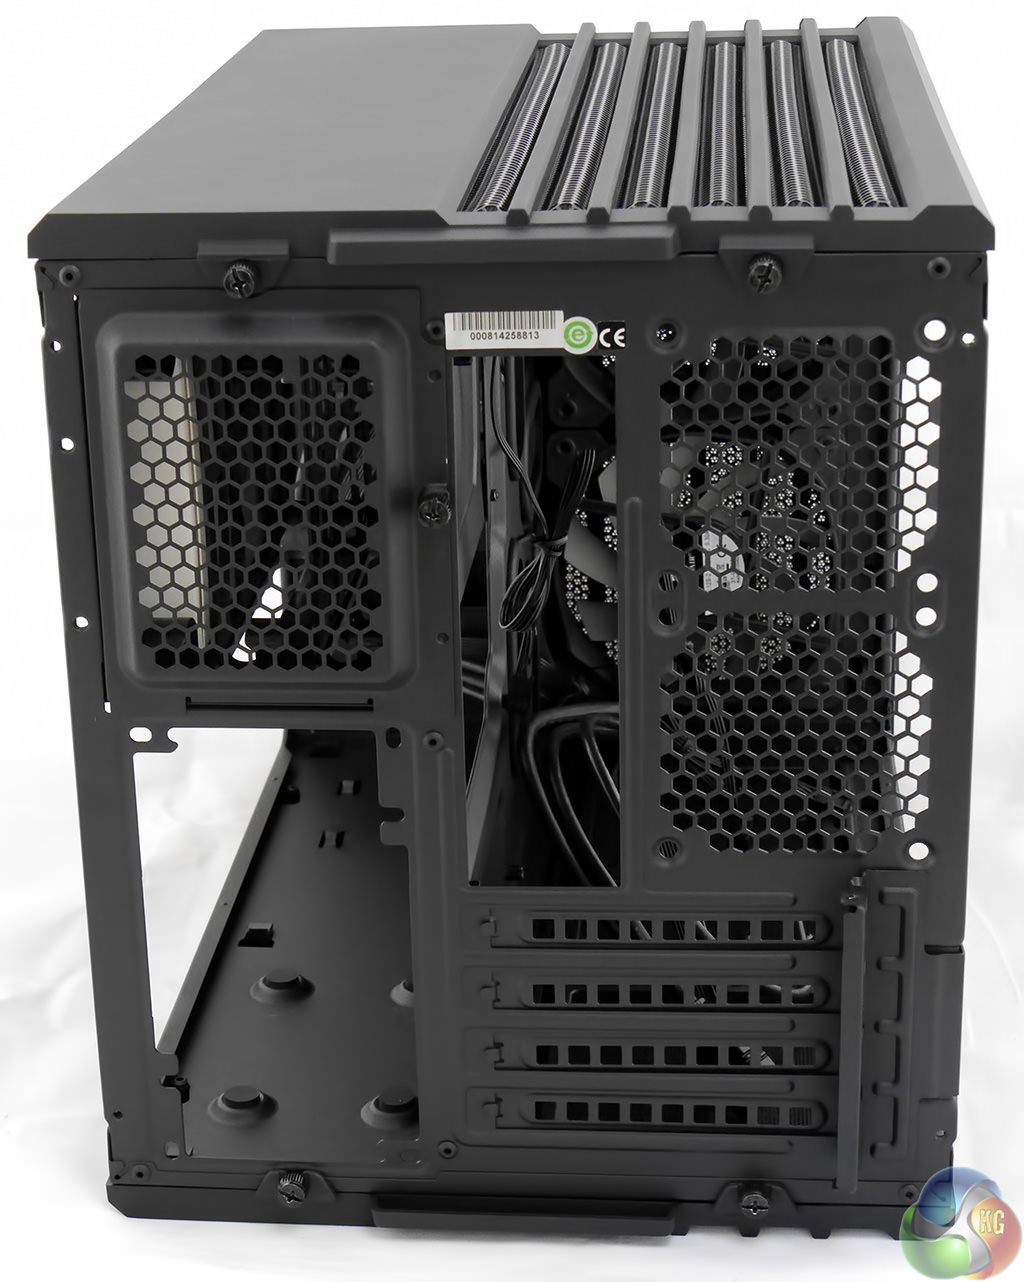
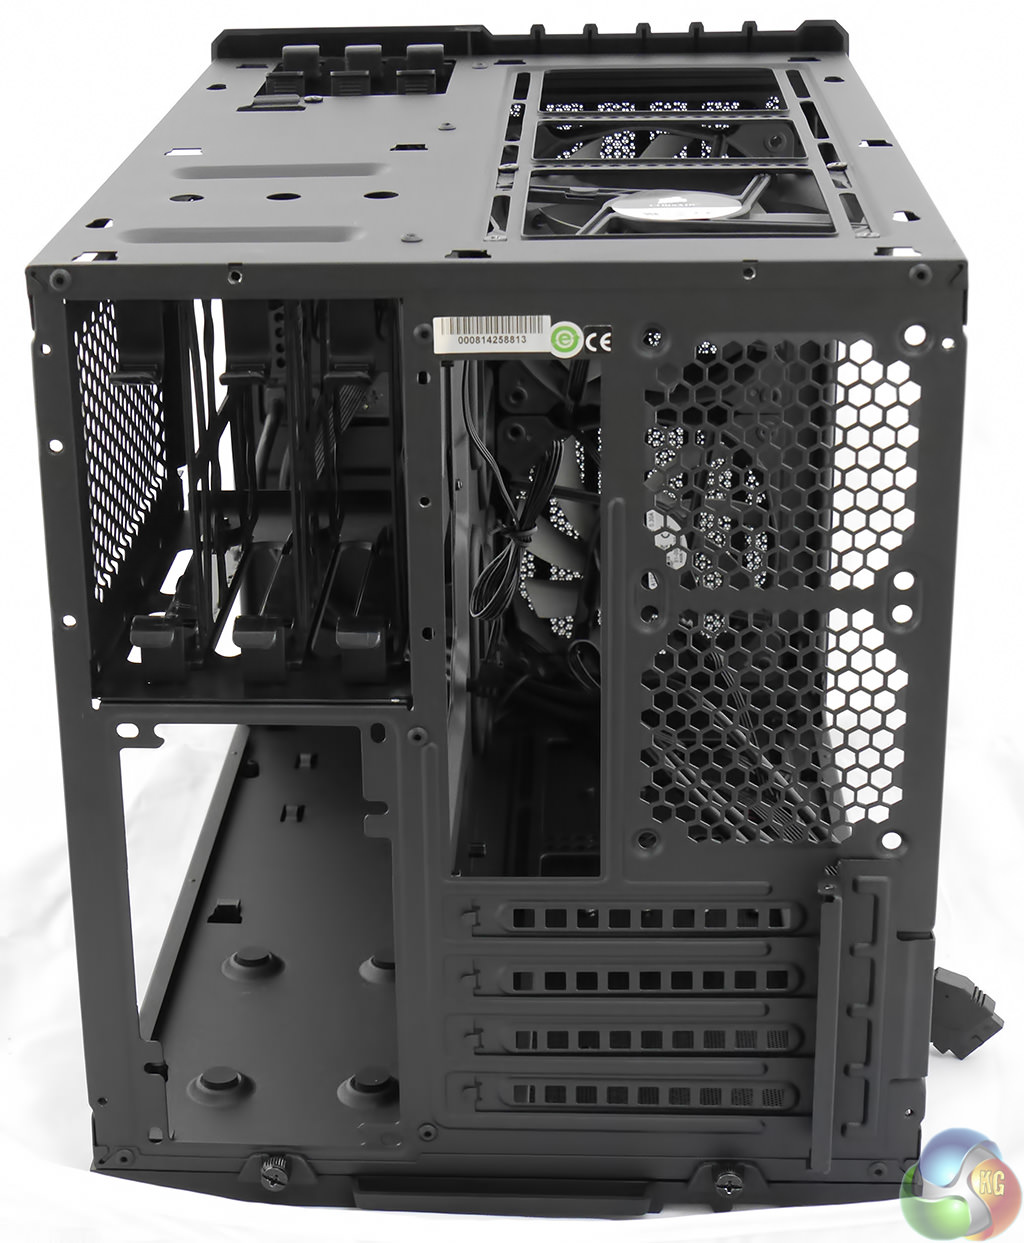
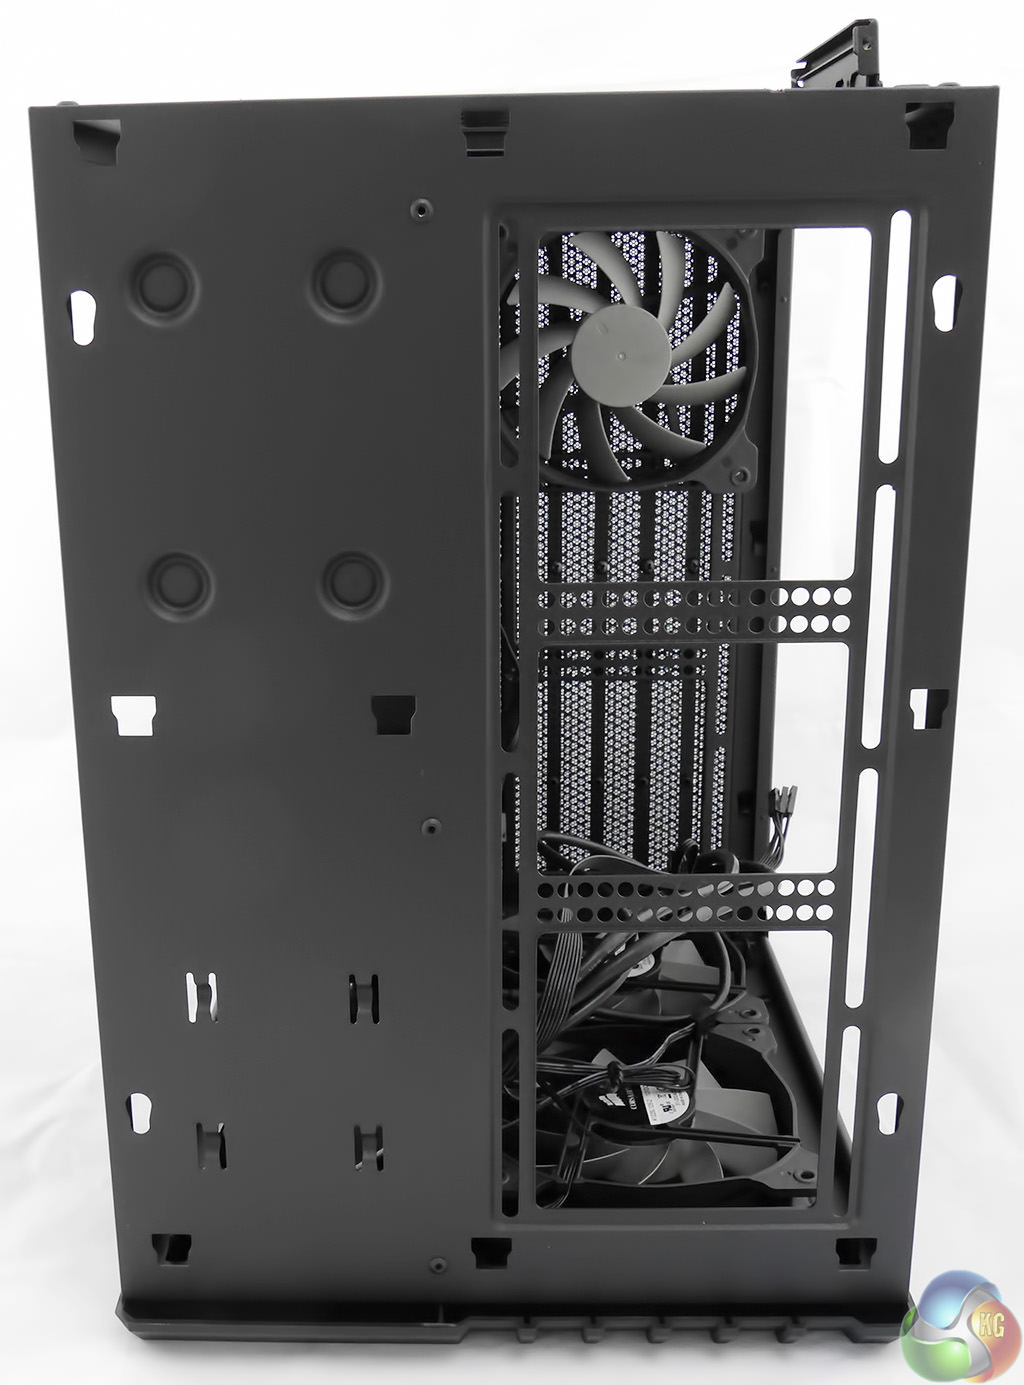
On the right side of the case you can see the panel is ventilated to allow air to pass to the power supply and drives. Turning the case to show the rear you can see where the power supply will be located next to the four expansion slots.

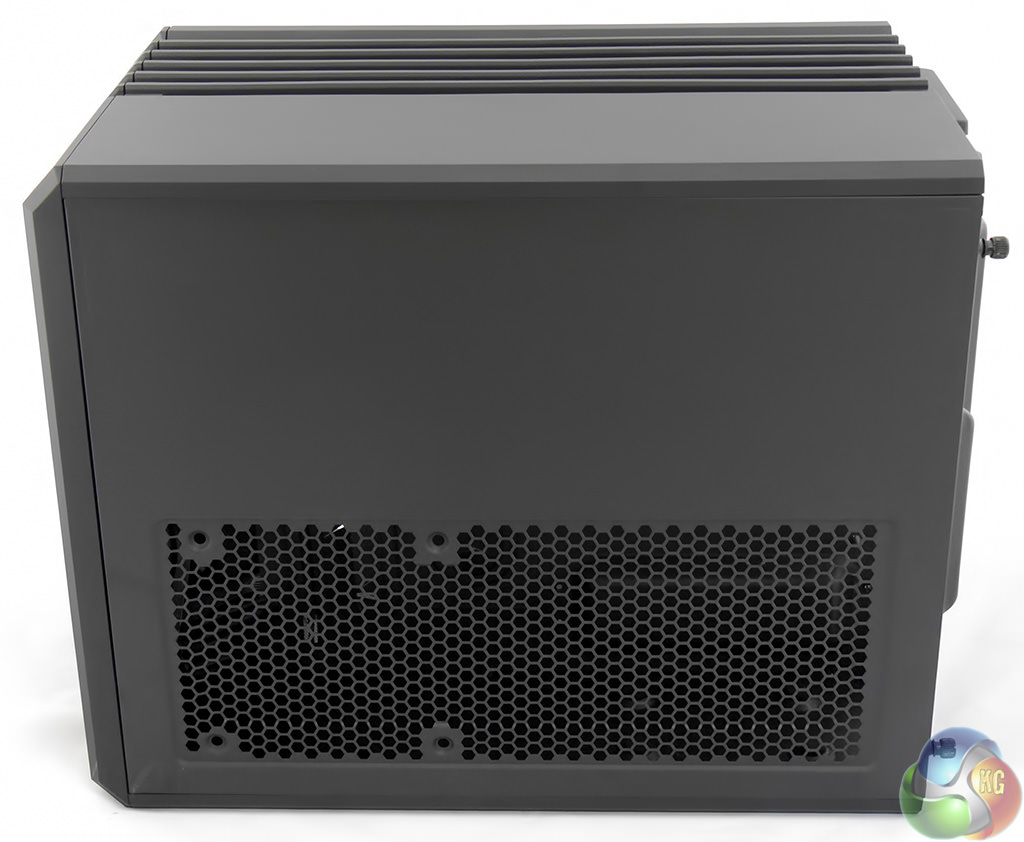
The dust cover over the vents is held in place with a number of magnets and is very easy to remove for cleaning. You'll notice there are mounts to add a 120mm fan towards the front of the case but no mounts further back on the side panel as the power supply occupies that space.
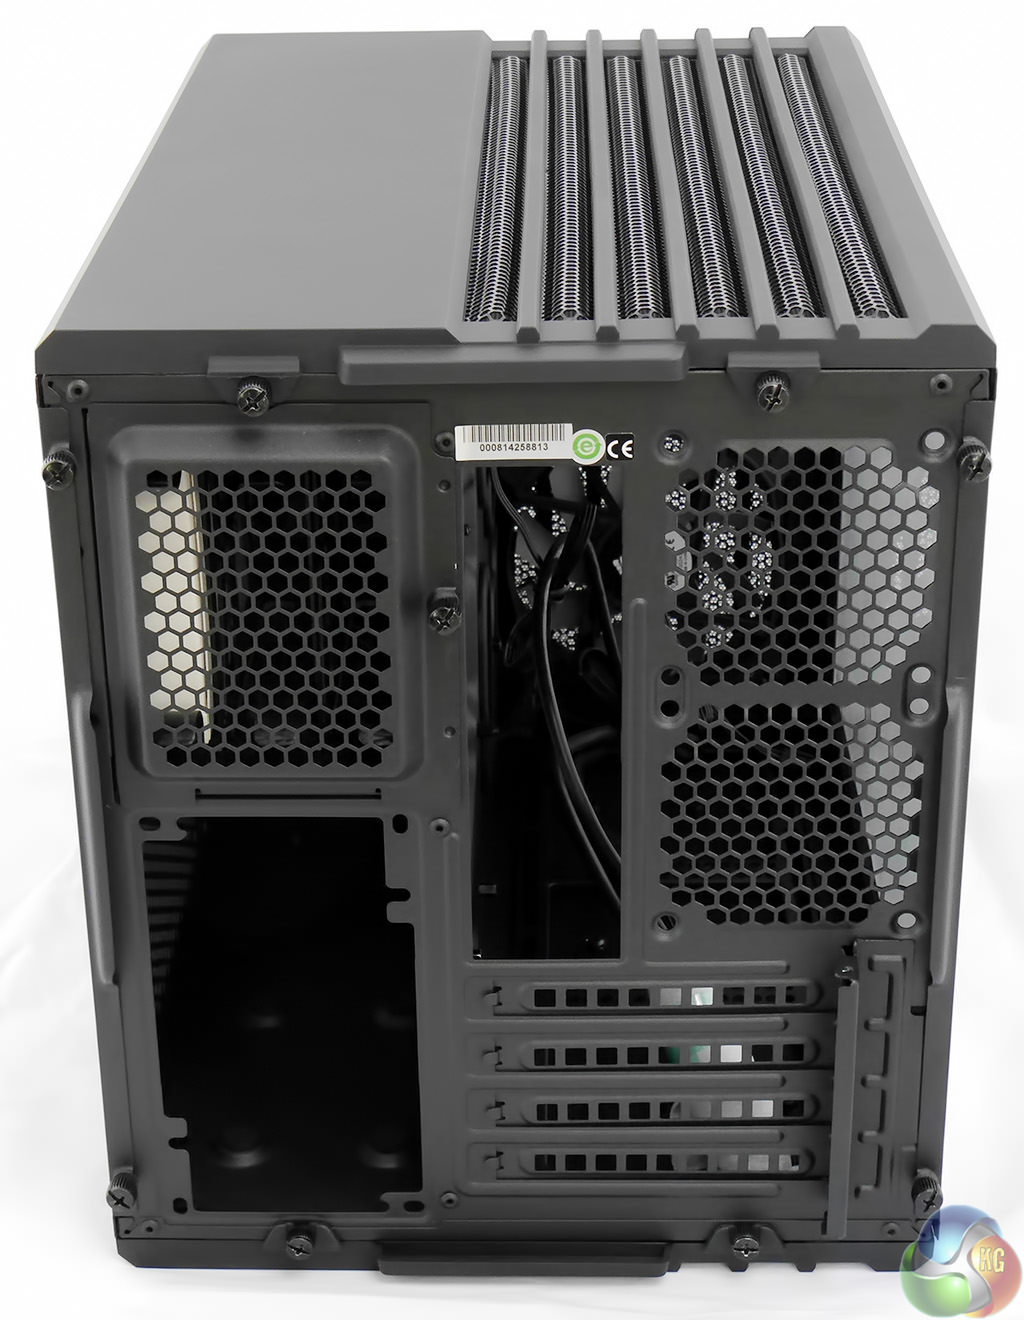
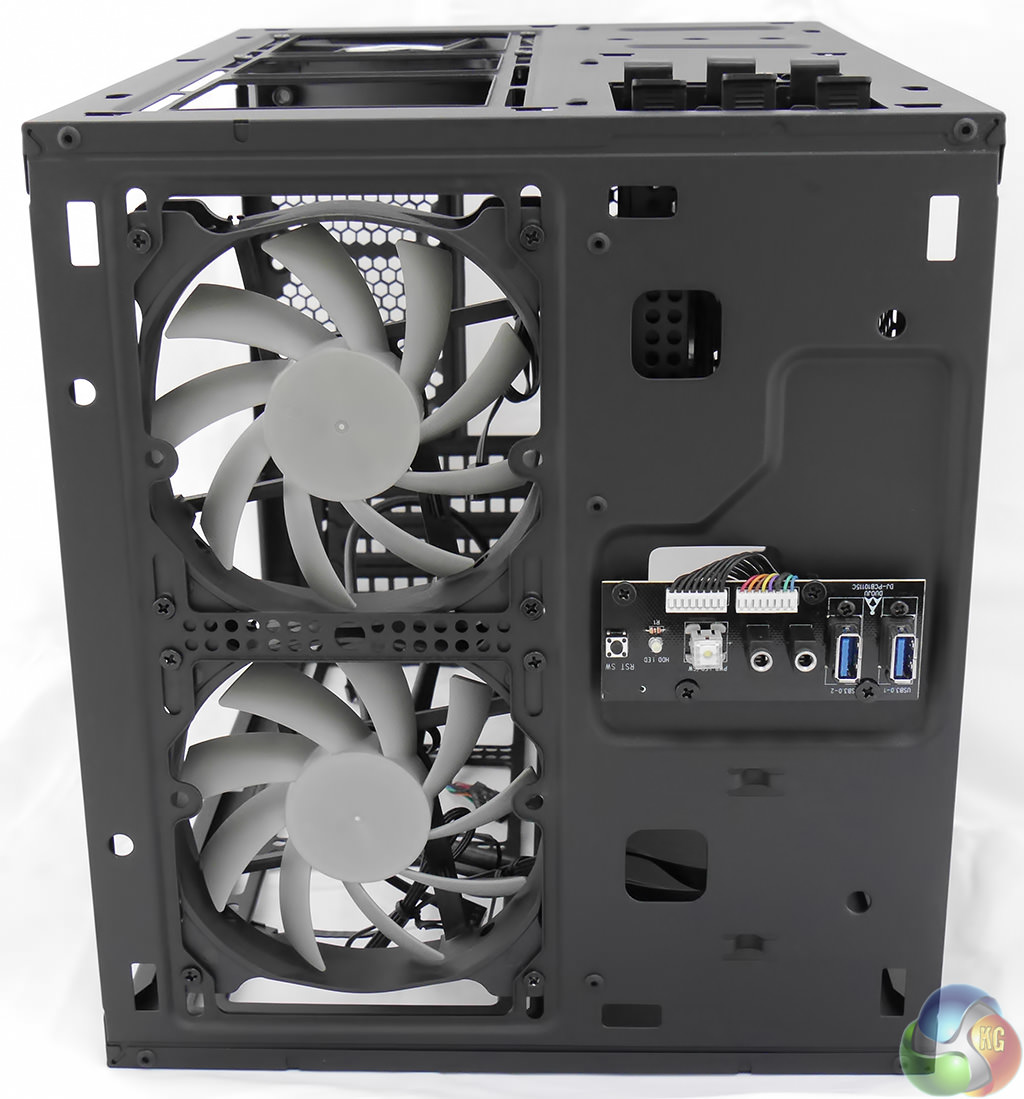
I can confidently predict the rear of the case is like nothing you have ever see before. Forgetting for a moment, that we are looking at the rear so left is right and right is left, you can see the power supply is at the bottom left of the panel. The I/O panel is located in the center with two 80mm fan mounts to the right hand side. Below that we have the four expansion slots (it is a Micro-ATX design after all) but that is enough to install a pair of gaming graphics cards in CrossFireX or SLI.
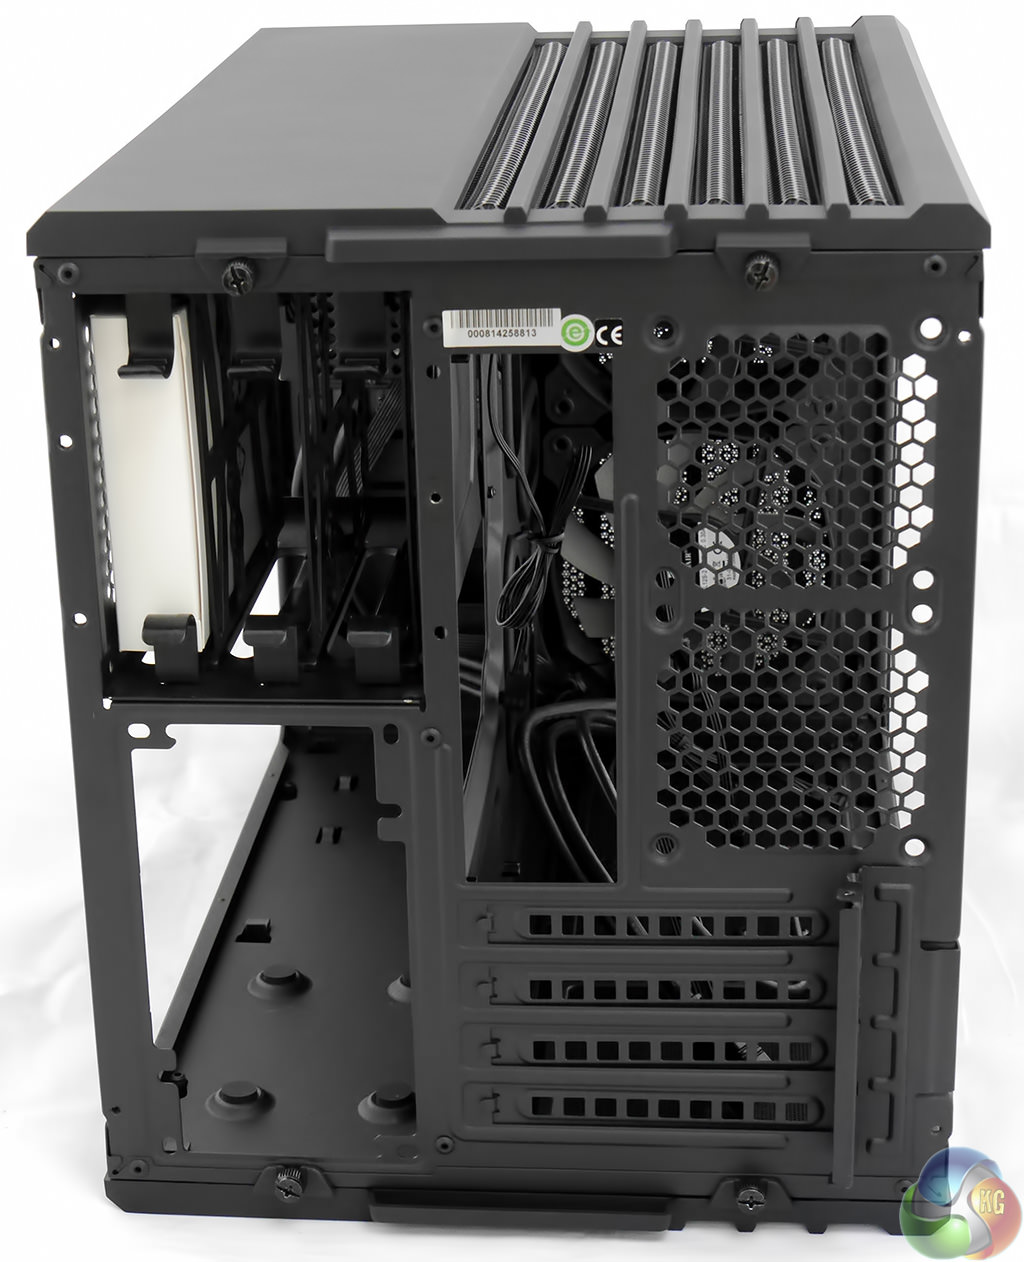
No doubt you are wondering about the perforated cover to the top left, just above the power supply. Would you believe it conceals the three 3.5-inch drive bays? The flash of white that you can see in the photos is the box of accessories that sits, as ever, in one of the drive bays. Yes, this means the hard drives are inserted from the rear of the case as we shall see in a while.
Incidentally the accessories consist of the various screws you need, along with some cable ties and four self adhesive rubber feet for the chassis. You don't get four screws for the power supply, which seems a bit mean.
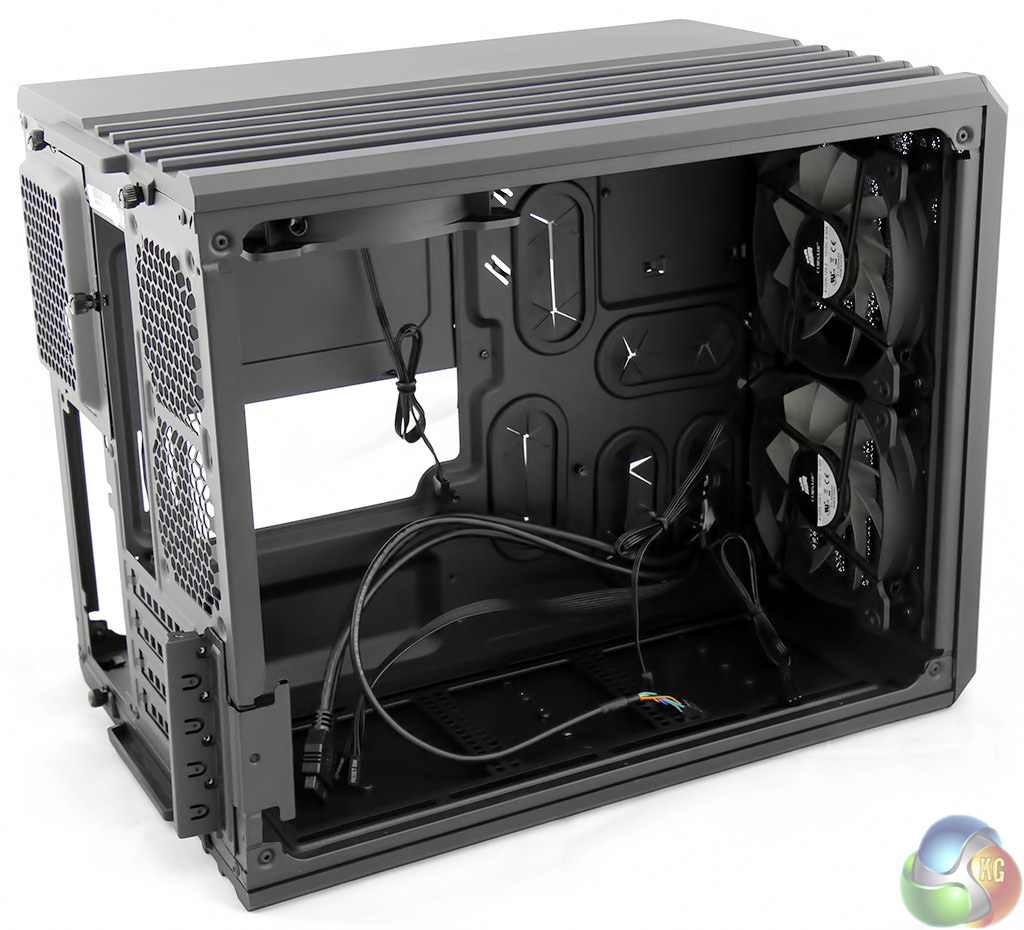
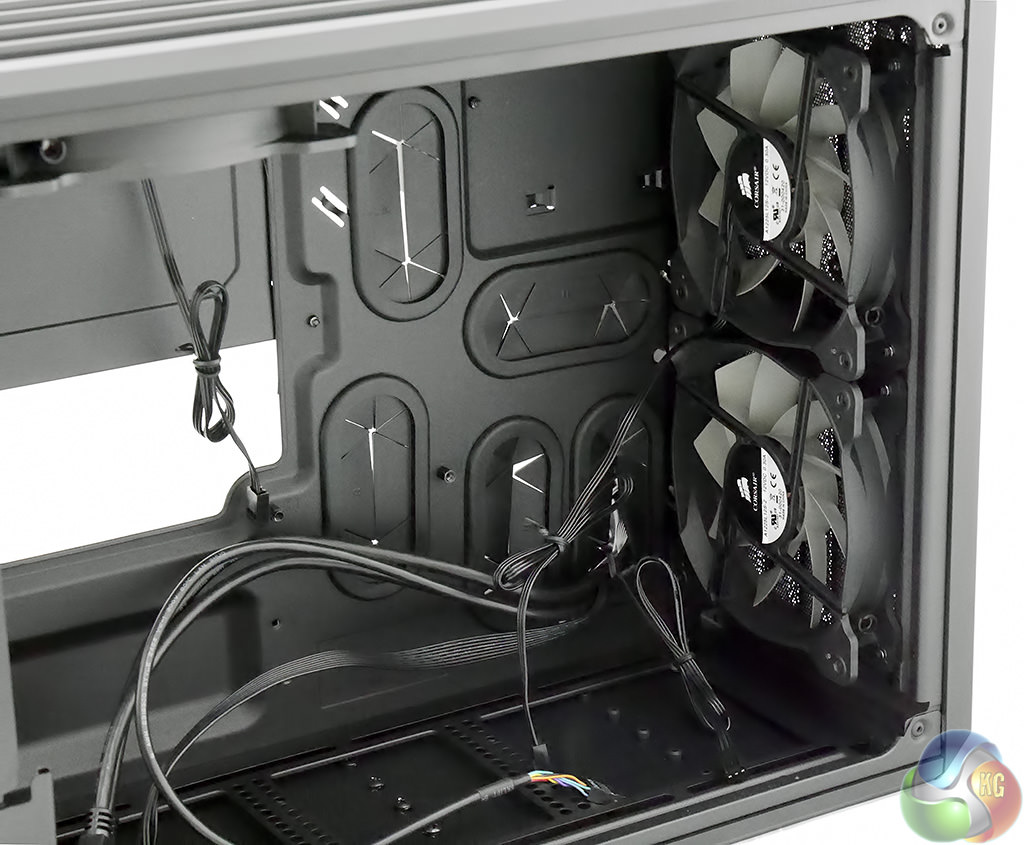
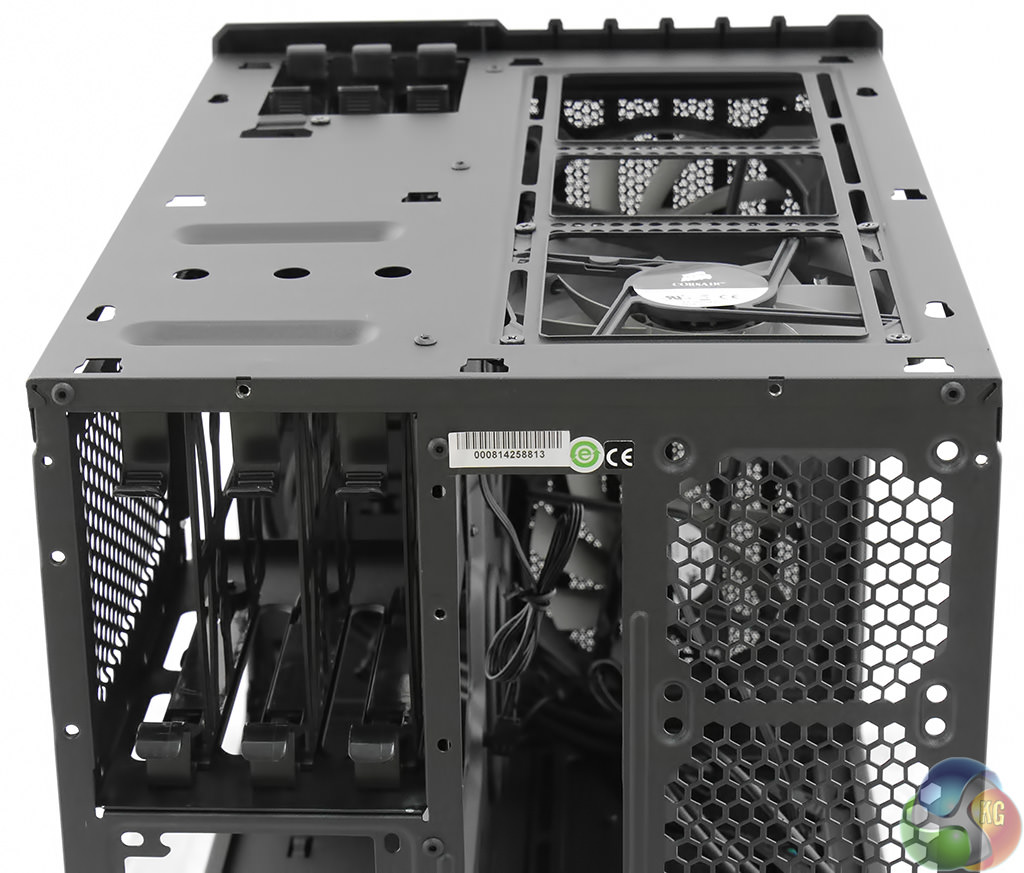
Undo two thumbscrews, remove the left hand side cover and voilà we have the main chamber in the case. This is where the motherboard, CPU, RAM and graphics cards go, however there are no drive bays or a housing for the power supply so the space is amazingly open and free from obstructions. Corsair supplies two 120mm fans at the front of the case and one 120mm fan at the rear of the roof. There is no fan controller.
If you choose to use a Mini-ITX motherboard then you have the option of installing a water cooling system in the floor of the case. Micro-ATX aficionados install their radiator at the front of the case, which means you'll have to ditch one or both of the fans that come as standard at the front of the Air 240.
If you go for a full 240mm radiator you are likely to hit a significant snag which is that the Air 240 will not have enough clearance to accommodate a full length 12-inch graphics card. We're only talking about the need for an extra 5mm or 10mm of space to make everything lovely but as things stand you need to consider the components you will use with a degree of care.
The four expansion slots use a tool-free system with a metal clip that holds the blanking plates and graphics card(s) in place. Be warned, the clip snaps into place and can easily attack a fingertip. Go on, ask me how I know.

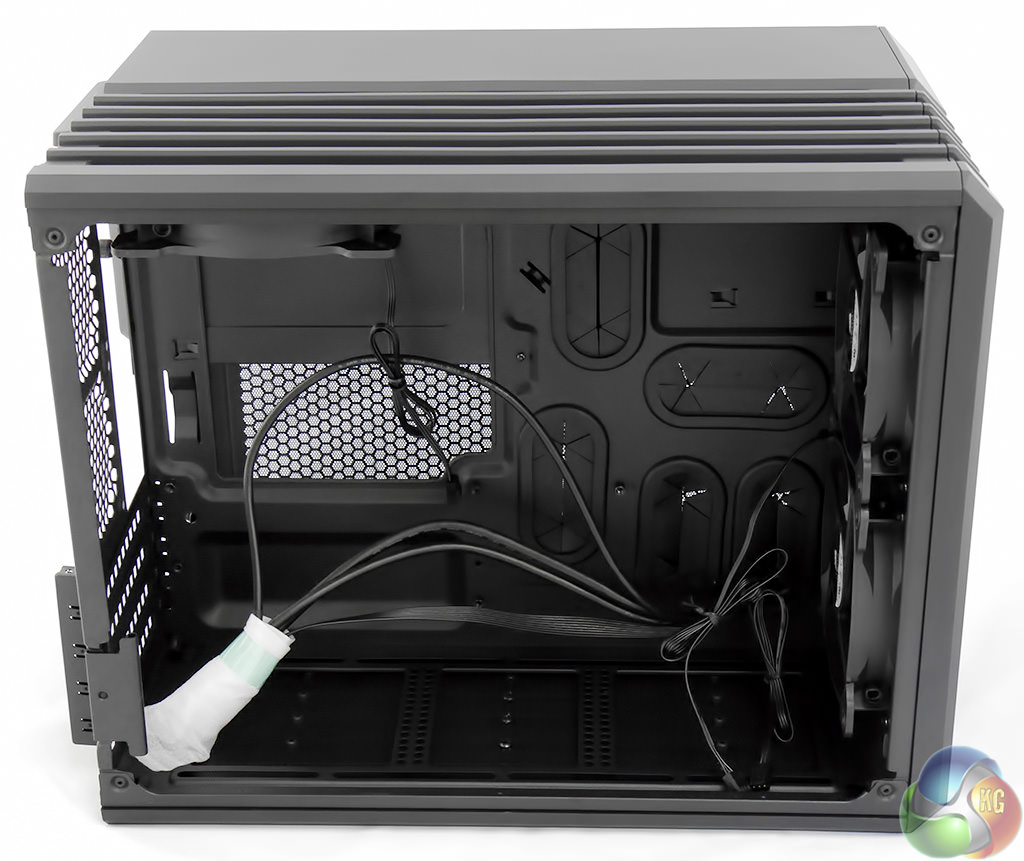
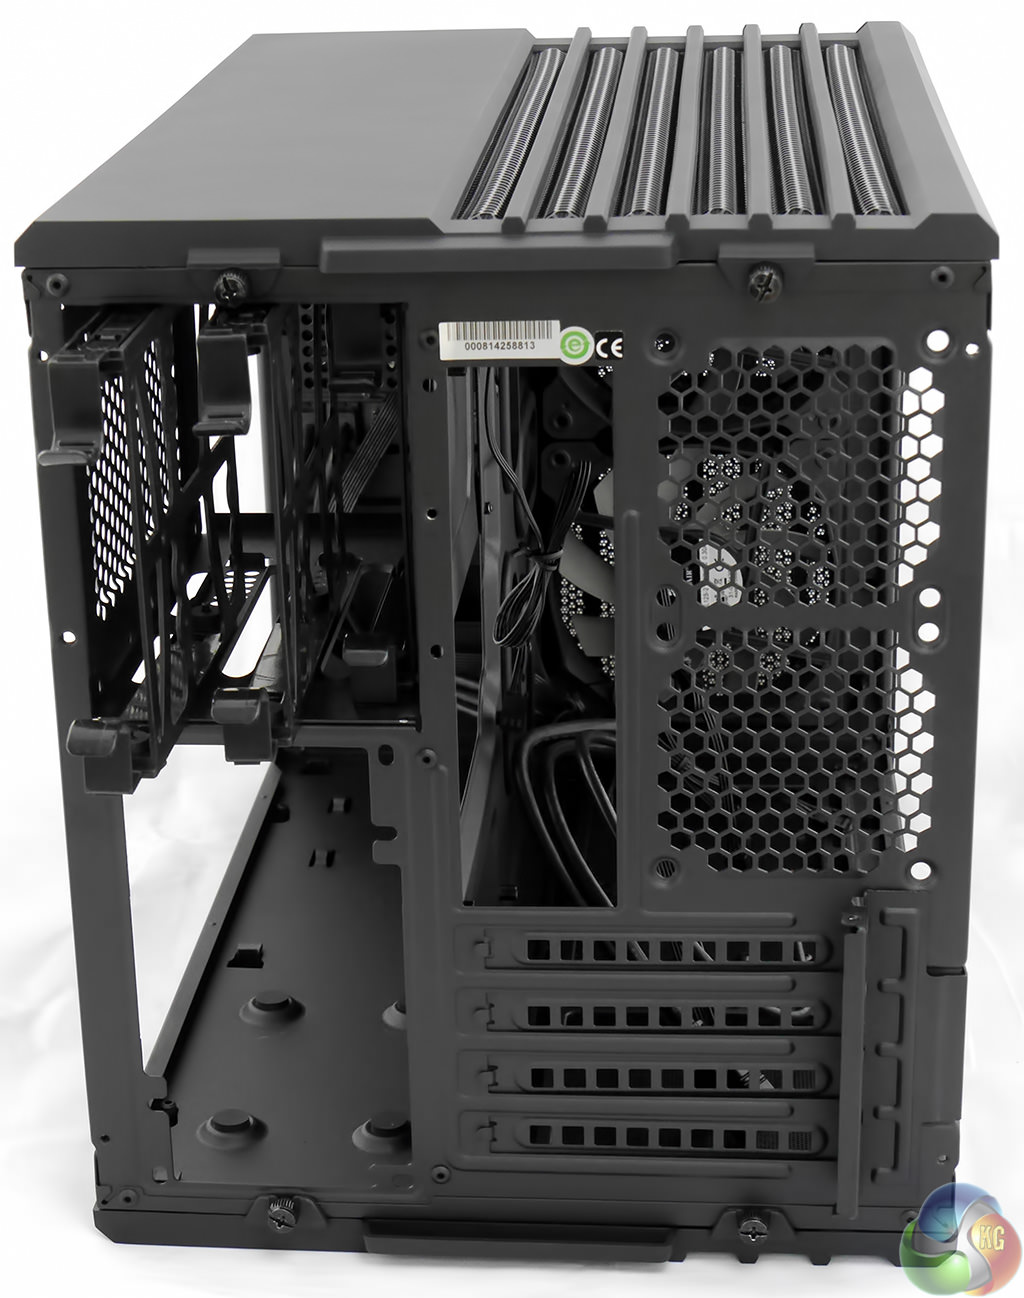
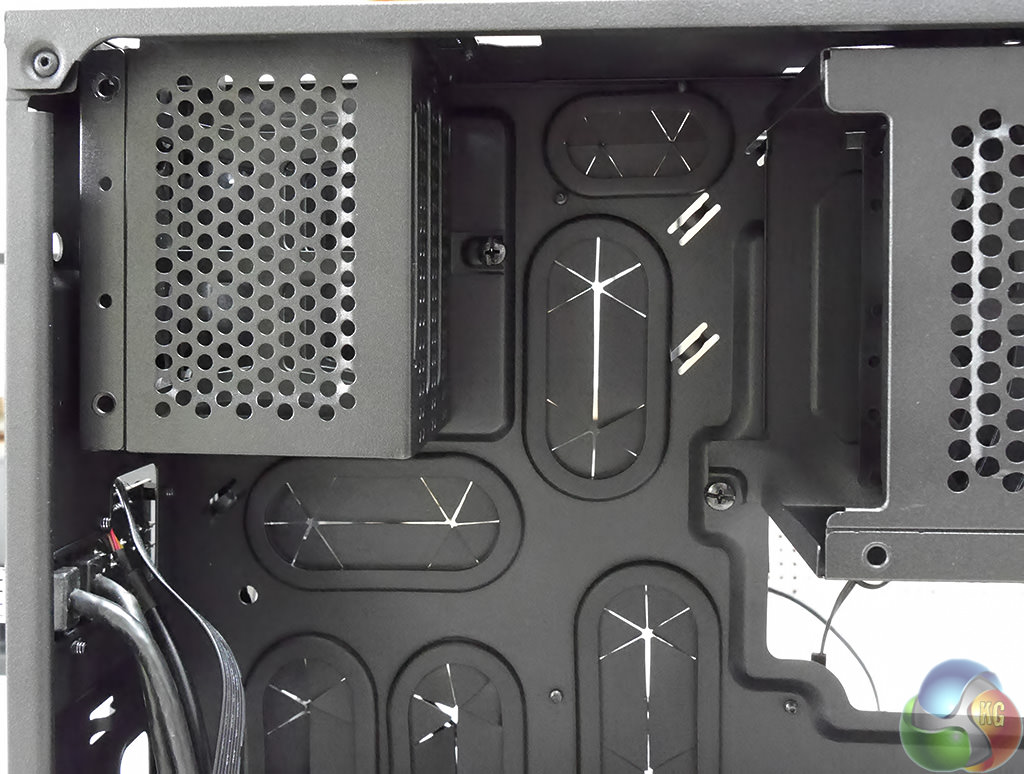
This is the side of the Air 240 that sets the duo of Corsair Air cases apart from most other cases on the market. Generally speaking you get about 25mm of clearance behind the motherboard where you can tuck away the wiring and perhaps house a Solid State Drive.
With Air 240 you get 100mm of clearance between the motherboard tray and right hand side panel which is enough space to accommodate the power supply, three 3.5-inch drives and three 2.5-inch drives.
Let's take a closer look at the drive bays starting with a reminder that you don't get any 5.25-inch optical drive bays. EVGA has a neat solution to the thorny problem of optical drives in its small form factor Hadron Air and Hydro cases with a slimline bay for a slot loading drive that fits across the case behind the front panel. This means that you insert DVDs in the side of the case which is unusual but effective.
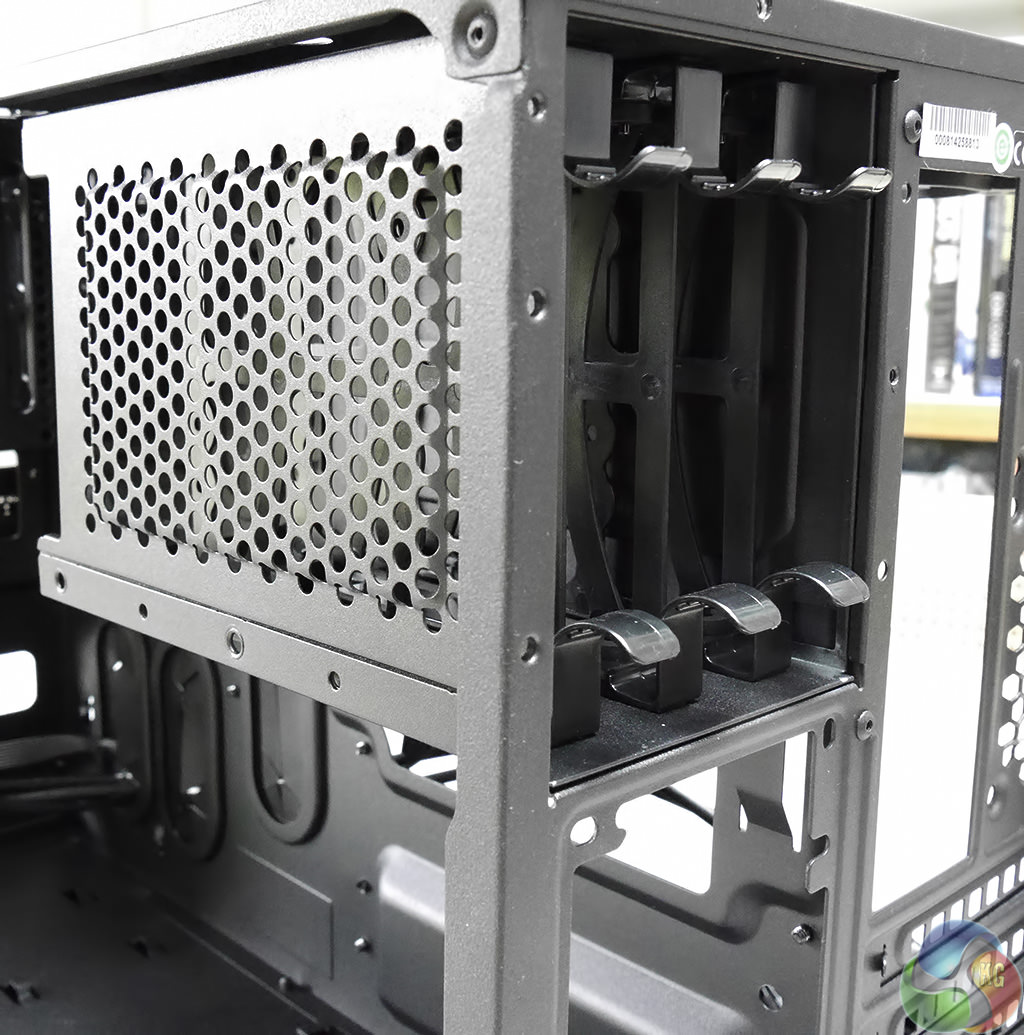
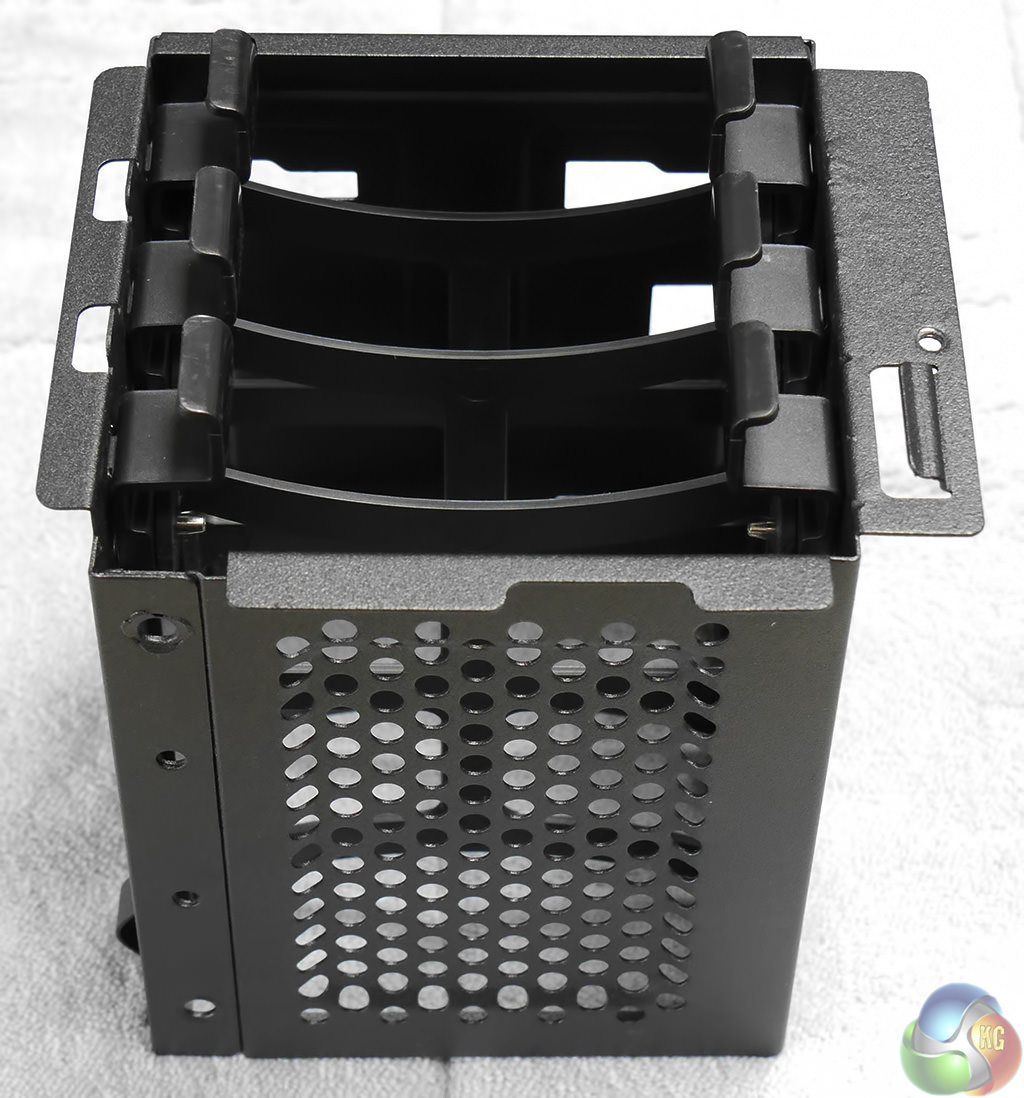
As mentioned before, with the Air 240 the 3.5-inch drives slide in from the rear of the case. The drive caddy can be removed once you have undone a thumbscrew. There is a good chance you will need to remove the drive caddy during your PC build as it obscures access to the back of the motherboard however you cannot simply omit the 3.5-inch drive caddy as that would leave a large hole at the back of your PC.
The three drives trays slide in and out of the caddy and flex into position around a 3.5-inch hard drive. If you choose you could screw a 2.5-inch hard drive or Solid State Drive into one of these trays however it makes more sense to use the dedicated 2.5-inch trays at the front of the Air 240.
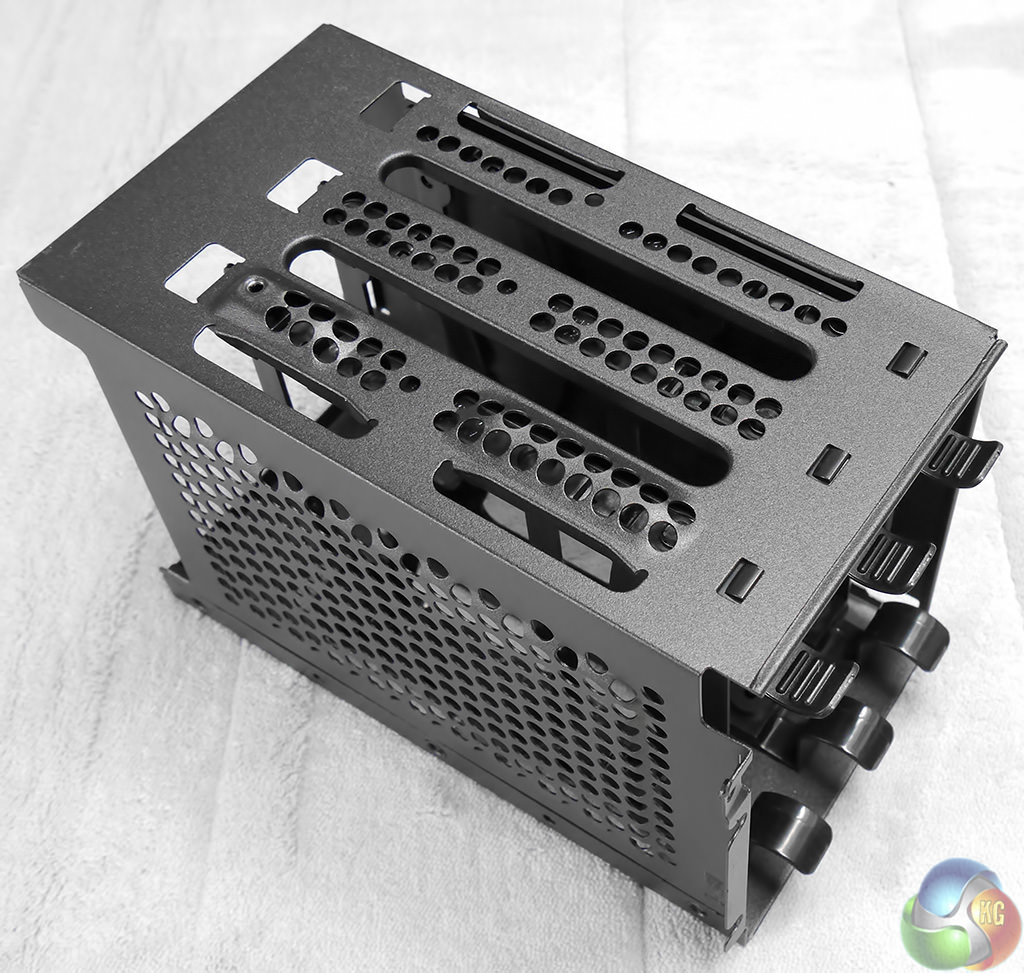
The unusual layout of the Air 240 means that you first remove two thumbscrews and then pull off the top cover of the chassis. This reveals the 2.5-inch drive caddy with its trays pointing upwards.

In this photo I have laid the Air 240 on its side so you are looking at the top of the chassis with the 2.5-inch drive trays partially removed.
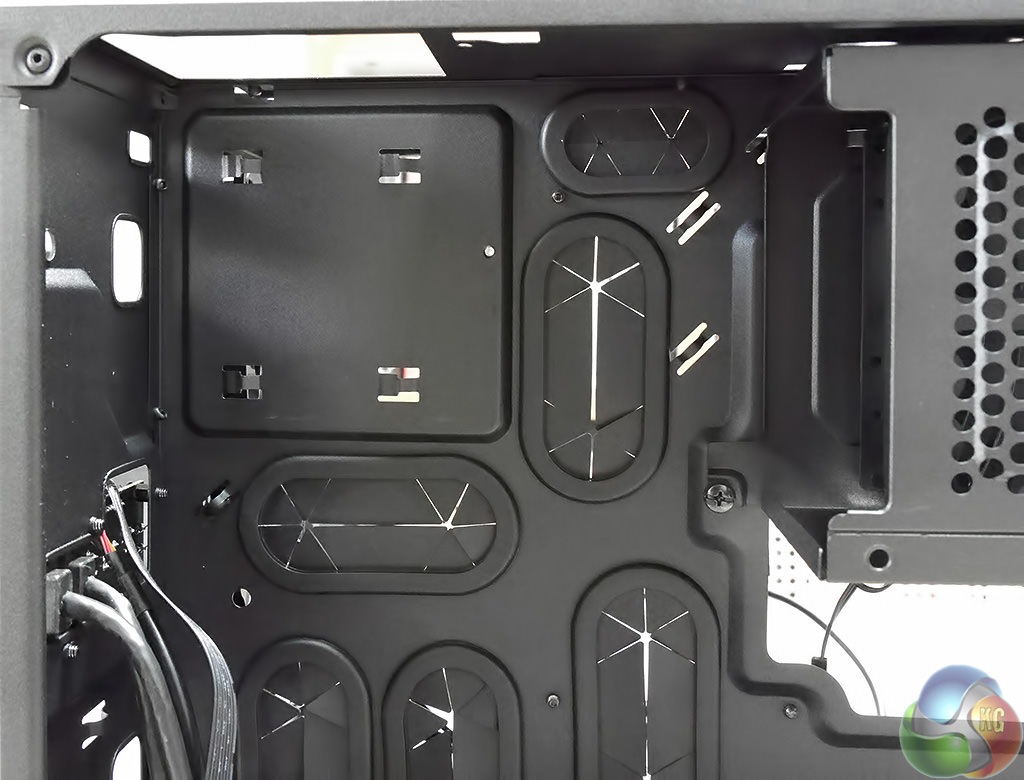
There is no obvious need to remove the 2.5-inch drive caddy but if you choose to do so you first have to undo a thumbscrew on the backside of the motherboard tray and then find a small screw that is located under the top cover. It's not difficult to do, but neither is it especially obvious.
Removing the bottom cover is also a simple matter of undoing two thumbscrews and sliding the cover away.
In all likelihood you will want to remove the front cover to gain access to the front fans and perhaps to install a water cooling system. With the two side panels and the top panel removed you unlatch four clips and the front cover pulls away.
At this stage in the game the Air 240 is minus its side, top, bottom and front panels and has been stripped to a bare skeleton. The build quality feels a bit flimsy however the Air 240 is so small that the various panels make it nice and rigid without any noticeable flex.
One thing I did notice is that the Air 240 is surprisingly tricky to pick up and move around as there are no obvious hand holds.

Building a PC into the Corsair Air 240 isn't especially difficult however you do need to do things in a certain order to avoid running into problems. First I installed my Micro-ATX motherboard, then I removed the front fans, installed the Corsair H100i water cooling system and then the graphics card. This was the point when I realised the Sapphire Radeon R9 290 I wanted to use simply would not fit so I plugged in a Sapphire Radeon HD7790 instead.
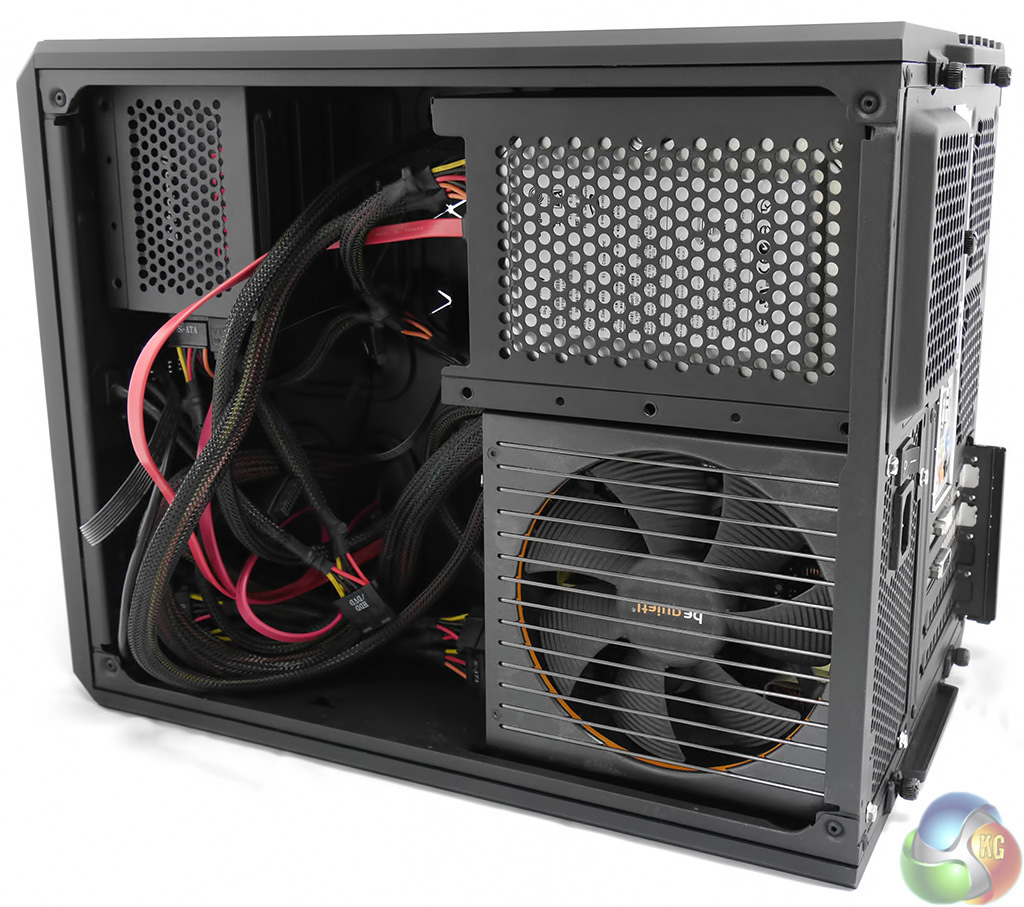
On the other side of the case I installed a 500W BeQuiet power supply, SanDisk Extreme SSD and Seagate Barracuda HDD.
If you remove the 3.5-inch drive caddy to gain access to the back of the motherboard to install the CPU cooler you need to be sure to replace the caddy before you install your power supply. You cannot do these jobs the other way round.
You don't have much scope for tidying up the cables in this side of the case so the best thing is to use a modular power supply that minimises the amount of wires you have to deal with. One thing I liked a great deal is the way that the power and data connections for the 2.5-inch and 3.5-inch drives are very close together. This makes it easy to plug in the power, unlike some cases where the 2.5-inch drives are a long distance away from the data drives.
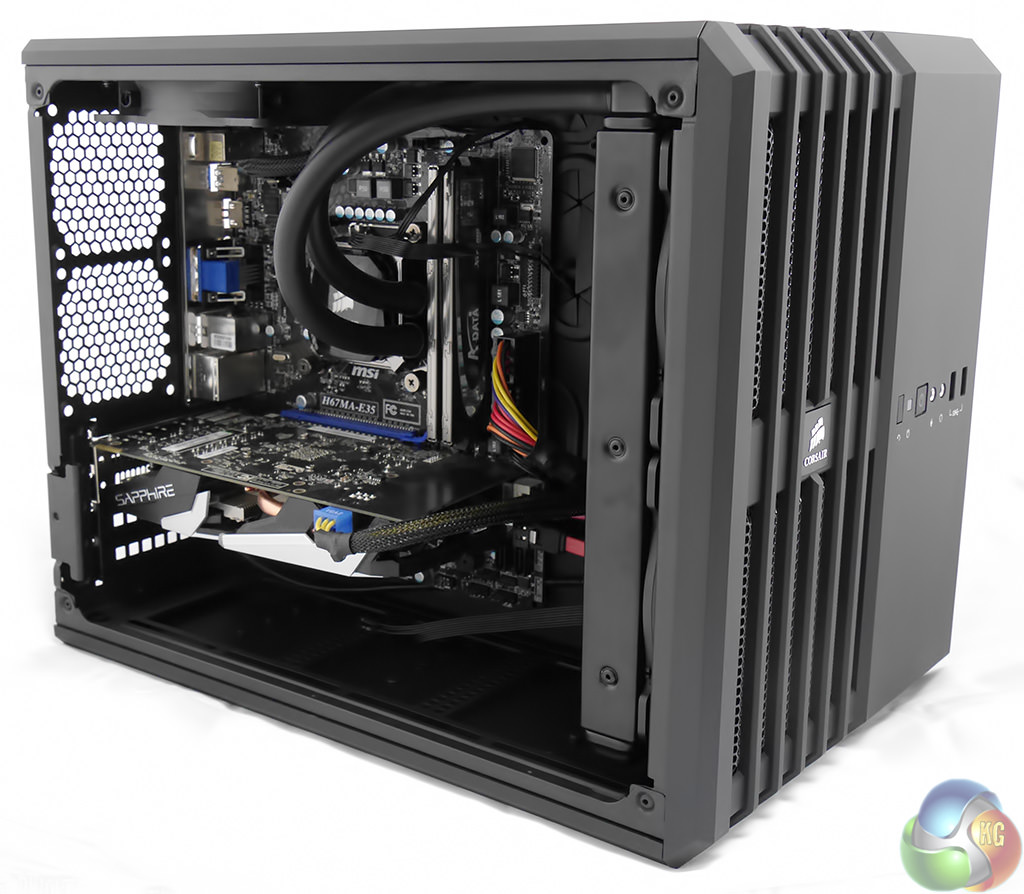
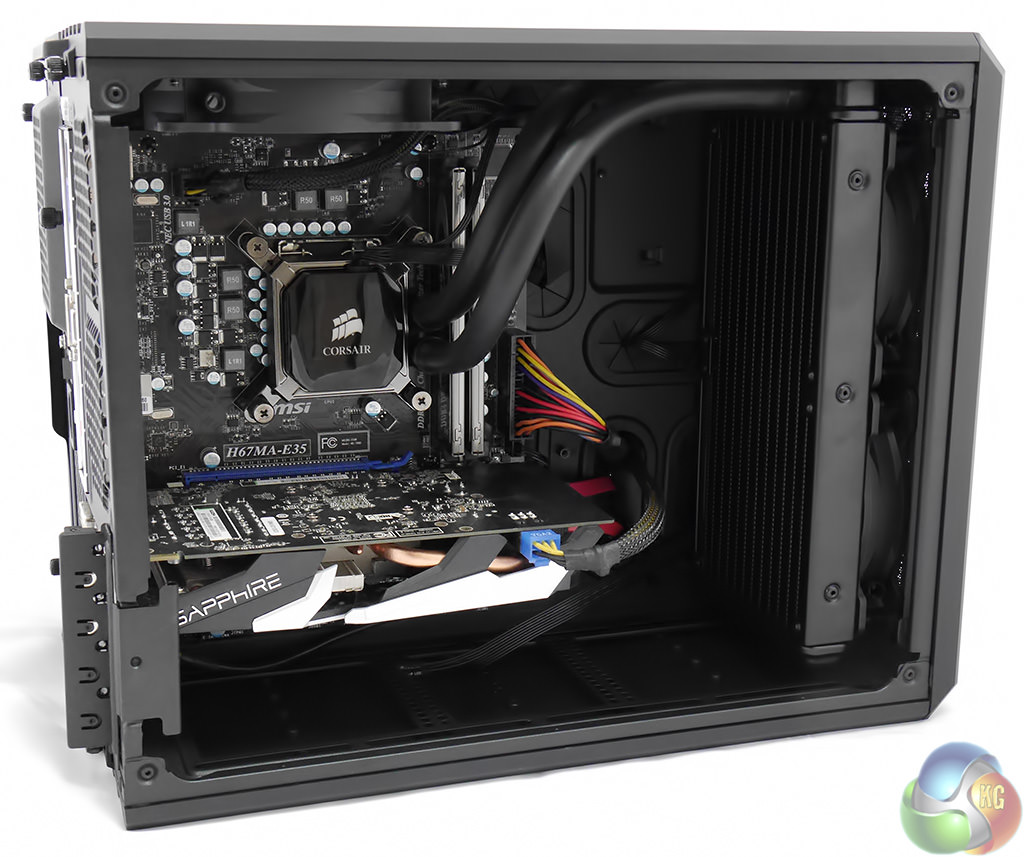
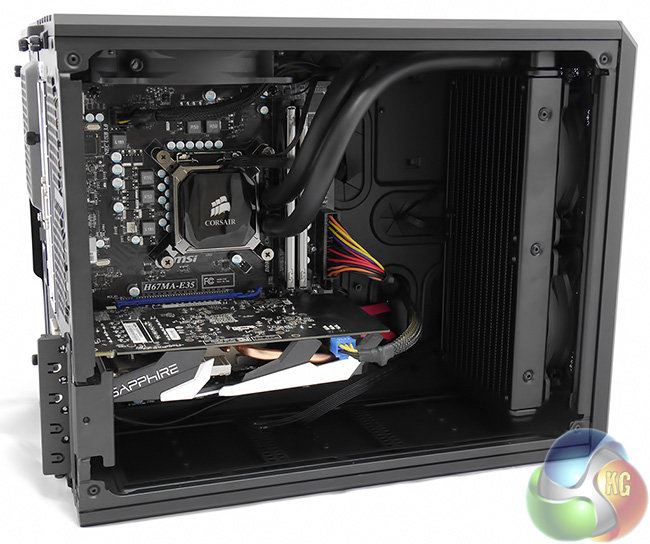
While the back side of the PC looks a bit of a mess the front side is lovely and tidy. You will note that I have positioned the Corsair logo on the water block the ‘right' way up to avoid causing pain and grief to our more obsessive readers.
During the PC build I had no problems with the lengths of any of the cables or the positions of any components, thanks to the compact nature of the Air 240.
To put this case through its cooling paces we will be using a test system consisting of an Intel Core i5-2300, MSI H67MA-E35 motherboard, Radeon HD 7790 with an Solid State drive and storage hard drive. This system allows us to produce a substantial amount of heat and effectively test the Corsair Carbide Air 240‘s cooling capabilities.
For stress testing we use a mixture of Prime95 and FurMark to create the maximum heat output. Prime95′s ‘Small FFTs’ setting allows us to stress our CPU. FurMark’s ‘GPU Burn-in’ mode creates the maximum amount of load our graphics card is ever likely to see.
Test System:
- Processor: 2.8GHz Intel Core i5-2300.
- Motherboard: MSI H67MA-E35.
- CPU cooler: Corsair H100i.
- Memory: Adata 1333MHz RAM.
- Graphics card: Sapphire Radeon HD7790 1GB.
- Power supply: BeQuiet 500W.
- Storage drives: SanDisk Extreme SSD and Seagate Barracuda HDD.
- OS: Windows 7 Professional 64-bit.
Thermal Performance Test Procedures:
- The Corsair Carbide Air 240‘s default fan configuration is: 2x 120mm front intake, 1x 120mm rear exhaust fans.
- The fans are operating at full speed.
- We allow the system to idle for 15 minutes and record the stable temperatures.
- We allow the system to operate under extreme stress for 15 minutes and record the stable temperatures.
Assess cooling.
The test system I built is lower powered than the systems I have used in recent reviews. In this instance I had a limited choice of Intel Micro-ATX motherboards to hand so I plumped for the MSI H67MA-E35 which I matched with a quad core Core i5-2300.
I had intended to use a Sapphire Radeon R9 290 however, as I mentioned, this graphics card is too long to use with a front mounted water cooling system, so I switched to a Sapphire Radeon HD 7790 instead.
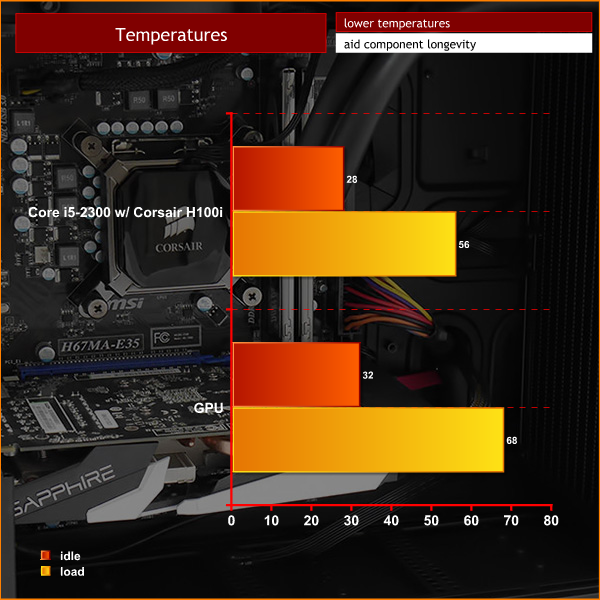
No problems with any of the temperatures. The Core i5 2300 idled at 28c, rising to 56c under load. The graphics card idled at 32c and rose to 68c under extended load.
The Corsair Air 240 is small but it cools very effectively.
Acoustic Performance
Acoustic Performance Test Procedures:
- We placed our Digital Sound Level Meter one meter away from the case.
- The case fans are set to maximum speed.
- The CPU cooler’s fans are deactivated.
- The Corsair Carbide Air 240‘s default fan configuration is: 2x 120mm front intake and 1x 120mm roof exhaust fans however I installed a Corsair H100i liquid cooler in place of the two front fans.
Assess noise
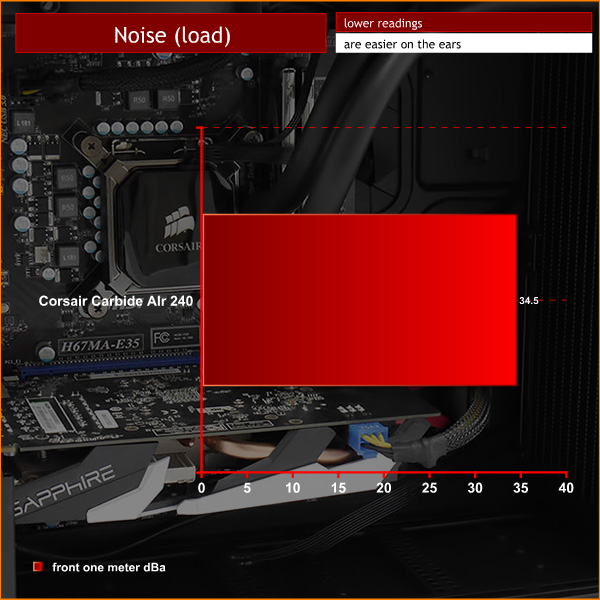
I didn't quite know what to expect from the Air 240 and was impressed that it was very quiet with the fans turned down, and wasn't especially noisy with the fans running at full tilt either.
There is one note of caution that I have to raise, which is the location of the PC. If you place your PC under a desk it is a distance away from your ears and there is a degree of baffling to deflect noise away from you. By contrast if the small form factor PC sits on your desk it is close to hand and directly in line. My guess is that Corsair Air 240 will sit on most people's desks so yes, it is quiet but yes, unfortunately, you will still hear it whirring away.
I like the Corsair Carbide Air 240 and applaud its novel design. The dual chamber layout separates the hot processor and graphics card from the power supply and drives, and that makes the cooling path as straight as an arrow. On the other hand the form factor means you are limited to either a Micro-ATX or Mini-ITX motherboard.
That may sound like a problem but it actually reflects the way that Corsair is slicing the PC case market into a bunch of tiny segments. If you want it big, tall and luxurious you can have an Obsidian 900D or you can save money with the Obsidian 450D.
The mainstream market is catered by the Graphite 730T and 760T and the Air 540 is a large dual chamber design, and so on, and so forth. By my reckoning Corsair has 30 different cases in its range that come in all shapes and sizes, with each model aimed at a specific segment of the market.
The way I see it is that any given Corsair hits some five to ten percent of the market, and is irrelevant to the other 90 or 95 percent.
The Carbide Air 240 fits that brief precisely as it is useless if you use an ATX motherboard and questionable if you don't want a PC plonked on your desk but instead want to keep it out of sight under the table.
On the other hand you may love the dual chamber design, applaud the whacky drive bays and admire the way you can remove every last panel in about 30 seconds.
One thing is for sure, the £69.95 price tag is impressively cheap and about £10 less than I would have predicted.
Buy from Overclockers UK now. Both black and white models are listed at £69.95 inc vat.
Discuss on our Facebook page, over HERE.
Pros:
- Dual chamber design separates the hot components from power supply and data drives.
- Low price.
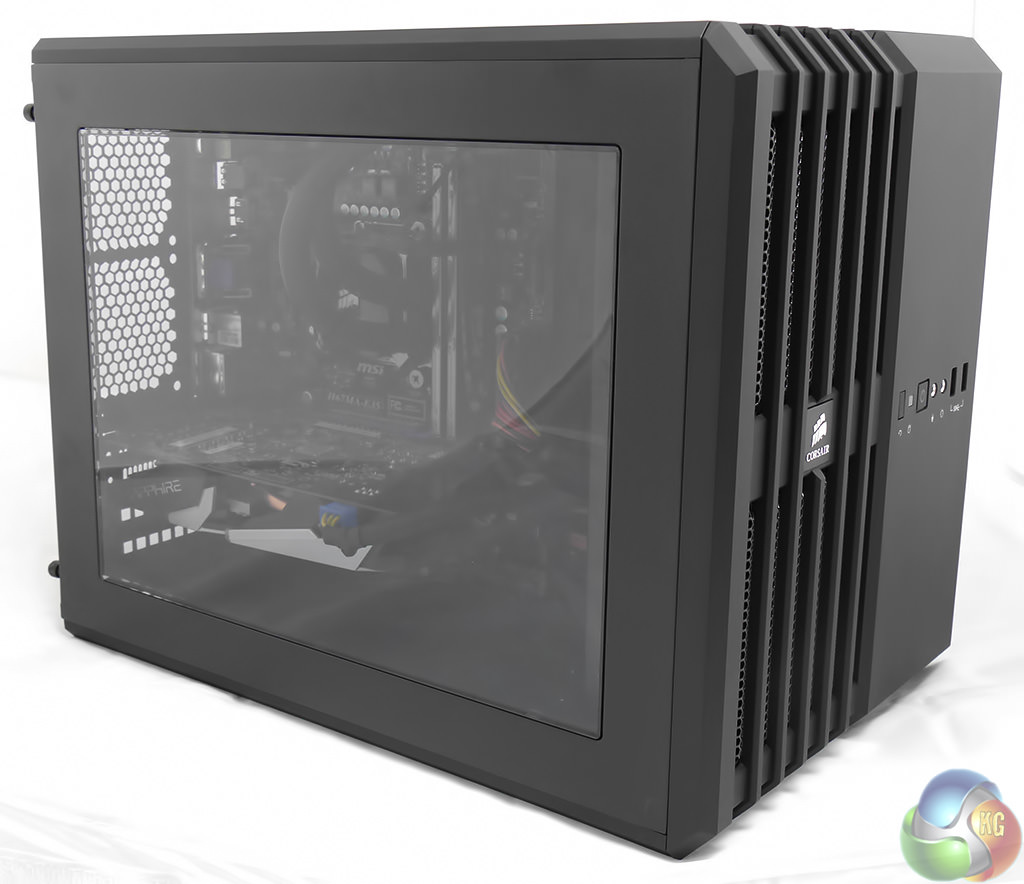
- Large window.
- Quick and easy to remove side, top, front and bottom panels.
Cons:
- The Air 240 is slightly too short to accommodate a 12-inch graphics card with a 240mm radiator at the front.
- No optical drive bay.
- Restricted to Micro-ATX or Mini-ITX components.
- The compact nature of the Air 240 makes the PC build laborious.
- No scope to install 140mm fans.
KitGuru says: Carbide Air 240 is precisely aimed at a select bunch of PC builders and they will be overjoyed with this new chassis.

Nice review, thanks.
Do you think there is enough clearance to install the H100i at the bottom even with a mATX mainboard and a single GPU? Then I might considering getting one of these.
With a mATX board in there, the bottom fan mounts are inaccessible… So no bottom rad, or even bottom fans, unless you go mITX 🙁
But with mITX, you might even get a full loop in there, with two 240 rads!