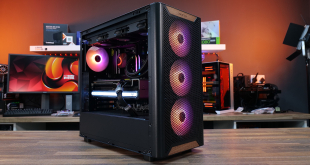
There is a vast amount of room to work with inside the Enthoo Primo thanks to the large exterior dimensions. The inside of the case is finished entirely in black which will complement most component choices well.
One of the most interesting aspects o the interior of the case is the isolated PSU design. The PSU is actually mounted vertically behind the motherboard tray, meaning it's completely isolated from the rest of the case thermally.
This creates a lot of room in the bottom of the case, and there is a bracket supplied which lets you install a 240 or 280 mm radiator in this location.
There is actually room for a 480 mm radiator in the floor of the case, however this cannot easily be fitted without modifications. Phanteks supply the case with a 140 mm fan in the floor of the case.
There are mounting points for a 480 mm radiator in the roof of the case, though, also supporting 420, 360, 280, 240, 140 and 120 mm radiators. There is plenty of headroom above the motherboard for installing thick radiators too. There should be just enough room for an 80 mm thick radiator with one layer of fans in the roof panel. Phanteks include a 140 mm exhaust fan in the roof of the case.
There is also room for a 240 mm radiator in the front of the case, although there isn't going to be much room for thicker models without removing the drive bays.
The hard drive bays themselves can only be accessed by removing the right hand side panel, as they are disguised behind a large metal panel.
There is plenty of provision for cable routing in the Enthoo Primo. There are a series of holes cut in the motherboard tray for cable routing, in addition to a generous amount of room behind the motherboard tray.
Installing a motherboard into the Enthoo Primo is very simple, as the motherboard stand-offs are preinstalled and there is plenty of room to work with inside the case. There is a large cut-out section in the motherboard tray to facilitate the installation of CPU coolers.
We did have some trouble installing our AMD Radeon 7950 graphics card, though, as the reservoir mount got in the way. It's pretty easy to remove, though, so this isn't a massive issue.
Installing the power supply is also pretty simple, and it's very easy to achieve a tidy build as the majority of the cables are disguised behind the motherboard tray.
Phanteks have chosen to use fairly standard hard drive brackets which support both 2.5″ and 3.5″ drives. There are six of these bays in total which should be more than adequate for most users.
 KitGuru KitGuru.net – Tech News | Hardware News | Hardware Reviews | IOS | Mobile | Gaming | Graphics Cards


Take my money, I love the power supply idea, get it OUT OF THE WAY!
Its a great looking case, I agree. I am tempted to upgrade my system for the coming year now with one of these at the foundation…. my old thermaltake is on its last legs
Looks very different which I like. Not sure I want to hide my power supply though, i paid £250 for it and love it!
well done in installing a 100% AIRCOOLED system in this WATERCOOLING case… *facepalm*
Is it possible to remove the entire hdd drive bay, to allow higher airflow into the case?
And how long videocard is supported?