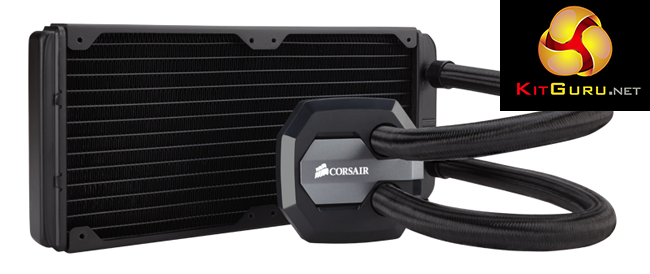
Today we are going to take a look at one of the latest all-in-one water cooling units from Corsair, the Hydro H100i GTX. This model has been designed to build on the success of the existing Corsair H100i which has proved a massive hit with gamers and enthusiasts worldwide.
Corsair are very well regarded in the all-in-one liquid cooling market, and offer a comprehensive range of products which encompass the needs of a wide spectrum of users. The Hydro H100i GTX fits in their range near the top, just below the flagship H110i GT.
We are very interested to see what the Hydro H100i GTX has to offer in our tests, and how it compares to existing models in terms of raw performance.
Specification
- Radiator dimensions: 276mm x 125mm x 30mm
- Fan dimensions: 120mm x 120mm x 25mm
- Fan speed: 2435 +/- 10% RPM
- Fan airflow: 70.69 CFM
- Fan static pressure: 4.65 mmH2O
- Fan noise level: 37.7 dB(A)
- Compatibility (Intel): LGA 1150, 1155, 1156, 1366, 2011, 2011-3
- Compatibility (AMD): Sockets FM1, FM2, AM2, AM3
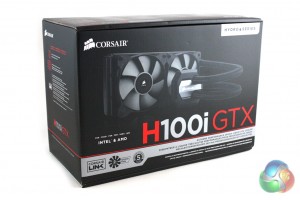
The Corsair Hydro H100i GTX is supplied in very familiar looking packaging, boasting a black and red livery. The front of the box features a large image of the cooler to give us an idea of what is inside.
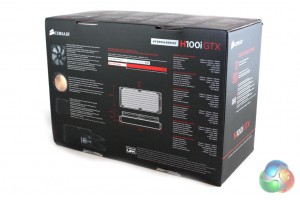
Turning the box around reveals details of the features and specification of the unit alongside some further imagery. The box itself feels good quality and should do a good job of protecting the cooler within.
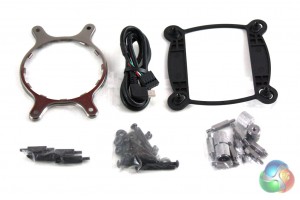
Inside the box, the bundle simply includes the required accessories for the installation of the cooler.
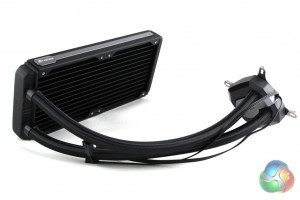
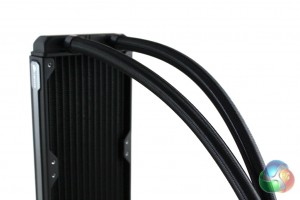
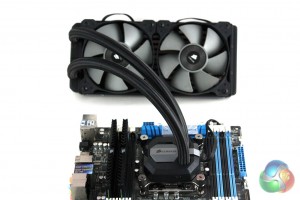
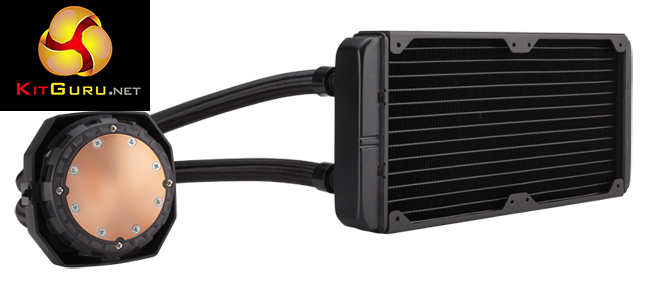
The Hydro H100i GTX follows the same basic design as the H100i, featuring a 240mm radiator (25mm thick) and a low profile CPU block pump unit. The similarities between the GTX and the standard H100i finish there, though. It would appear that the GTX uses a completely different OEM design to the H100i, with design clues hinting that it is based on an Asetek design rather than the original’s CoolIT Systems design.
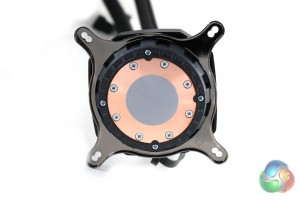
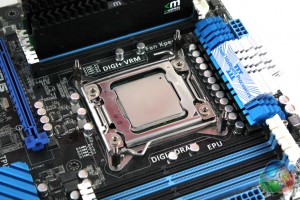
With the goal of simplifying the installation process, Corsair have chosen to pre-install the Intel retention plate. This is likely to make the installation process a little more complicated for those users who are looking to build an AMD based system, however it should not be a deal breaker.
The cold-plate itself is made from copper to facilitate heat transfer. Corsair have chosen to pre-apply the thermal paste, again with the aim of simplifying the installation process.
Corsair have chosen to use braided tubes to connect the CPU block and radiator which feel very good quality indeed. They are a good deal stiffer than the rubber tubes that we have seen previously, however they feel much more durable.
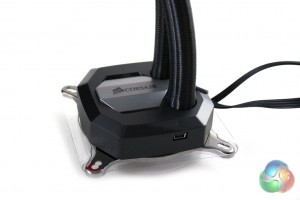
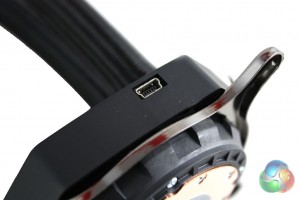
There is a mini-USB connector in the side of the CPU block which allows us to connect the cooler to our motherboard using a USB header. This enables the Corsair Link functionality of the cooler. We will go through this in more detail later on in the review. There are two fan sockets protruding from the block which let you connect the two fans to the cooler to enable Corsair Link functionality. It is worth noting that these would require fan splitters if you plan to add a pair of extra fans in a push-pull configuration.
Corsair Link can be downloaded from the Corsair website and takes the form of a software utility which lets us configure various aspects of the performance of the cooler. We are able to choose between quiet, balanced and performance modes for the fan, in addition to a fixed percentage (of max speed) or a custom curve, as well as quiet and performance modes for the pump.
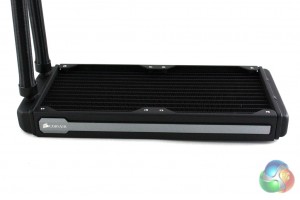
The 240mm radiator is very similar to those we have seen in the past from Corsair. The only slight difference is the addition of a piece of grey trim which boasts the Corsair logo. This improves the radiator from an aesthetic point of view, and we understand that these are interchangeable and can be customised with different colours. Unfortunately Corsair do not include any other coloured trim with the unit.
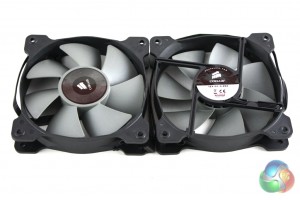
Corsair include two SP120L fans with the cooler which are very good quality. They are very similar to the SP120 fans which Corsair sell separately, albeit slightly cheaper versions with added PWM functionality. These are 120mm models which spin up to 2,435 RPM.
Corsair have been producing all-in-one CPU coolers for a number of years now and their experience in design clearly manifests itself in the simplicity of the installation process. There is a detailed installation guide included which guides us through the process, although it is so simple that most enthusiasts will not even need to glance at it.
Firstly, we must secure the stand-off screws into the CPU socket. Please bear in mind that those now using the Socket 2011 platform will need to attach a backplate in the process.
Then, we can secure the CPU block into place using the four thumbscrews provided.
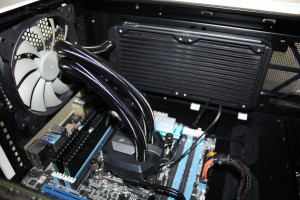
Finally, we can install the radiator and fans into the case using the provided screws. We chose to install the fans in a pull configuration, sucking air through the radiator and expelling it through the roof of the case.
To test the performance of the Corsair Hydro H100i GTX, we built a powerful X79 based system on an open test bench to push the cooler to the limits. As we were testing on an open test bench, we directed a Be Quiet! Shadow Wings 120 mm fan at the VRM circuitry to better simulate the airflow generated in a case.
For our extreme tests, we manually overclocked the i7-3930K to 4.7 GHz by increasing the multiplier to 47x, leaving the baseclock set at 100 MHz.
We set Load Line Calibration to ‘High', and increased the CPU Current Capability to 120% with a minor voltage increase. Speed stepping was disabled for both stock and overclocked tests.
We tested the Corsair Hydro H100i GTX with the fans in performance mode and in quiet mode. The pump speed was set to performance for both tests.
Coolers Tested
- Corsair Hydro H100i GTX
- Corsair Hydro H80i GT
- Cooler Master Nepton 240M (fans at 12V)
- Corsair H105
- Corsair H110 (fans at 12V)
- Corsair H90 (fan at 12V)
- Phanteks PH-TC14PE (fans at 12V)
- Noctua NH-D14 (fans at 12V)
- Processor: Intel Core i7-3930K
- Motherboard: Asus P9X79
- Memory: 16 GB (4 x 4 GB) Mushkin Blackline 1600 MHz
- Thermal Paste: Arctic Cooling MX-2
- Graphics Card: AMD Radeon HD 7950
- Graphics Card (noise tests): HIS Radeon HD 5550 Silence
- Power Supply: Seasonic Platinum P1000W
- Prime 95 (64-bit)
- CPUID Hardware Monitor
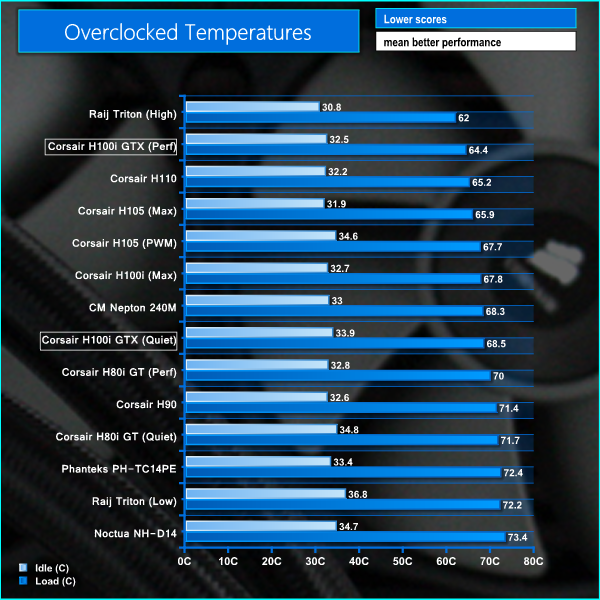
For temperature tests we loaded the system for 10 minutes using Prime 95 and recorded the CPU temperature using CPUID HWMonitor. We then restarted the system and left it idling at the desktop for 10 minutes before recording temperatures. The temperatures recorded are based on an ambient temperature of 20 degrees C.
We are impressed with the temperatures offered by this H100i GTX, especially compared to the original H100i. We were particularly impressed with the performance of the unit in quiet mode, though, where it achieve solid performance whilst being almost inaudible.
In our noise level tests we switched off all the case fans and replaced the AMD Radeon HD 7950 graphics card with a HD 5550 passive model so were just taking into account the noise generated by the cooler fans themselves.
We measured the noise level with a Digital Noise Level meter at a distance of 1 m from the front of the system.
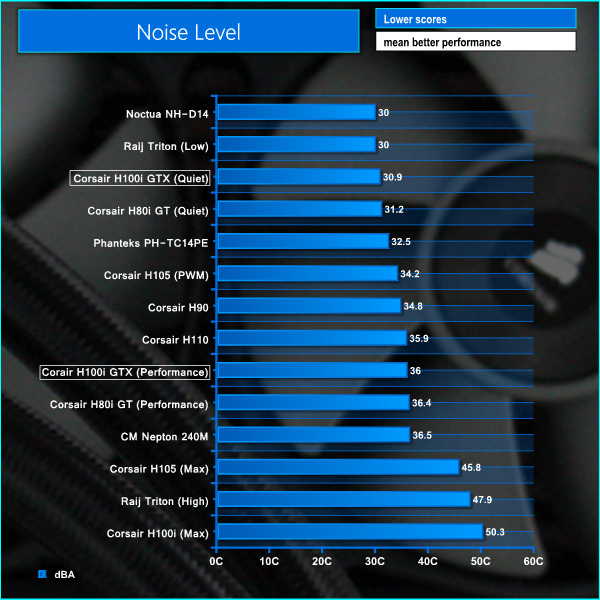
We were impressed with the acoustics of the H100i GTX in both performance and quiet modes. For those who want to create their own balance between cooling performance and acoustics, this can be set up through the Corsair Link software.
We are very impressed with what the Corsair Hydro H100i GTX liquid CPU cooler has to offer. It is great to see Corsair continually improving their product range with new models which offer something different to the existing.
As expected from Corsair, the build quality of the cooler is absolutely fantastic. If fact this model is the best we have tested yet in terms of quality. Corsair have further refined the mounting mechanism of the cooler which is extremely easy to install. In fact, even the least experienced users should have no trouble whatsoever.
Corsair include two of their quality SP120L fans with the unit which are PWM models. These are speed controlled, allowing for an excellent balance between cooling performance and acoustics.

The Corsair Hydro H100i GTX is available from Overclockers UK for £102 inc. VAT. At this price, we feel that it offers good value for money considering the features and class leading performance it offers.
Discuss on our FACEBOOK page, over HERE.
Pros:
- Impressive cooling performance.
- Excellent build quality.
- Simple installation process.
- Corsair Link software.
Cons:
- More expensive than other 240mm liquid CPU coolers.
KitGuru says: Another excellent cooler from Corsair.
 KitGuru KitGuru.net – Tech News | Hardware News | Hardware Reviews | IOS | Mobile | Gaming | Graphics Cards





Nice, although if you have the room and silence is an issue, looks like the H105 is the overall better choice if radiatior thickness isn’t an issue.
Thanks, I was wondering how this thing performed.
A quality tower cooler performs as well, cost less and never leaks coolant. It’s foolish to introduce liquids to a typical PC when HSFs perform just fine. These CLCs/AOIs are for the technically challenged who hasn’t done their homework.
got a h80i, it is quiet and cool, my friend thought it was a waste of money, then he came round to my house, had to get down on the floor to check that the pc was running. All In One coolers work well for me, pretty idiot proof and very quiet, will only fit AIO in future, not have the knowledge for a custom loop which might leak 🙁
✯☆✯☆☆✯86$ PER HOUℛ@ai7:
Going Here you
Can Find Out,
►►► >https://WorkOnlineSofts.com/get3/1sposition…
❂❂❂❂❂❂❂❂❂❂❂❂❂❂❂❂❂❂❂❂❂❂❂❂❂❂❂❂❂❂❂
looks like the guest is someone who gets a big meaty glans to furiously rub their epiglottis for their daily protein drink and then they whip it out to plunge where the sun never shines and lick off all that brown stuff….
According to whois, workonlinesofts.com is available! and only $10.99 almost like someone ripped it to shreds and did not tell master bates the spammer 🙂
Yea because air coolers are incredibly technical to install……
got one of these fitted to the new rig, totally silent 🙂
the titan x is quiet, the case fan at the rear trying to dump heat out the back is anything but quiet 🙁
have ordered an aftermarket AIO cooler for the titan 🙂
lol. yea this guy must have been a rocket scientist to get that air cooler going.
In my first build I said to myself “Is now or never” so i jumped. I bought a 360 XPSC kit. It brings everything you need in order to achieve your first loop. Really straight forward installation and you just need to make sure everything is tight. You should go for it, man. It is an awesome ride.
looks to be an american product, for $500 so probably £500. the H80i AIO is about £85, so expect the xpsc kit would be better. how do you deal with draining the fluid every 12-18 months ?
as the self build kits can suffer from biofilm and need flushing
360 means that you will need 3 120mm (minimum) fans. So, 1st rule: every component means 120mm. So with the XPSC 360 you can liquid cooled up to 3 components. I currently cooled my cpu and my gpu. Everything stays cooled and nice. Personally I wouldn’t get involved with the colored coolant (dyers). Just use distilled water or the coolant provided by the kit. If you want some color in your loop your are better off with the colored tubing or UV reactive ones. Very old pic btw